
Quickstart
This guide describes how to add your app to Apphud and make initial setup.
Apphud setup has three parts
- SDK integration — install the Apphud SDK in your app, initialize it, hook it into your purchase / paywall flows. Required for every Apphud-backed app.
- Dashboard configuration — set up your stores, products, paywalls, placements, and targetings in the Apphud dashboard. Drives what your SDK calls return at runtime.
- Data migration — only if your app already had paying users before integrating Apphud. See the Data Migration Guide.
This guide walks through all three. You can do SDK integration and Dashboard configuration in parallel — they don't depend on each other.
Create an Apphud Account
You can sign up for a free Apphud account here. Once registered, you will be prompted to add your first app.
Add a New App
If you have just registered, you will see a form to add your first app. Otherwise, if you skipped this upon registration you can click the "Create app" button on "No apps found" banner.
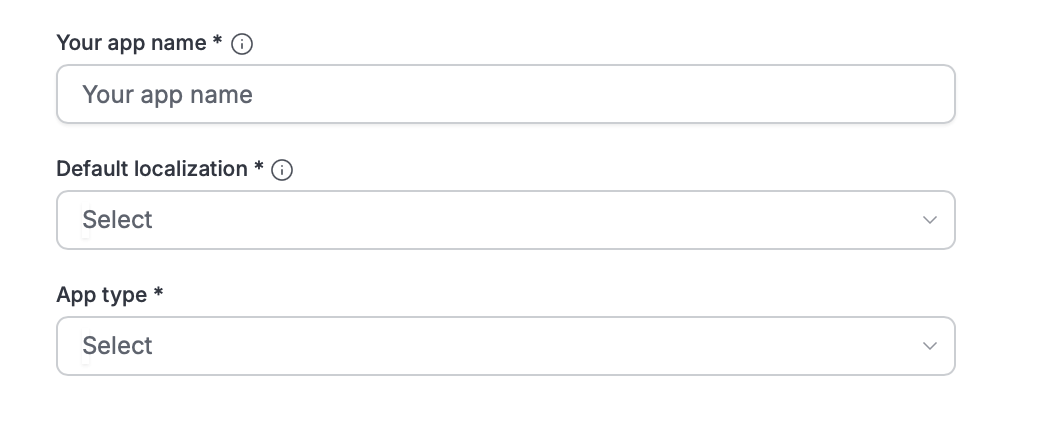
App name - This name identifies your app within the Apphud platform. It doesn't need to match the name in app stores.
Default localization - Default app localization can be changed later.
App type - Game or Non-gaming app.
Afterwards you'll be prompted to configure a platform(s) for the app. This is a brief initial set up, optional at this point, and can be done later.
iOS App Setup
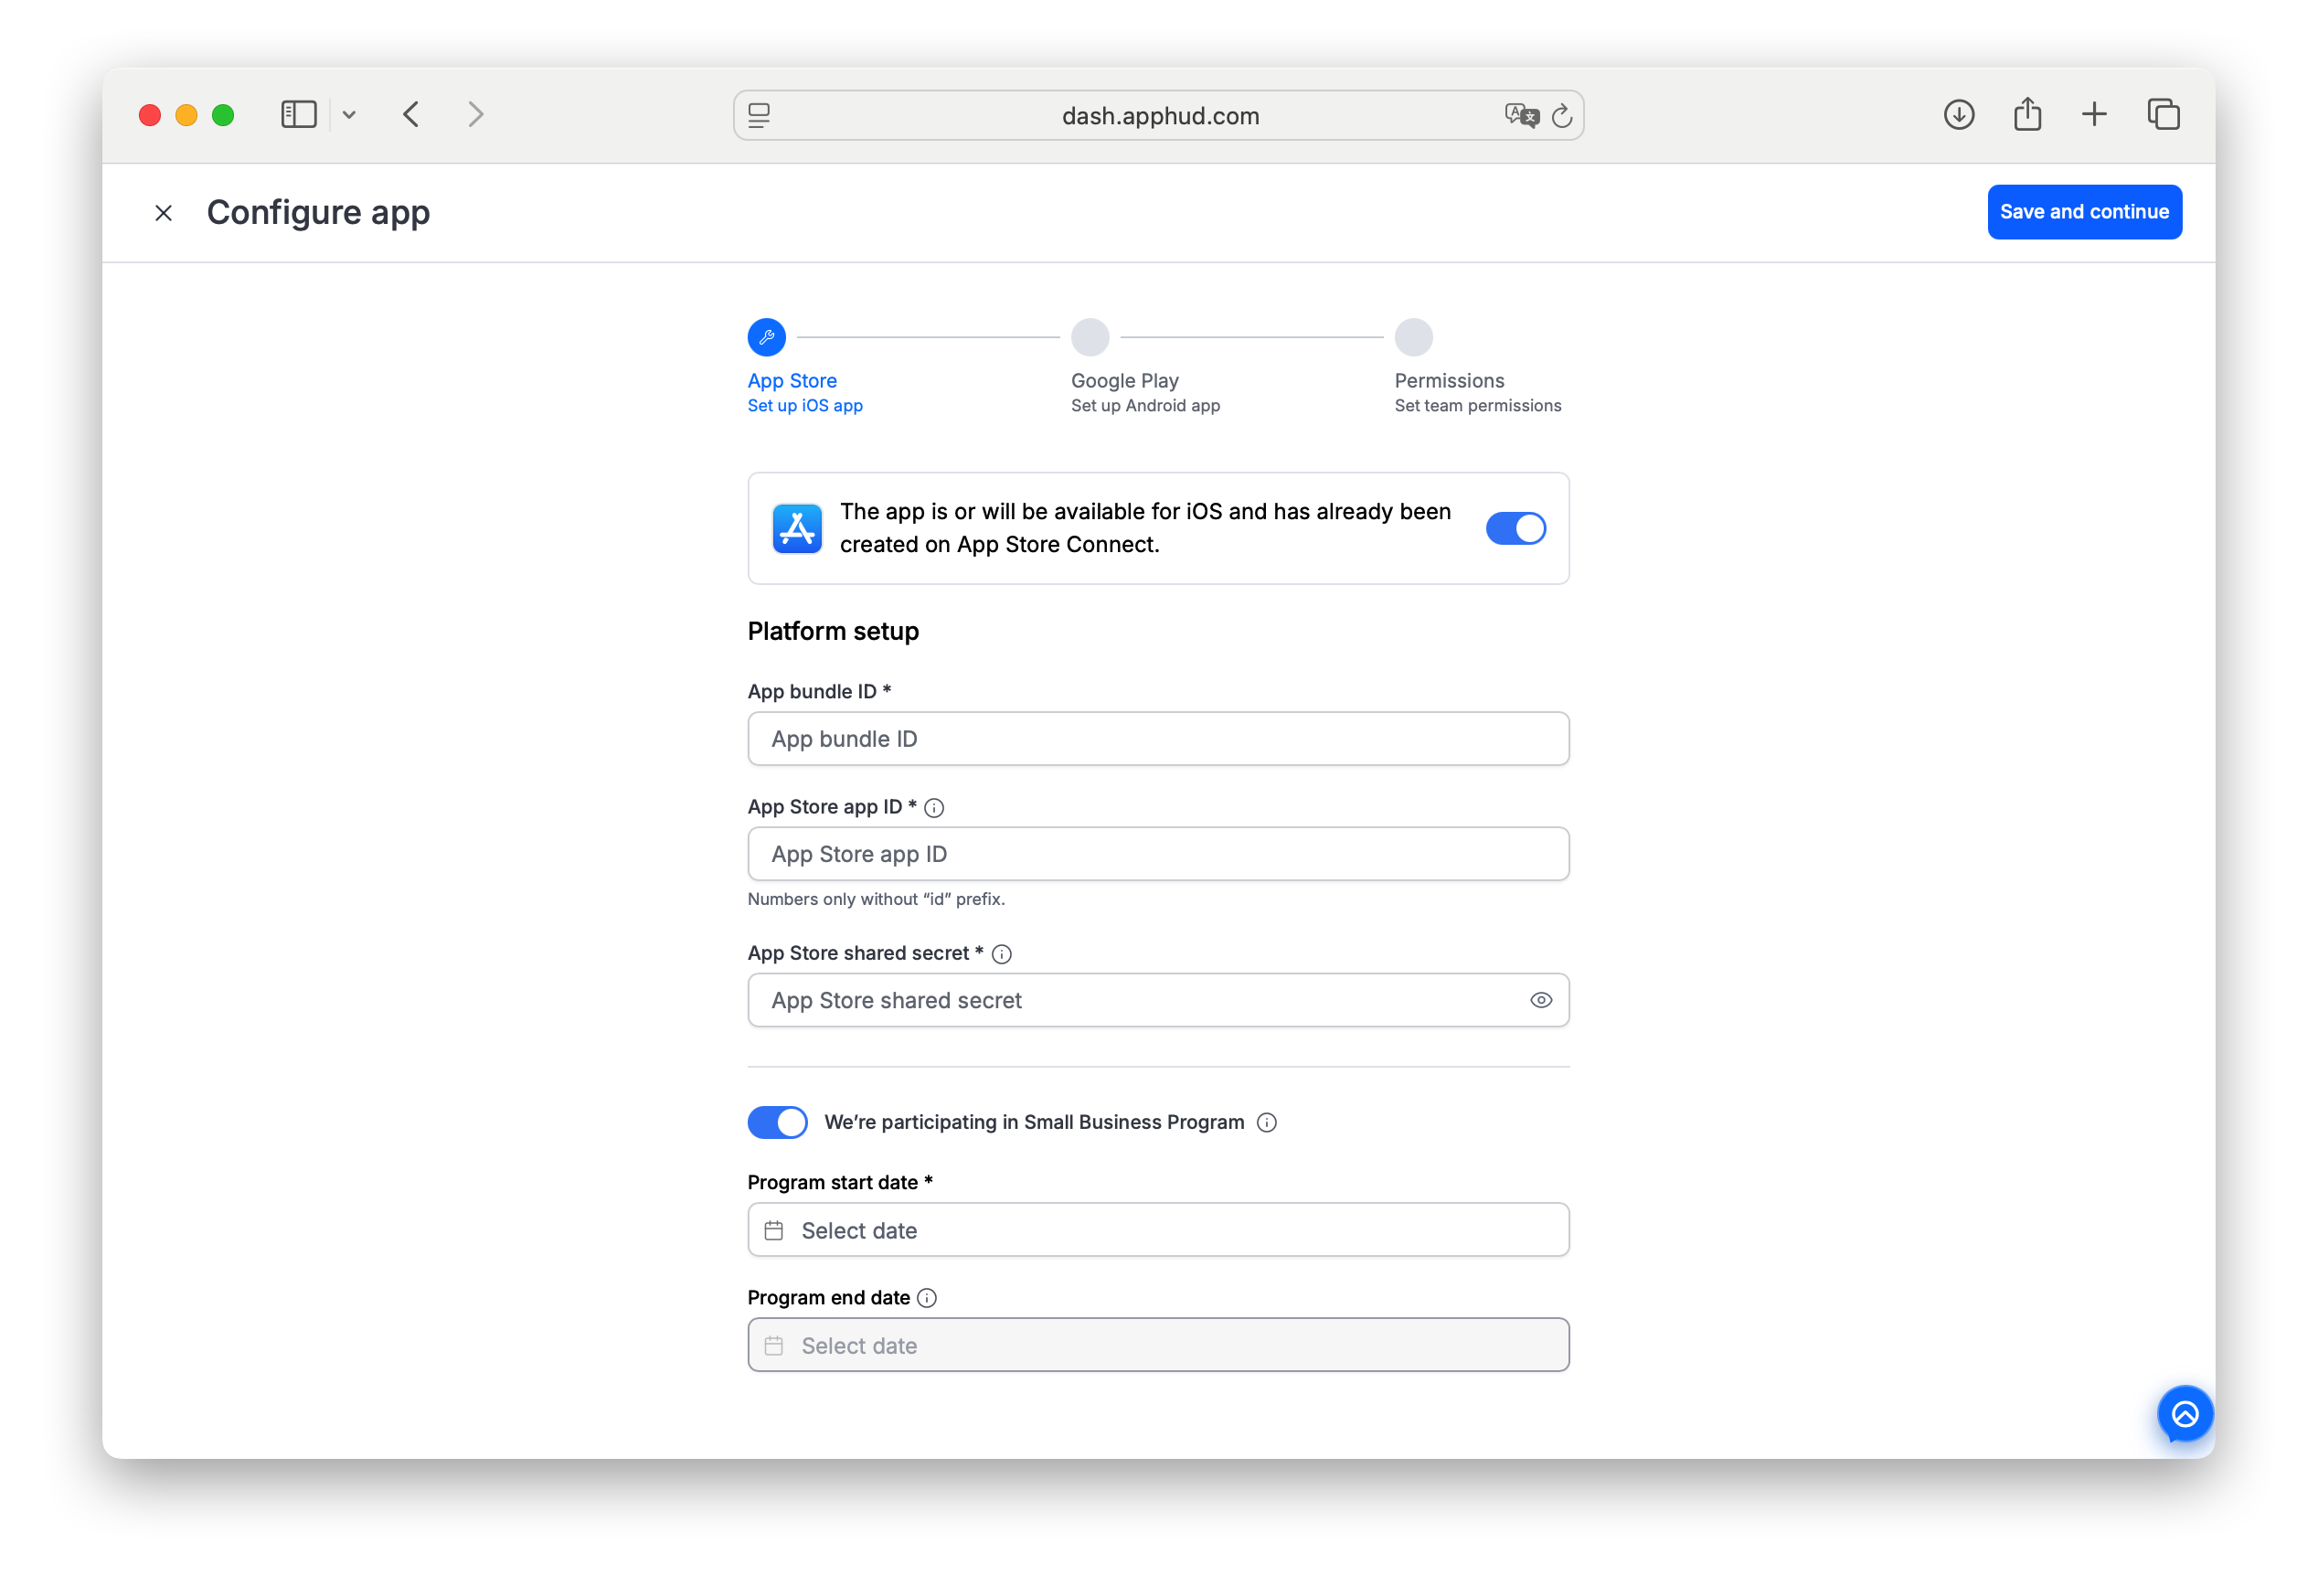
App bundle ID
To get Bundle ID open App Store Connect, go to "My Apps" and choose your app. At the app page find “Your Bundle ID”.
App Store app ID
A unique numeric identifier used by Apple to manage and identify apps on the App Store.
App Store Shared Secret
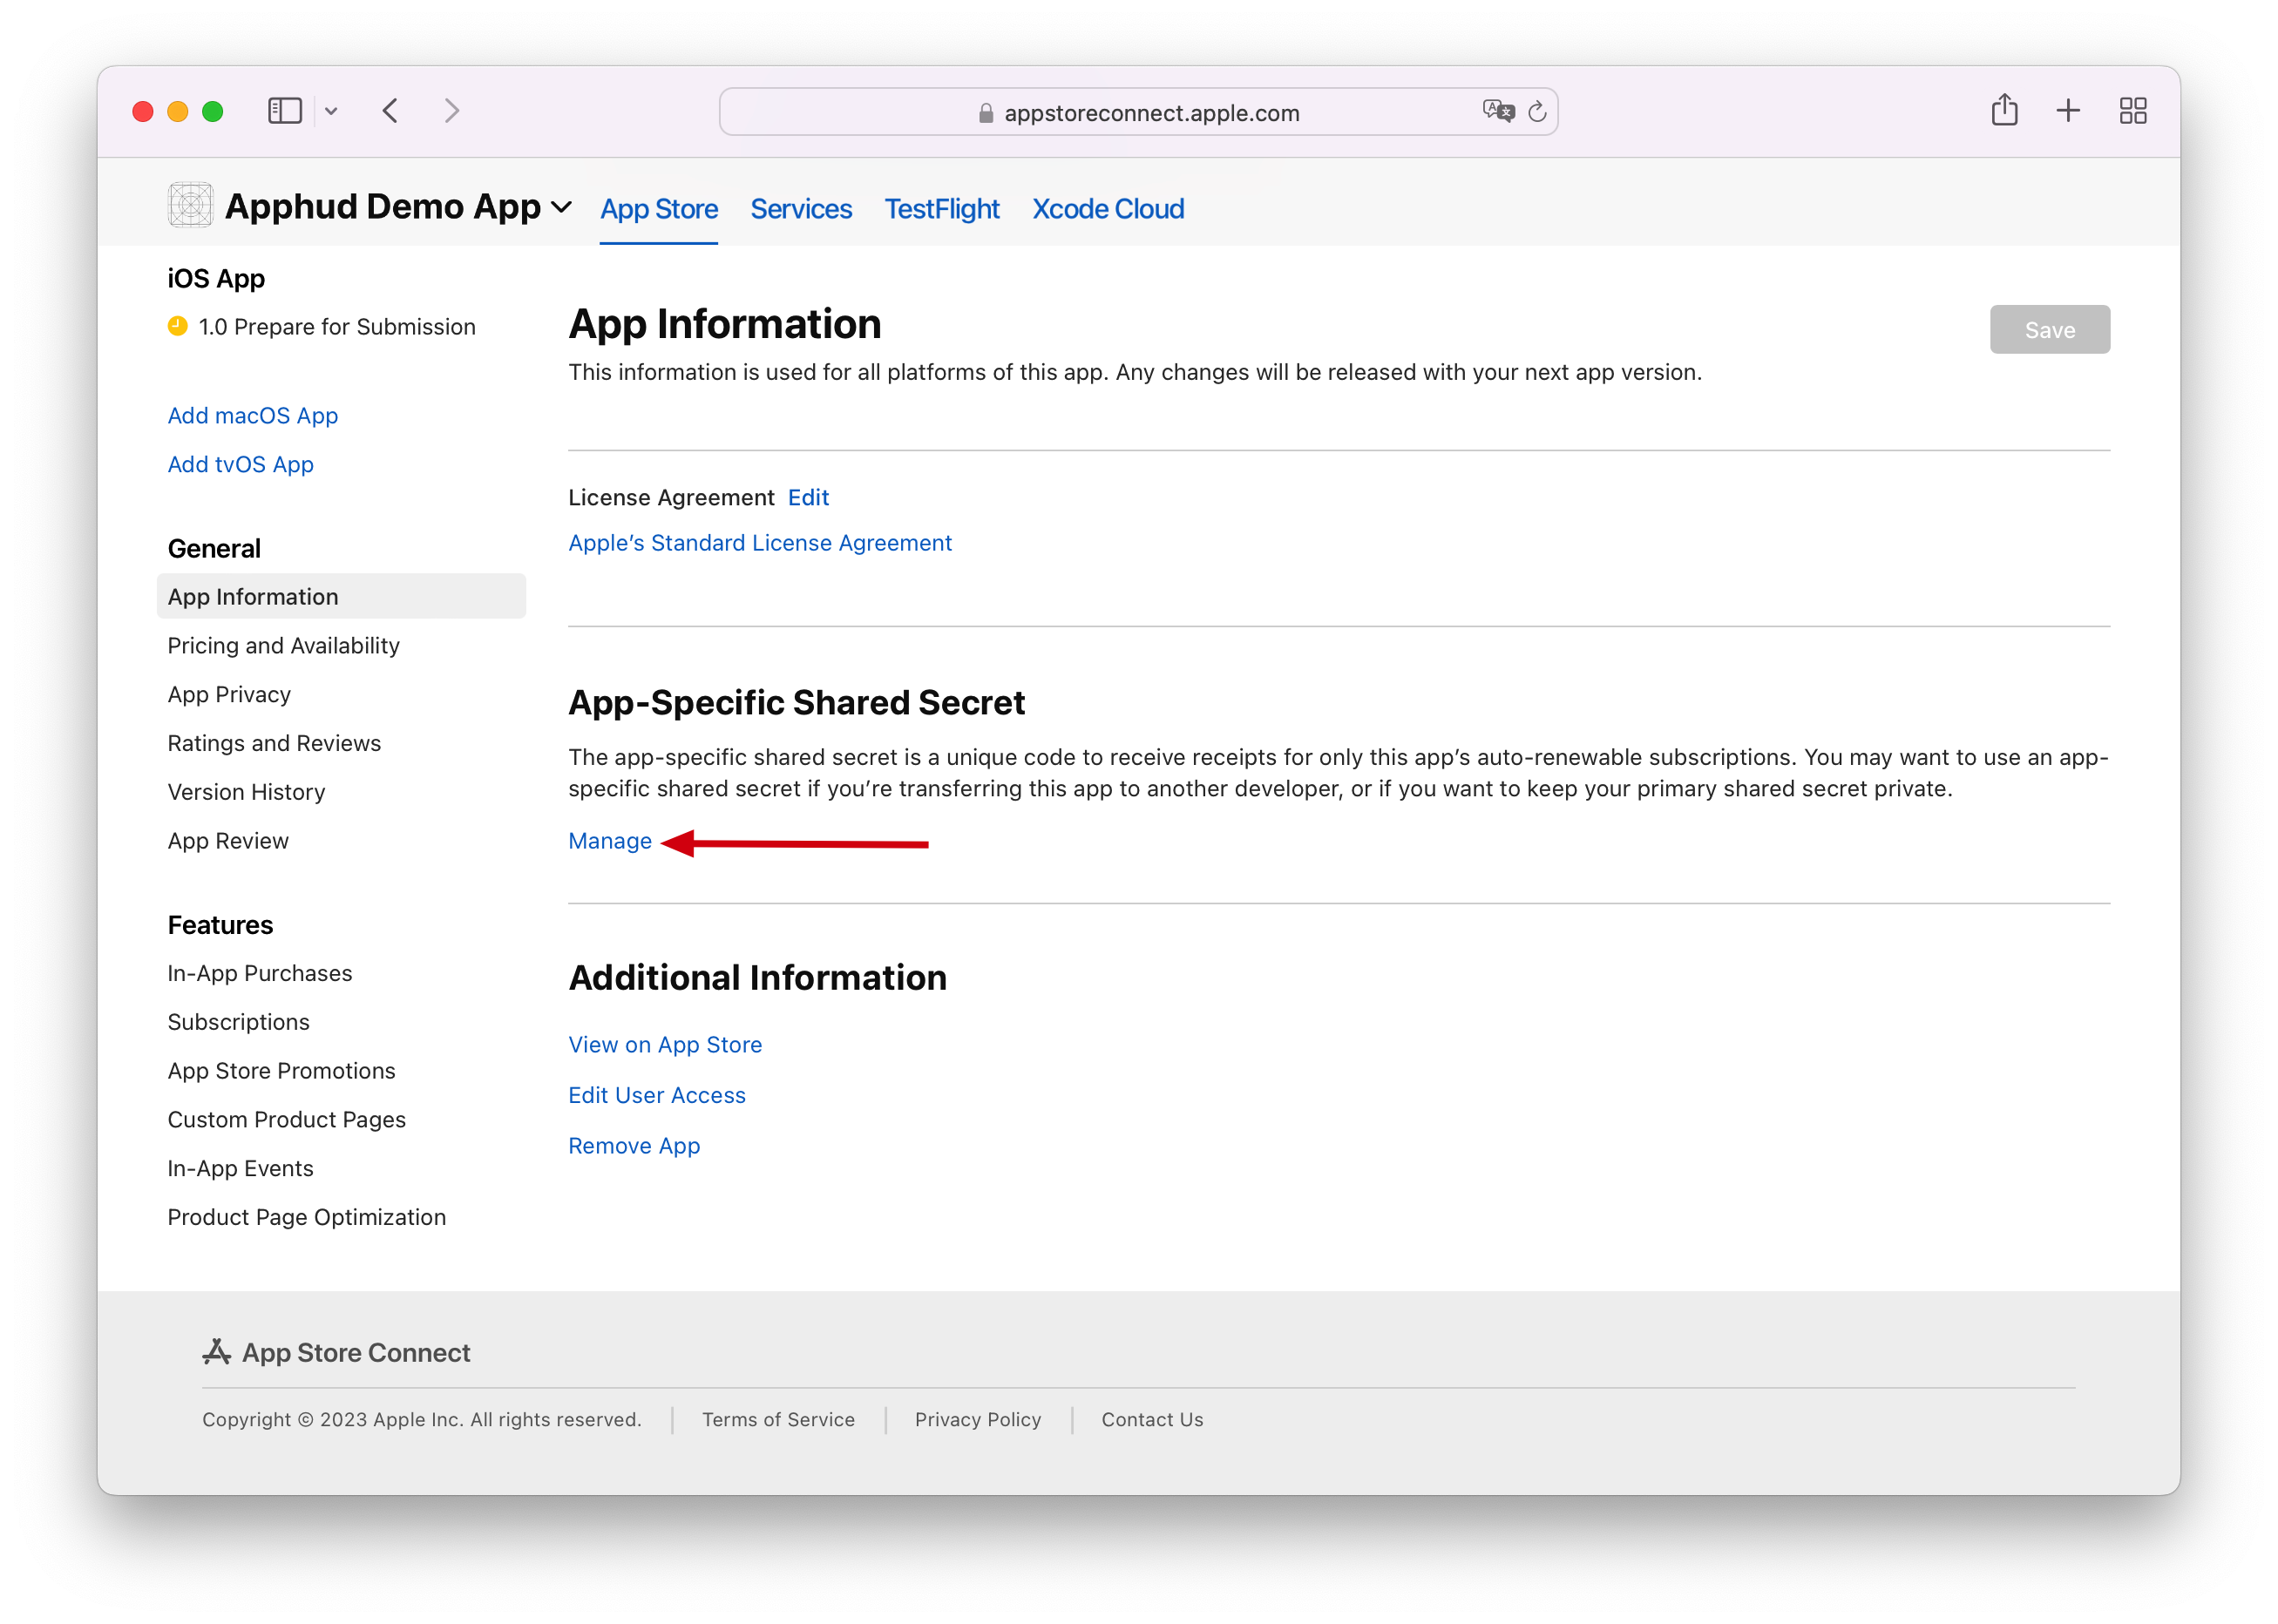
To get Shared Secret:
- Open App Store Connect, go to "My Apps" and choose your app.
- Select "App Information" submenu.
- Click the "App-Specific Shared Secret" link on the right.
- Create and copy the Shared Secret.
Apple Small Business Program
Apple's Small Business Program offers reduced commission rates for developers earning up to $1 million annually. If you are in this program, enter the dates to help Apphud accurately calculate Apple fees.
You can specify the enrollment right away using this instruction, or set it up later on.
Once done with App Store settings, click Save and Continue.
Android App Setup
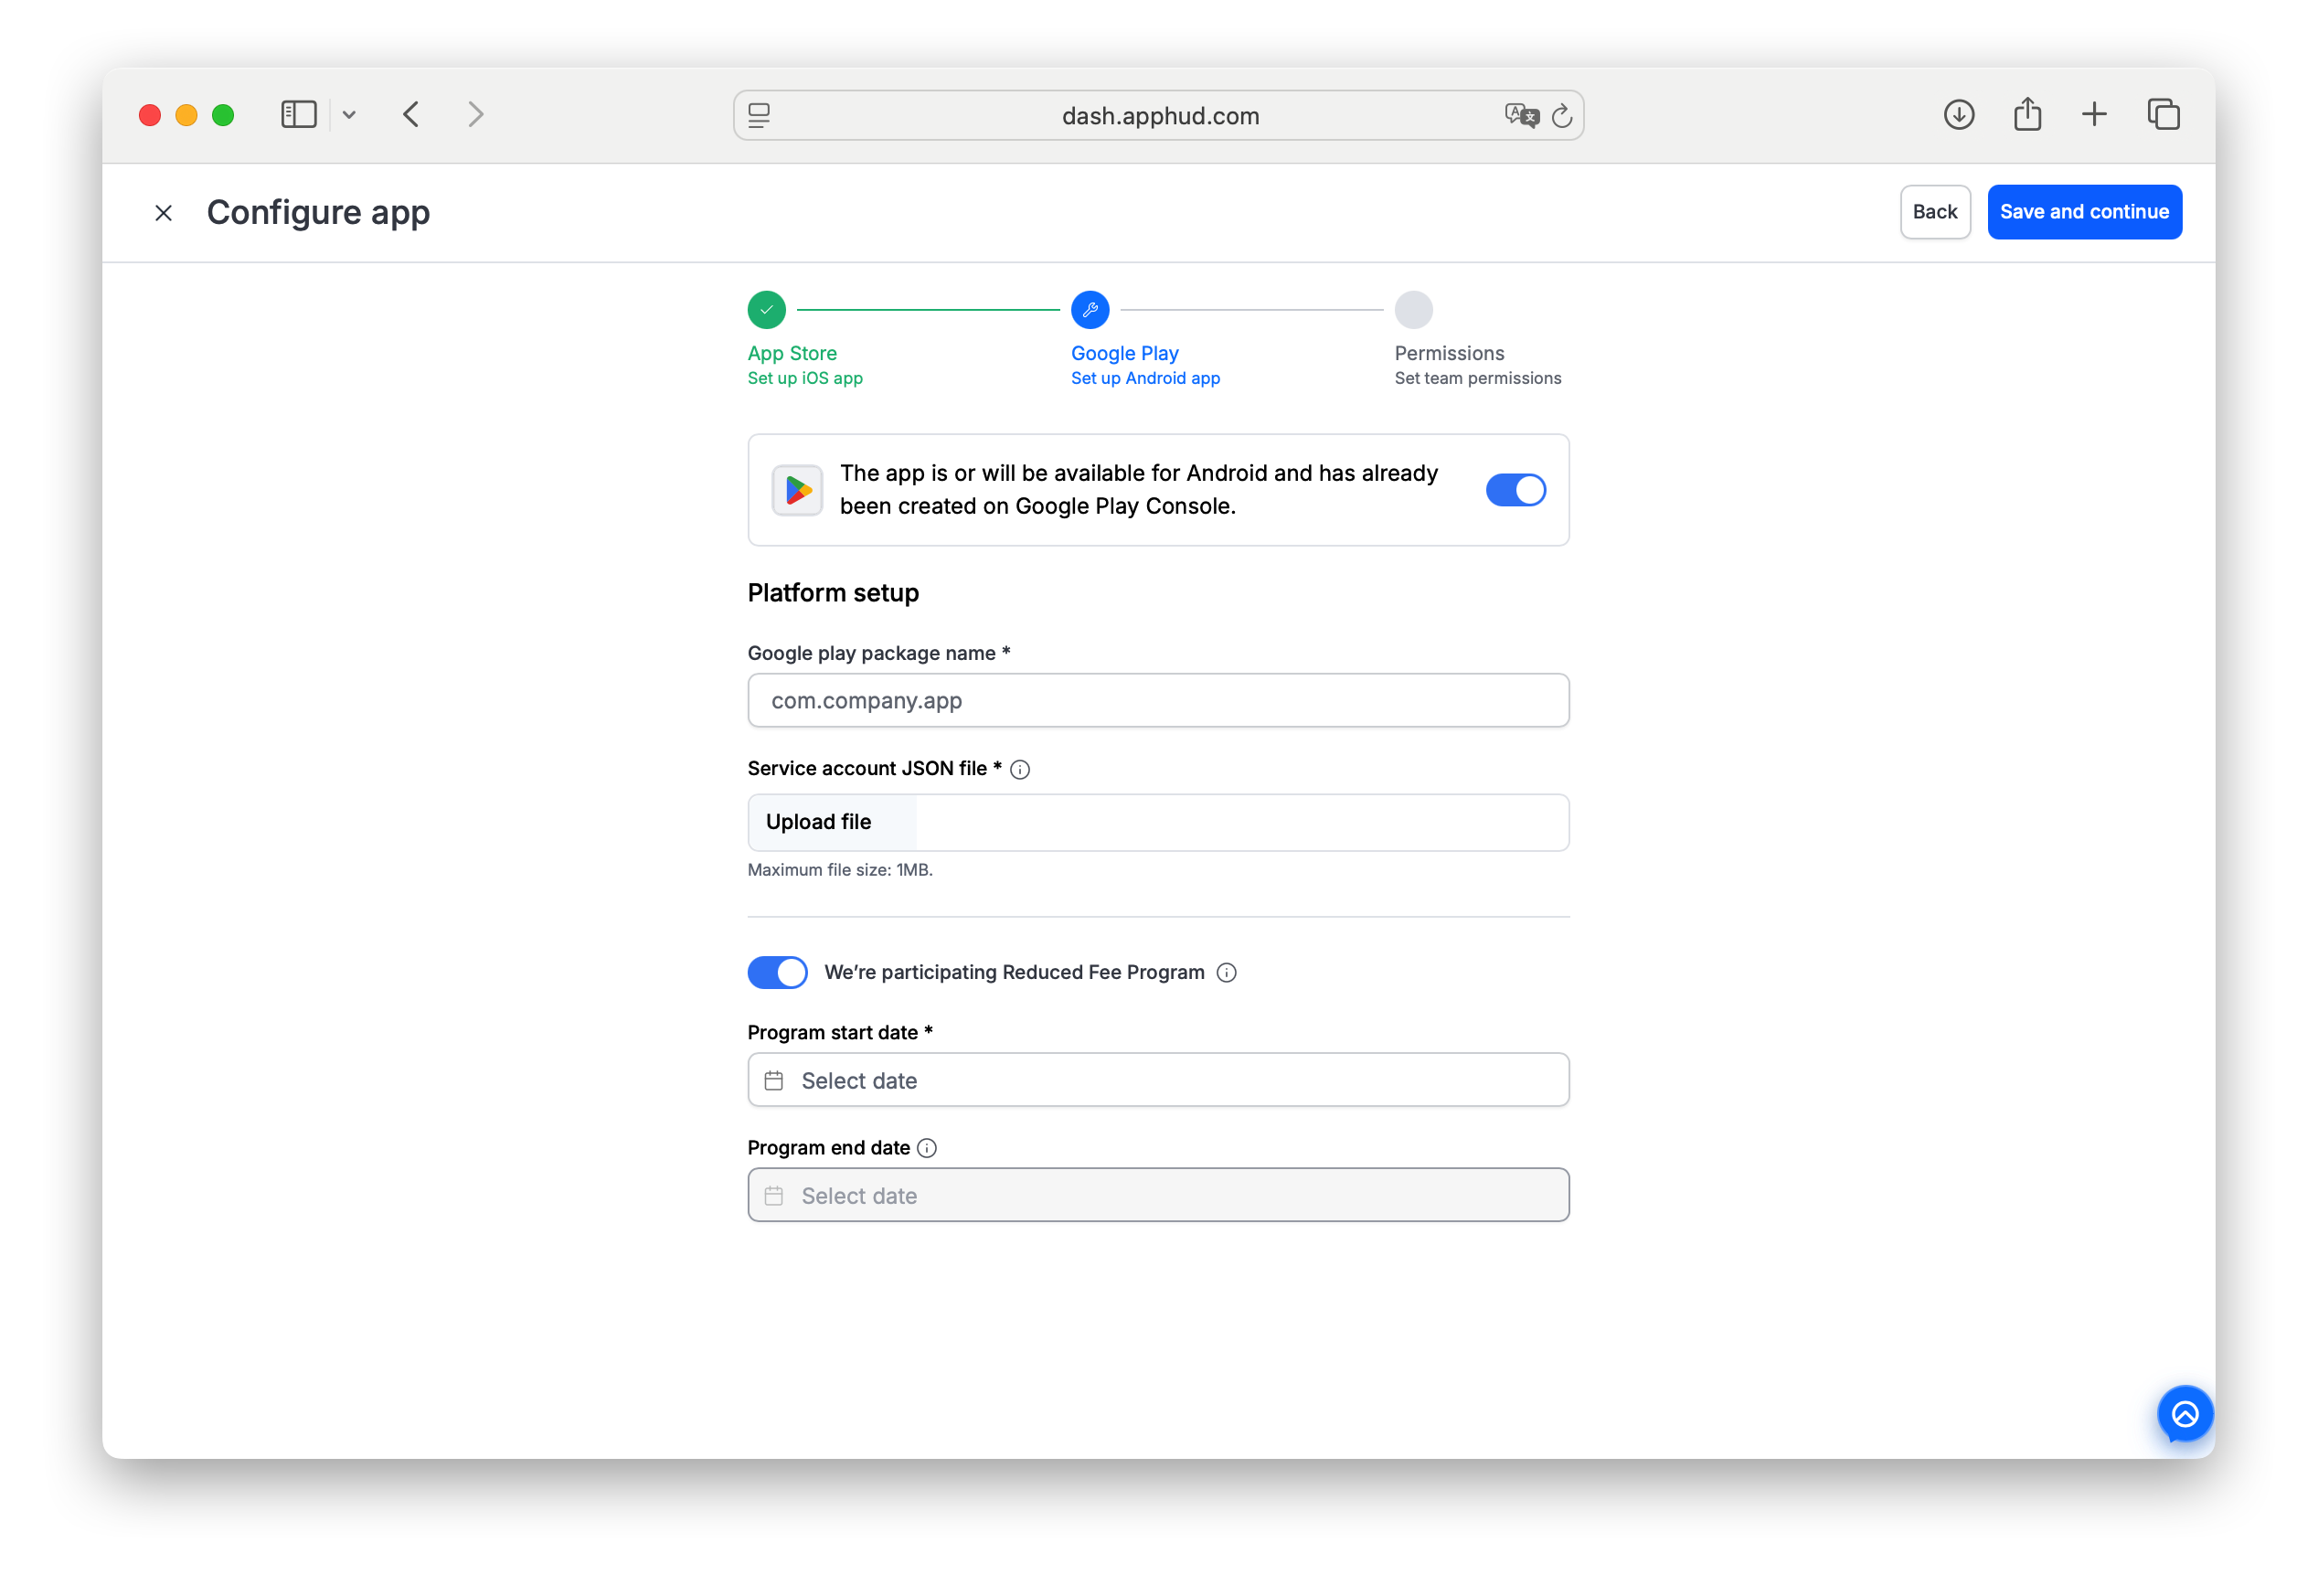
Google play package name
Enter your app's package name.
Service account JSON file
For all Android apps you must provide Google Play Service Credentials in order to authorize Google API calls.
Google Reduced Fee Program
Google's Reduced Fee Program offers lower commission rates for developers earning up to $1 million annually. If you are in this program, enter the dates to help Apphud accurately calculate Google fees.
You can specify the enrollment right away using this instruction, or set it up later on.
Permissions
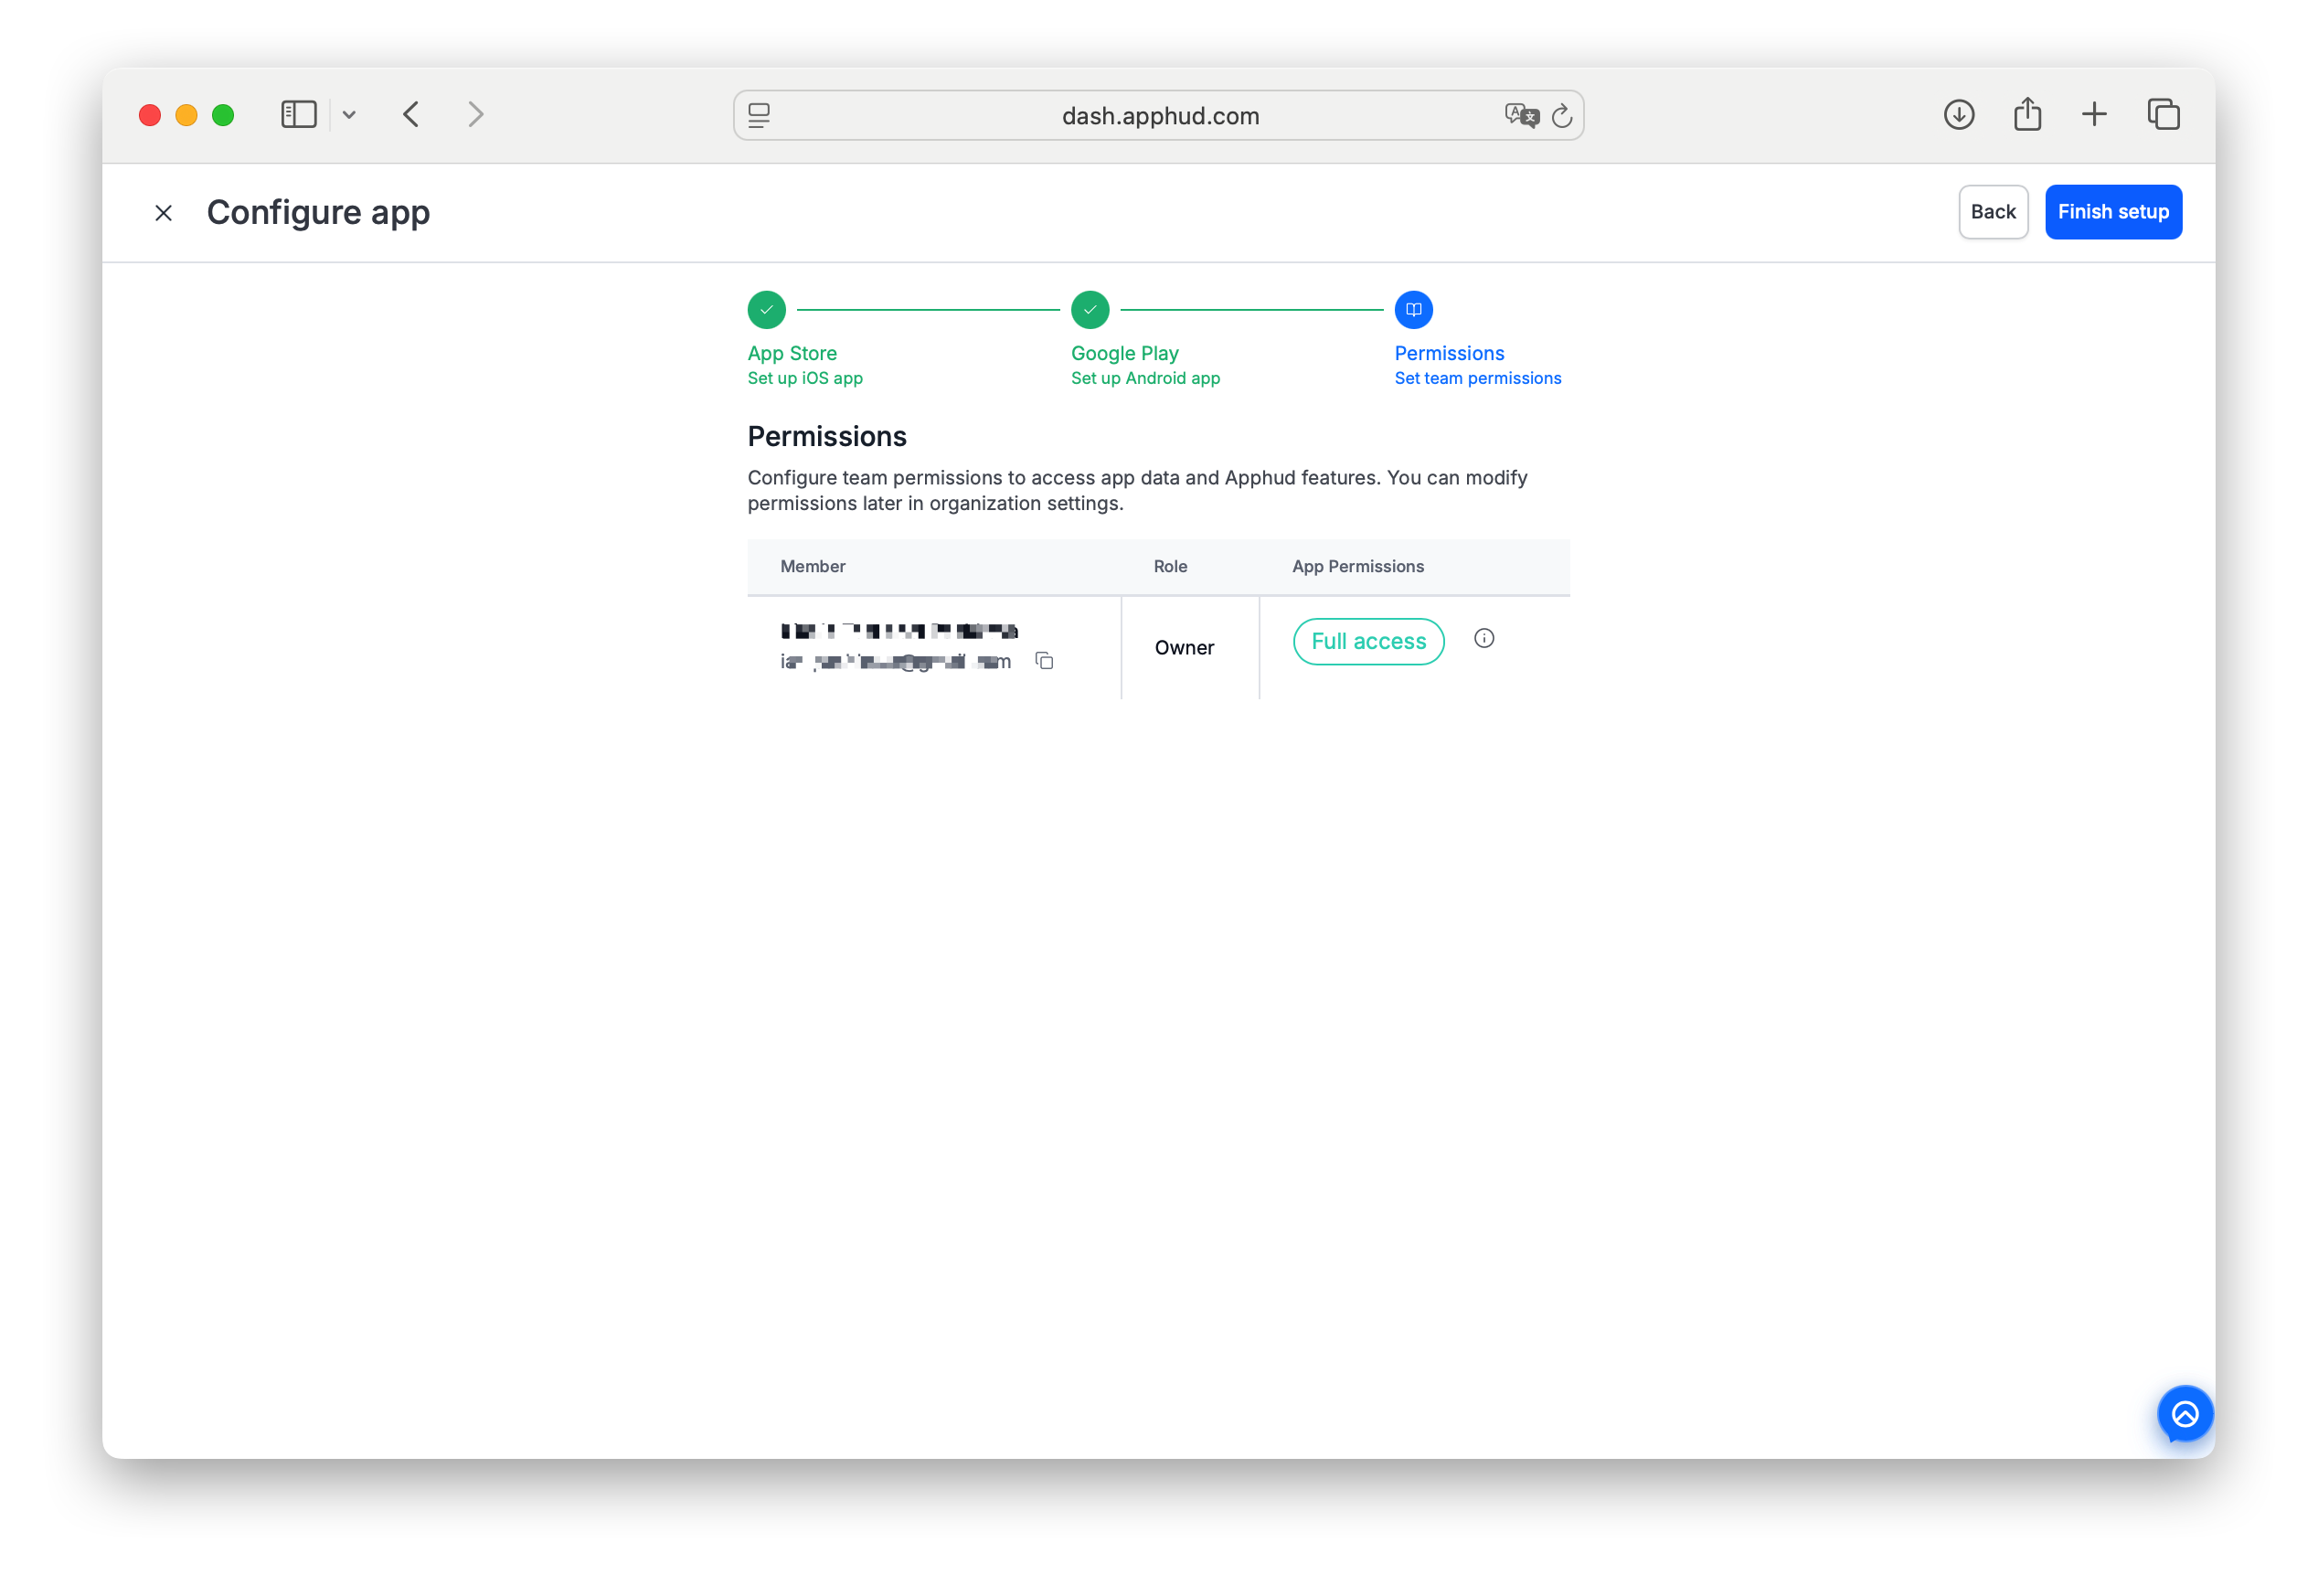
If you're creating your very first app right after registering the organization on the Free plan, the team-permissions step is just informative — Free plans have only the Owner seat, so there's no one else to grant access to. You'll be able to configure team access later, after upgrading to a premium plan that includes additional seats.
For subsequent apps in an organization that already has a premium subscription, the team-permissions step lets you assign which existing organization members should have access to the new app right in the creation wizard.
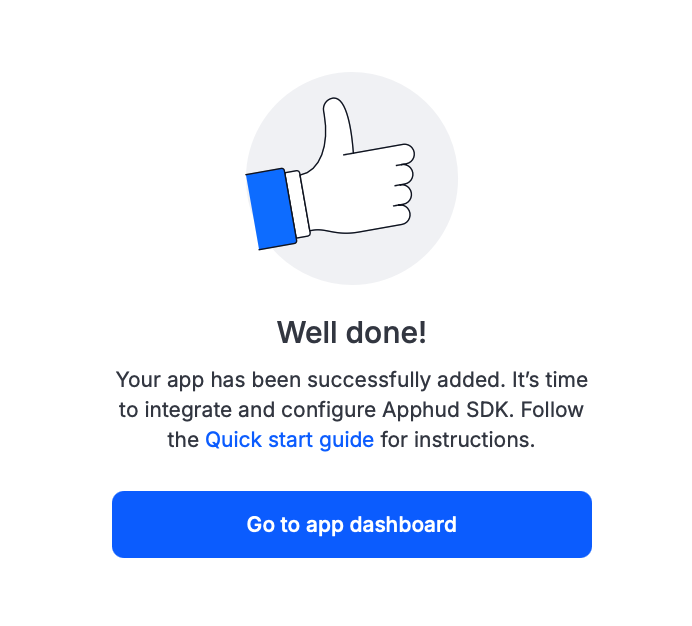
Click Finish setup once all done and see a notification. Click Go to app dashboard
Configure your stores firstBefore you can configure products in Apphud, your in-app purchases must already exist in App Store Connect and/or Google Play Console, and your store credentials in Apphud must be saved (App Store Shared Secret, Google Play service account JSON, etc.). Apphud reads product metadata from the stores via these credentials.
If you skipped the platform setup during app registration, complete it now in App settings → Mobile platforms before continuing.
Same applies if you're integrating via the Customers API — store credentials are still required so Apphud can verify and enrich incoming purchase data.
Configure your products and delivery — end-to-end
Once stores are connected, dashboard configuration is a 4-step chain. Each step builds on the previous one — and unlocks the next.
- Permission Groups — optional. Define if you have multiple permission tiers (e.g.,
Premium+VIP). A default Premium group is created automatically — start with that for single-tier apps. See Permission Groups. - Products — register the IDs of your in-app purchases (same IDs you defined in App Store Connect / Google Play Console). Group them into Bundles for convenience. See Products.
- Paywalls — design the configurations your app will show: which products to offer together, with what custom JSON payload, and optionally with which Figma-rendered screen attached. See Paywalls.
- Placements + Targetings — decide where in your app each paywall appears (Placements) and which audiences see which paywall (Targetings).
After these four are set up, SDK calls like Apphud.fetchPlacements { ... } return the right paywall, for the right user, at the right point in the flow.
For the deep dive on each step, follow the Product Hub guide.
Install SDK
Please follow SDK Installation guide for your platform.
Get your SDK API key
Your SDK API key — the apiKey you pass to Apphud.start(...) — lives in App settings → Authentication center.
In Apphud 2.0 the SDK key is created per store, automatically, when you set up a platform. A brand-new app that hasn't connected a store yet shows "No API keys found" here — that's expected. To get a key:
- Go to App settings → App Store (or Google Play) and configure the store — see Mobile platforms.
- Apphud creates the SDK key for that store automatically.
- Open App settings → Authentication center. The key appears in the table — the Type column labels it iOS SDK key, Android SDK key, and so on. Copy the value from the Key column and pass it to
Apphud.start(apiKey:).
Legacy appsApps created before per-store keys also show a single Master SDK key (Deprecated). It still works, but new apps use the per-store SDK keys above.
Need a server-to-server / Analytics API key instead? Create it separately — per app via Authentication center → New S2S key, or org-wide via Organization settings → S2S API Keys (requires a plan with S2S API access).
Initialize SDK
Once you successfully installed SDK, you need to initialize it and optionally identify your user with custom User ID / Device ID. Basic initialization looks like this:
Apphud.start(apiKey: "YOUR_API_KEY")[Apphud startWithApiKey:@"YOUR_API_KEY" userID:nil observerMode:NO];Apphud.start(this, "YOUR_API_KEY")await Apphud.start(apiKey: "YOUR_API_KEY", observerMode: false);await ApphudSdk.start({ apiKey: "YOUR_API_KEY" });ApphudSDK.Start("YOUR_API_KEY", (ApphudUser user) => { });For more details, check our Initialization and Identification guide.
Collect Device Identifiers
Device Identifiers include:
- IDFA (iOS)
- IDFV (iOS)
- Advertiser ID (Android)
- App Set ID (Android)
Collecting Device Identifiers is required for marketing attribution providers: AppsFlyer, Branch, Facebook, Adjust, Tenjin, Singular, etc.
Refer to this guide for code examples.
Please note that you must also collect Attribution Data. Please check documentation for corresponding attribution provider.
Collect Attribution Data
Collecting Attribution Data is required for marketing attribution providers: Apple Search Ads, AppsFlyer, Branch, Facebook, Adjust, Tenjin, Singular, etc.
Please check documentation for corresponding attribution provider.
Observer Mode
If you are planning to use your own purchase logic, consider integrating Apphud SDK in Observer (aka Analytics) mode. In this case you are responsible for displaying products, making purchases and finishing / acknowledging transactions. Apphud SDK will only track successful purchases. Check out Observer Mode guide for details.
Display Available Products
Before working with products in SDK, make sure you created all in-app purchases in App Store Connect / Google Play Console, and made necessary set up in Apphud Product Hub. Please follow our Configuring Products guide for details.
The recommended way of displaying products is using Placements.
Placements are specific locations within a user's journey, such as onboarding, settings, and other key points, where internal paywalls are intended to be displayed. These placements enable app developers to strategically position their paywalls in various parts of the app to effectively engage different user segments.
Retrieve your placements by calling:
Apphud.fetchPlacements { placements, error in
    // if paywalls are already loaded, callback will be invoked immediately
    if let paywall = placements.first(where: { $0.identifier == "YOUR_PLACEMENT_ID" })?.paywall {
        let products = paywall.products
        // setup your UI with these products
    }
}
Apphud.fetchPlacements { apphudPlacements, apphudError ->
val placement = apphudPlacements.firstOrNull { it.identifier == "YOUR_PLACEMENT_ID" }
val paywall = placement?.paywall
// work with your paywall and it's products here
}static Future<ApphudPlacements> fetchPlacements() asyncconst placements = await ApphudSdk.placements();
const paywall = placements.find(p => p.identifier === "YOUR_PLACEMENT_ID")?.paywall;
const products = paywall?.products;
// setup your UI with these productsApphudSDK.FetchPlacements((List<ApphudPlacement> list, ApphudError error)=>{});Placements must be created in Apphud Product Hub. Each placement contains an ordered array of paywalls and their target audience.
Each paywall contains products and custom JSON dictionary.
You can retrieve products array by calling paywall.products on your desired paywall object.
Get more details in our Displaying Products guide.
Make Purchases
To make a purchase call:
Apphud.purchase(product) { result in
   if let subscription = result.subscription, subscription.isActive(){
      // has active subscription
   } else if let purchase = result.nonRenewingPurchase, purchase.isActive(){
      // has active non-renewing purchase
   } else {
      // handle error or check transaction status.
   }
}
Task {
// productStruct is Product struct model from StoreKit2
// $isPurchasing should be used only in SwiftUI apps, otherwise don't use this parameter
let result = await Apphud.purchase(productStruct, isPurchasing: $isPurchasing)
if result.success {
// handle successful purchase
}
}[Apphud purchase:product callback:^(ApphudPurchaseResult * result) {
if (result.subscription.isActive){
// has active subscription
} else if (result.nonRenewingPurchase.isActive){
// has active non-renewing purchase
} else {
// handle error or check transaction status
}
}];Apphud.purchase(activity, product, offerIdToken) { result -> }await Apphud.purchase(product: product)ApphudSdk.purchase({ productId: "YOUR_PRODUCT_ID" }).then((result) => {
// handle purchase result
});ApphudSDK.Purchase(
product, // ApphudProduct
offerIdToken: "", // Android only. String, by default null.
oldToken:"", // optional. String, by default null
replacementMode: null, // optional int? by default null
consumableInAppProduct: false, // Android only. Pass true to purchase consumable product.
callback: (ApphudPurchaseResult result) => {})
)More details can be found in our Making Purchases guide.
Check Premium Access
If you have subscriptions and nonconsumable lifetime purchases, you can use following method to check whether you have active subscription or active nonconsumable. Note, that this method should not be used if you have consumable purchases.
Apphud.hasPremiumAccess()await Apphud.hasPremiumAccess();[Apphud hasPremiumAccess];Apphud.hasPremiumAccess()ApphudSDK.HasPremiumAccess();More details can be found in our Checking Subscription Status guide.
Check Subscription Status
To check subscription status regardless of non-consumable purchases call:
Apphud.hasActiveSubscription()[Apphud hasActiveSubscription];await ApphudSdk.hasActiveSubscription();await Apphud.hasActiveSubscription();Apphud.hasActiveSubscription()ApphudSDK.HasActiveSubscription();Advanced Setup
Check out our Additional Resources guide on free trial eligibility checking, handling promoted in-app purchases, sandbox testing, and more.
App Release ChecklistTo minimize the risk of mistakes during setup and avoid the need for app resubmission, please read the App Release Checklist carefully.
Next Steps
- Set up Server Notifications if you haven't already.
- If you have existing subscribers, see our Data Migration Guide on migrating existing subscriptions.
- If you qualify for App Store Small Business Program, check out the guide on how to inform Apphud.
- To engage with your subscribers, set up Rules and Push Notifications.
- To optimize your In-App Purchase pricing, get started with A/B Tests.
Updated about 1 month ago