
Google Cloud Storage
Configure daily automated exports of transactional data to Google Cloud Storage
Connect Apphud's Daily Data Exports to your own Google Cloud Storage (GCS) bucket — receive a gzip-compressed .csv snapshot of all transaction data delivered automatically once a day, ready for BigQuery, Looker, or your data warehouse pipeline.
How to Add Integration?
Step 1 - Preparations in Google Cloud
Create a GCS Service Account and a bucket Apphud will write to.
Create GCS Service Account credentials
Go to the Google Cloud Console and select Service Accounts:
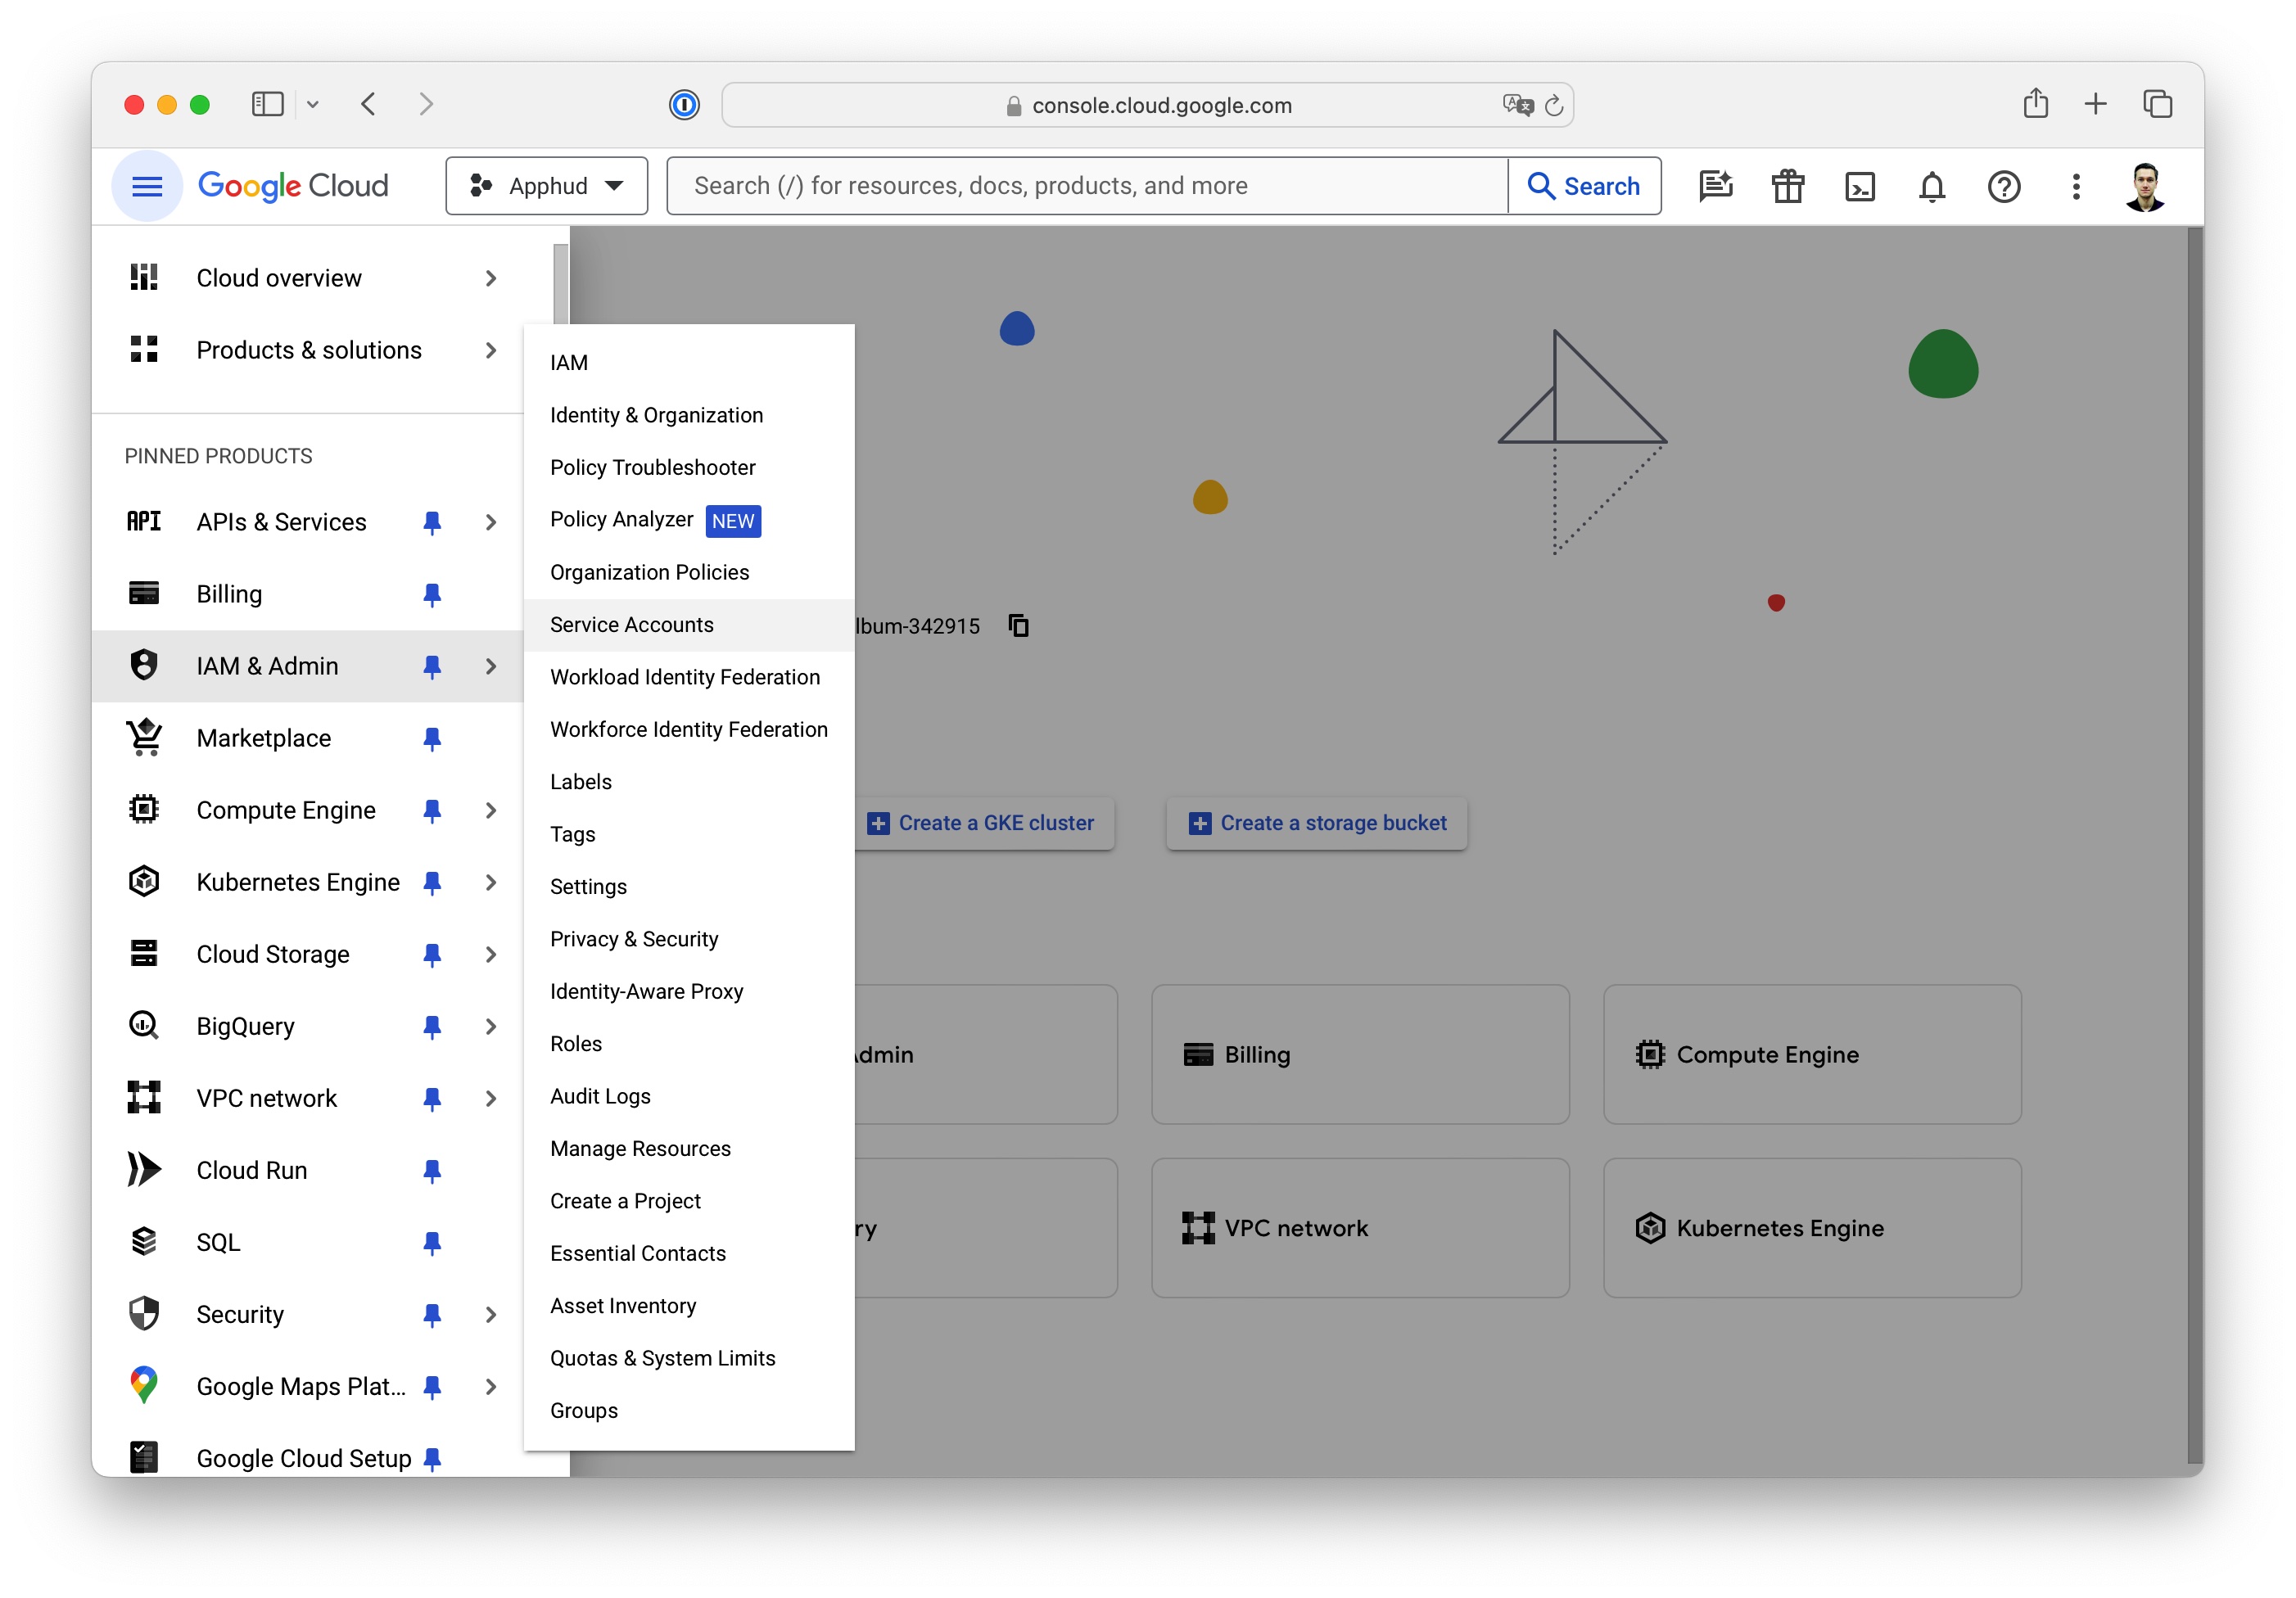
Create a new Service Account:
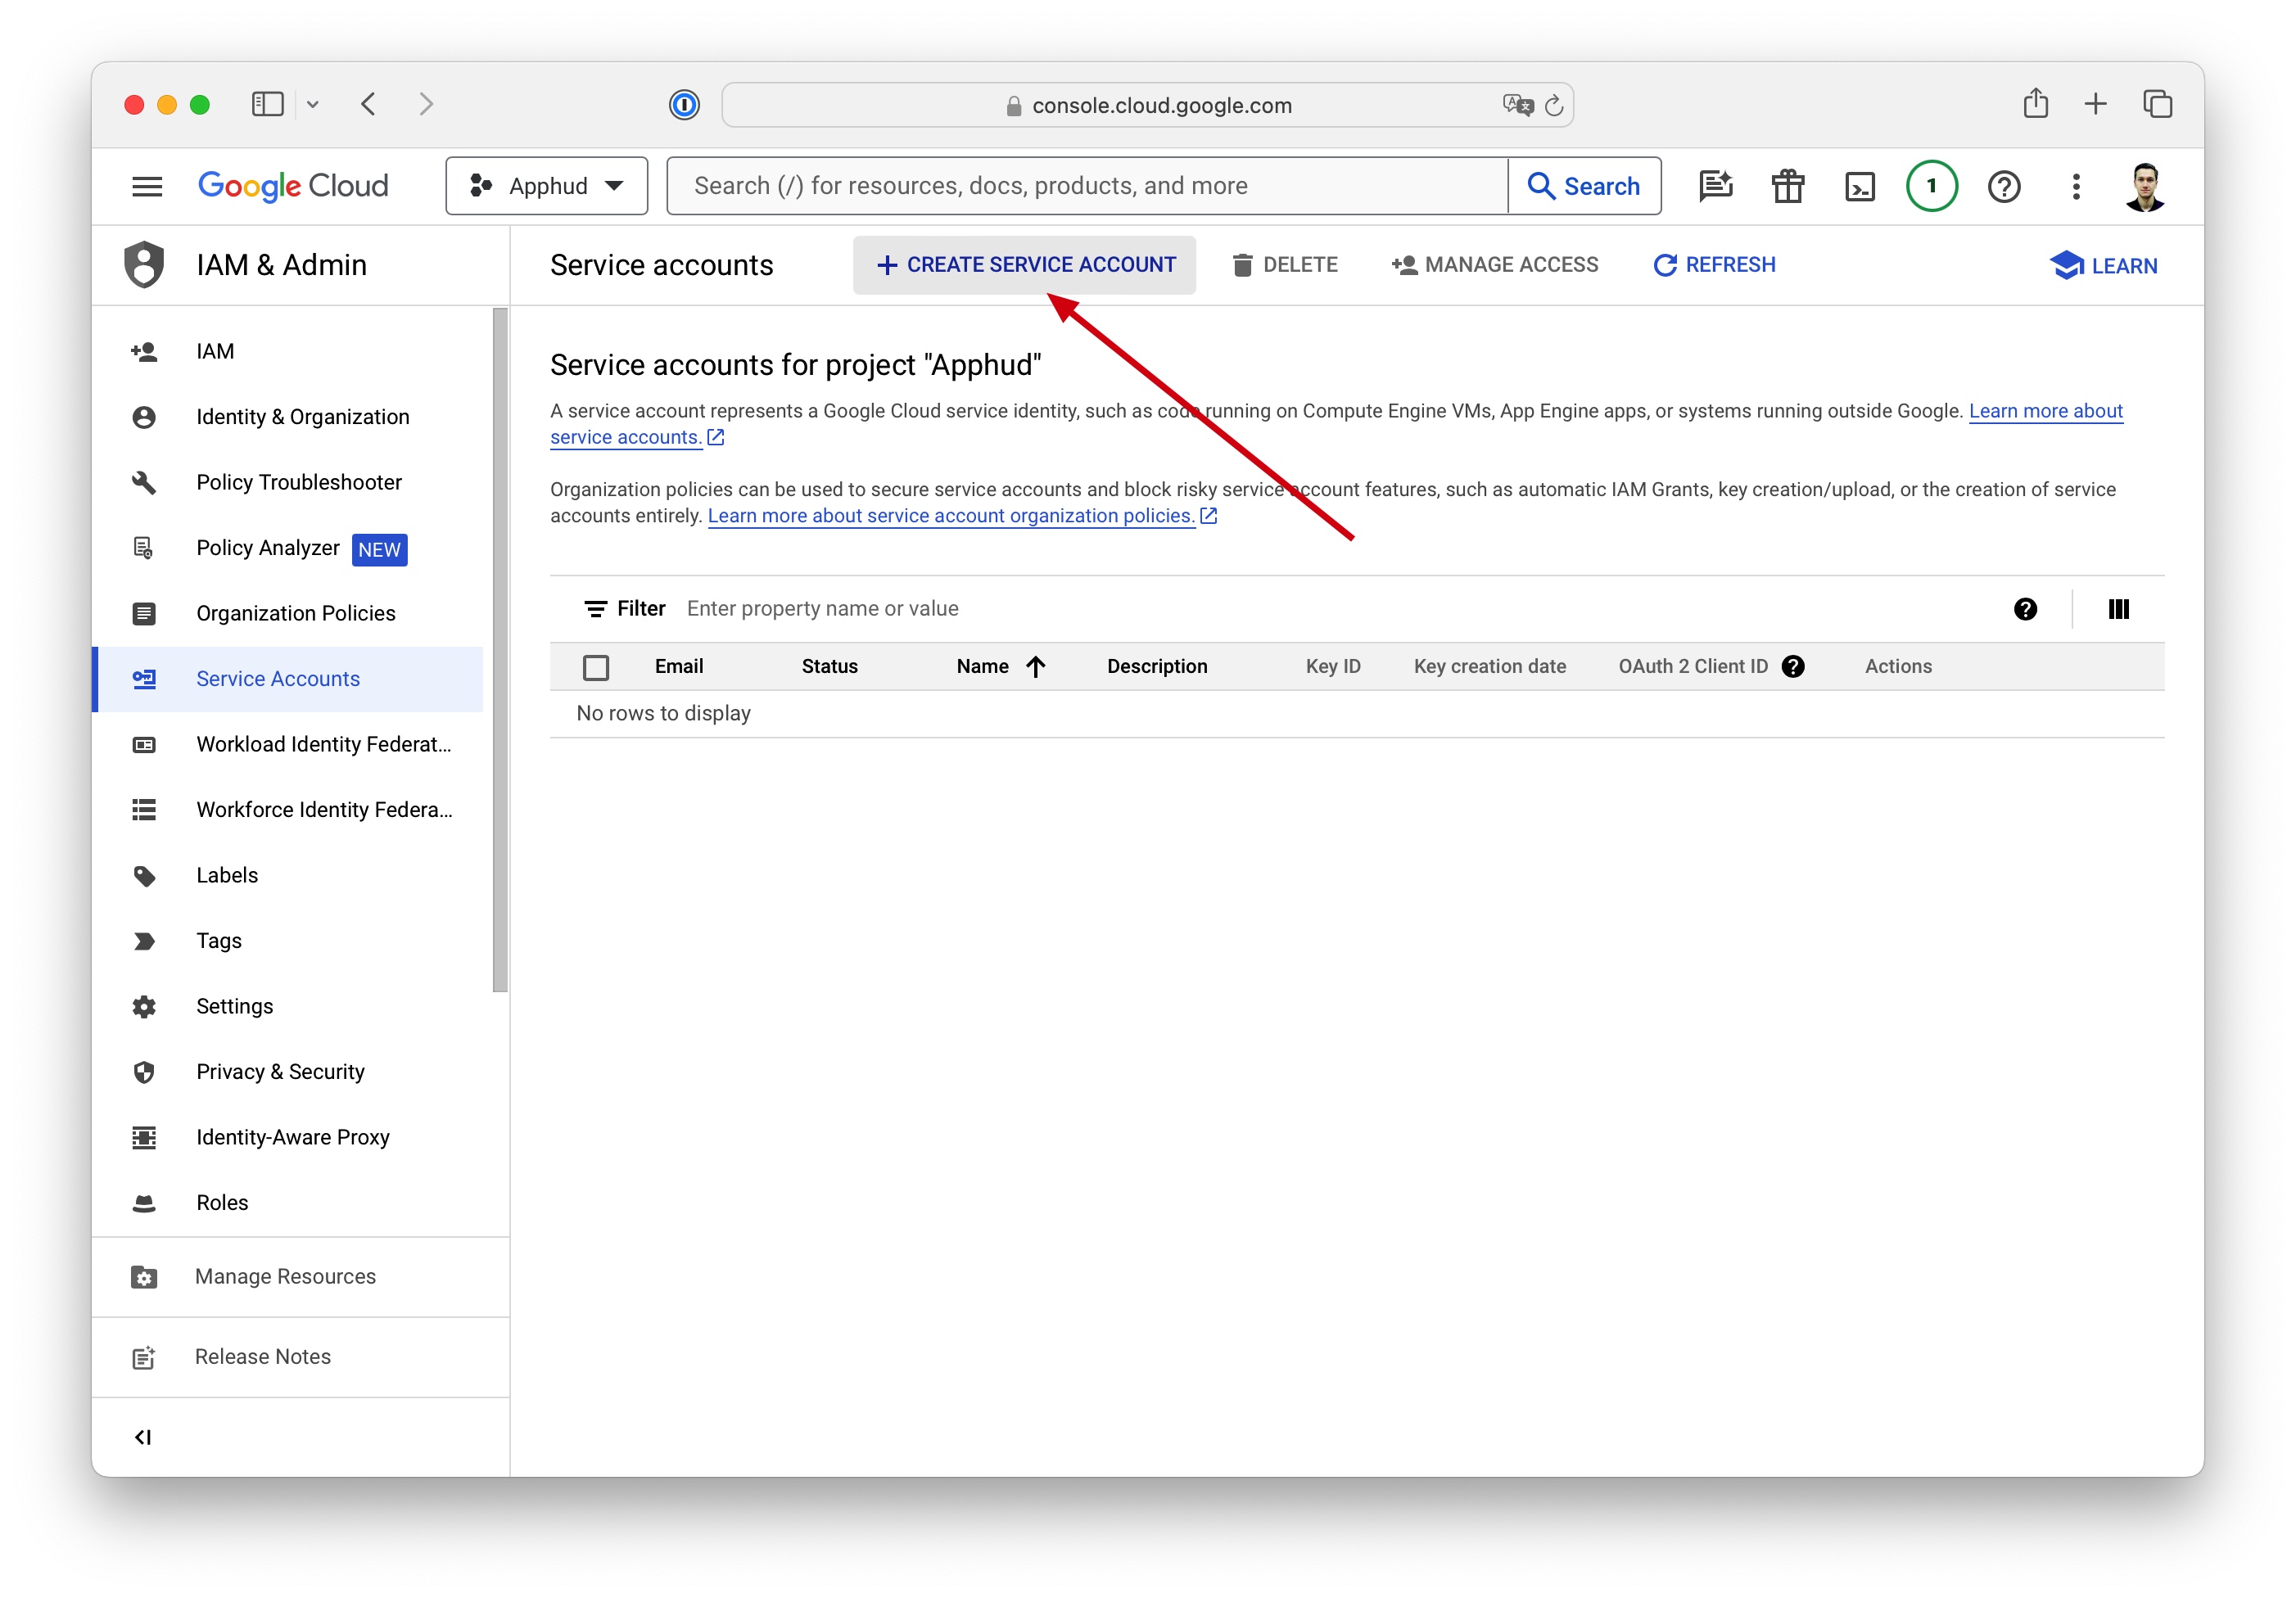
Enter a name and description and click Done:
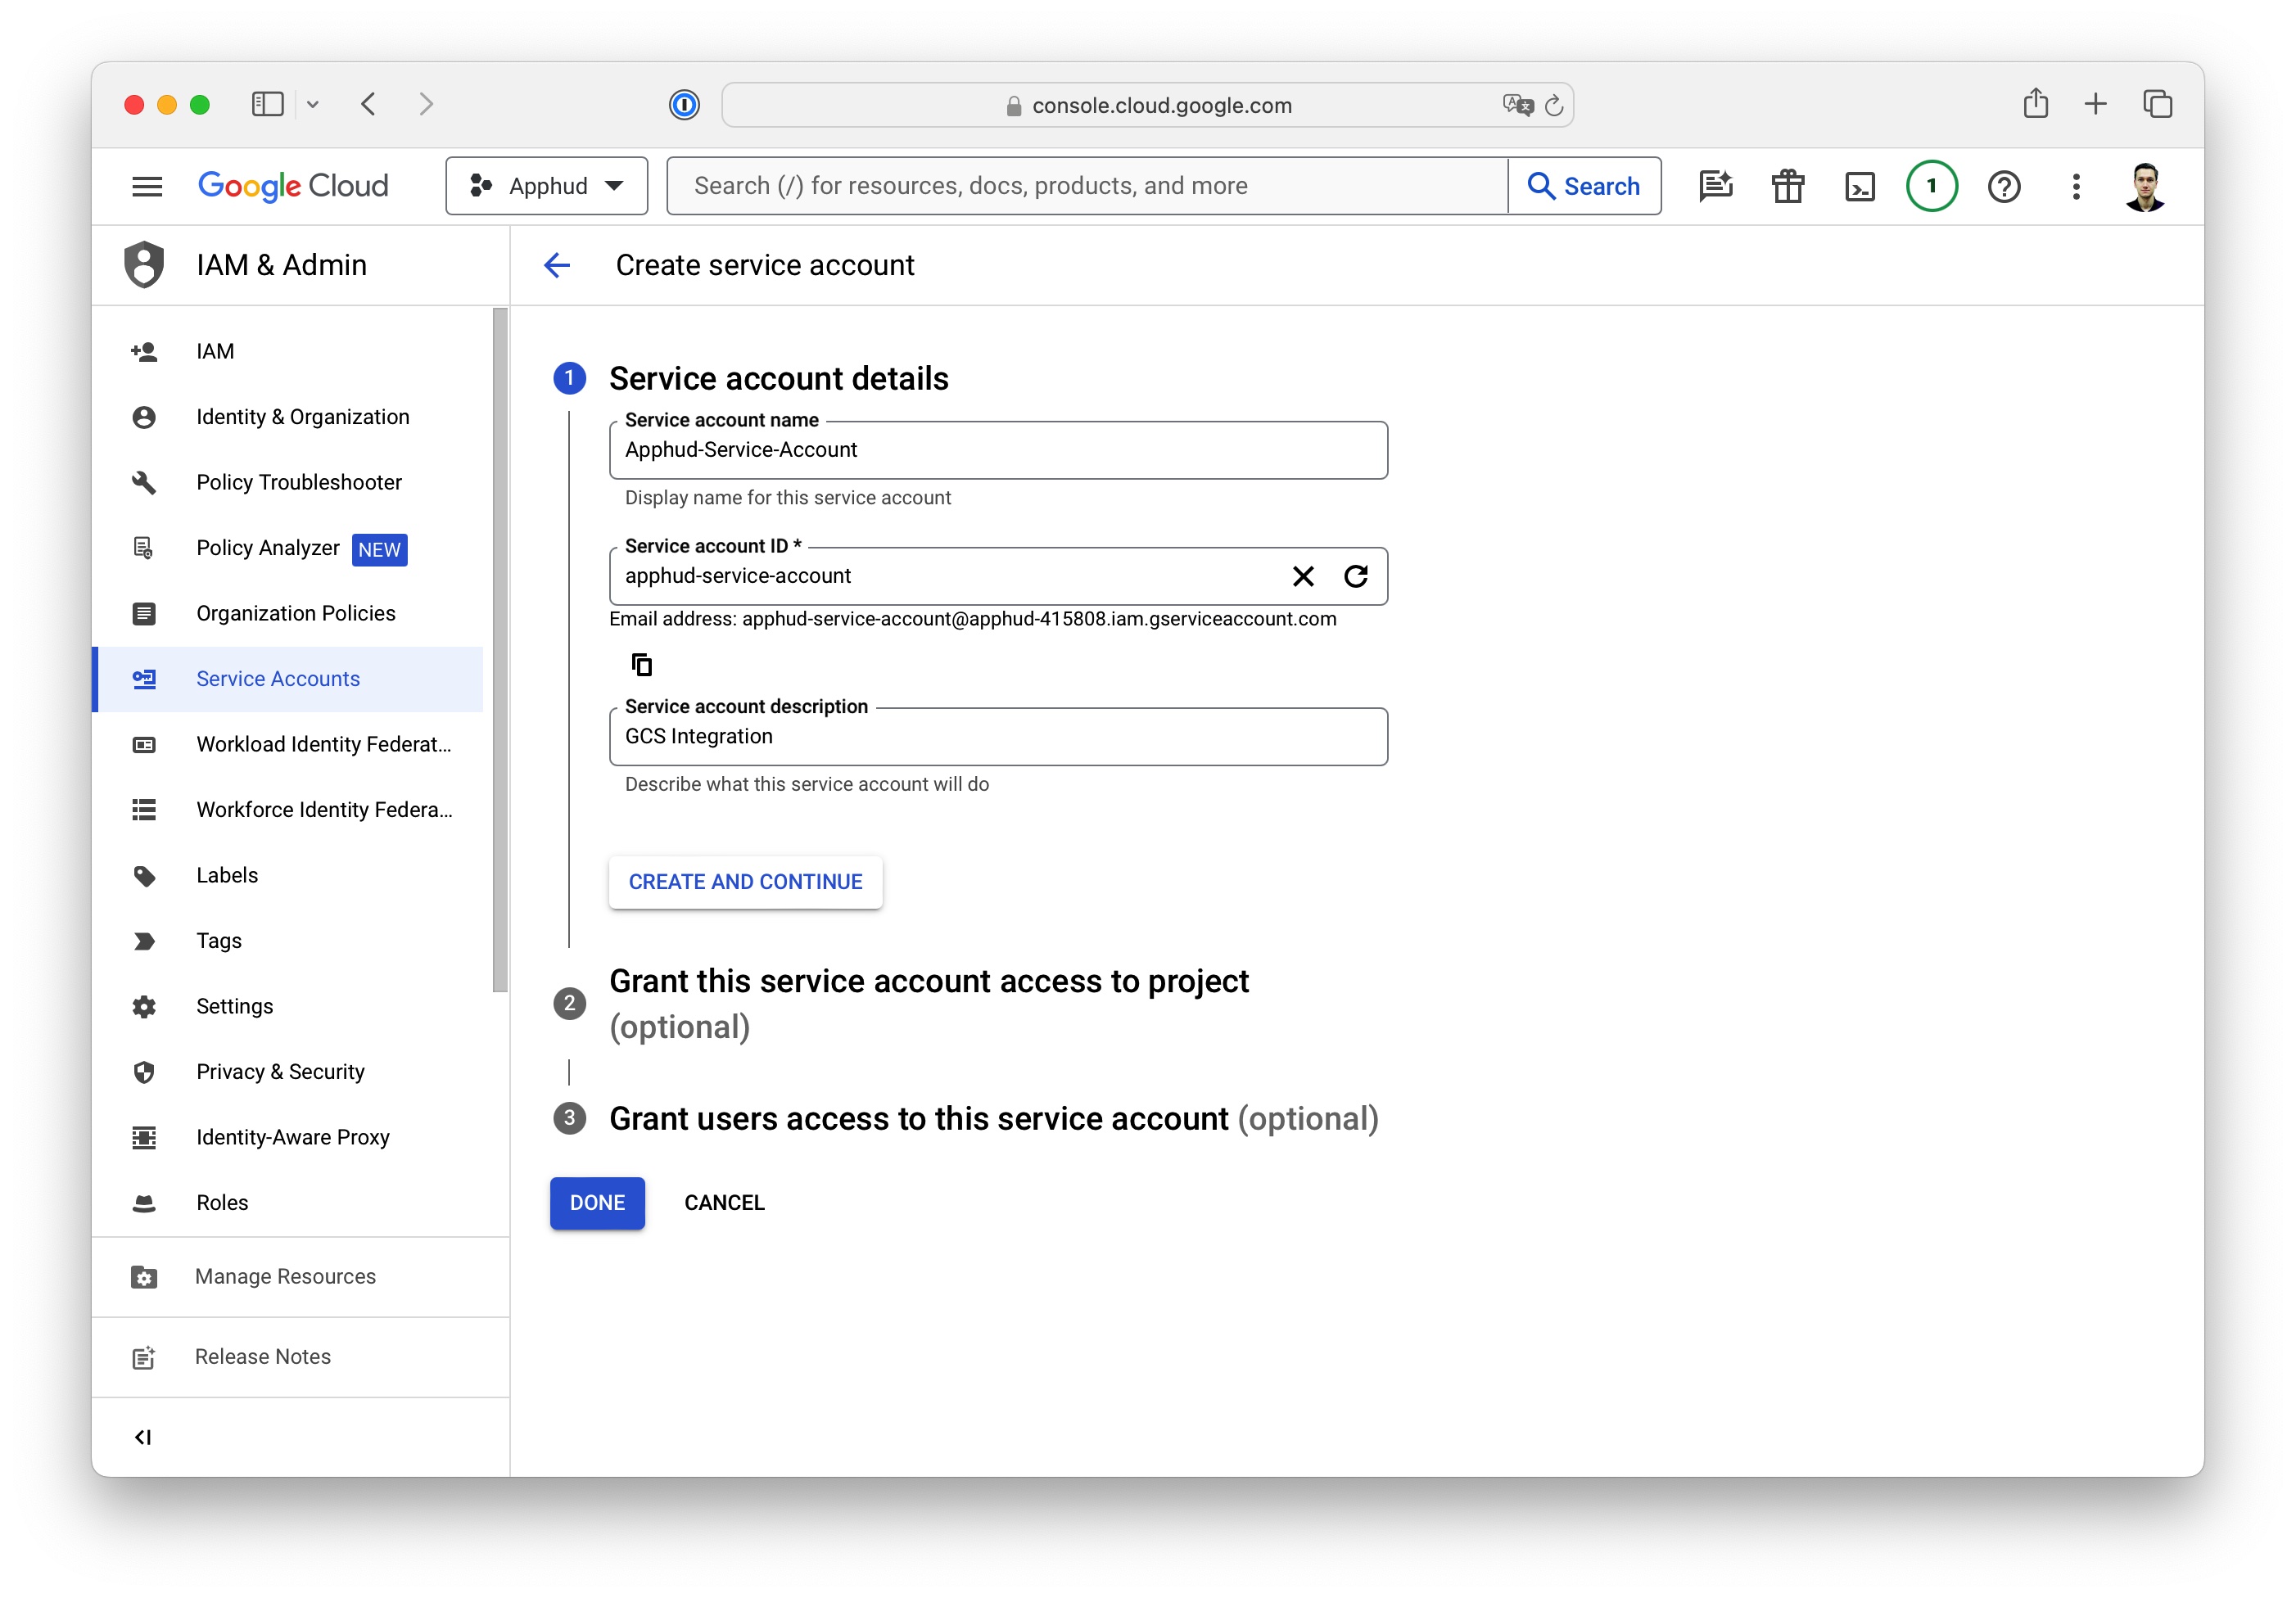
Copy the Email of this Service Account — you'll need it later.
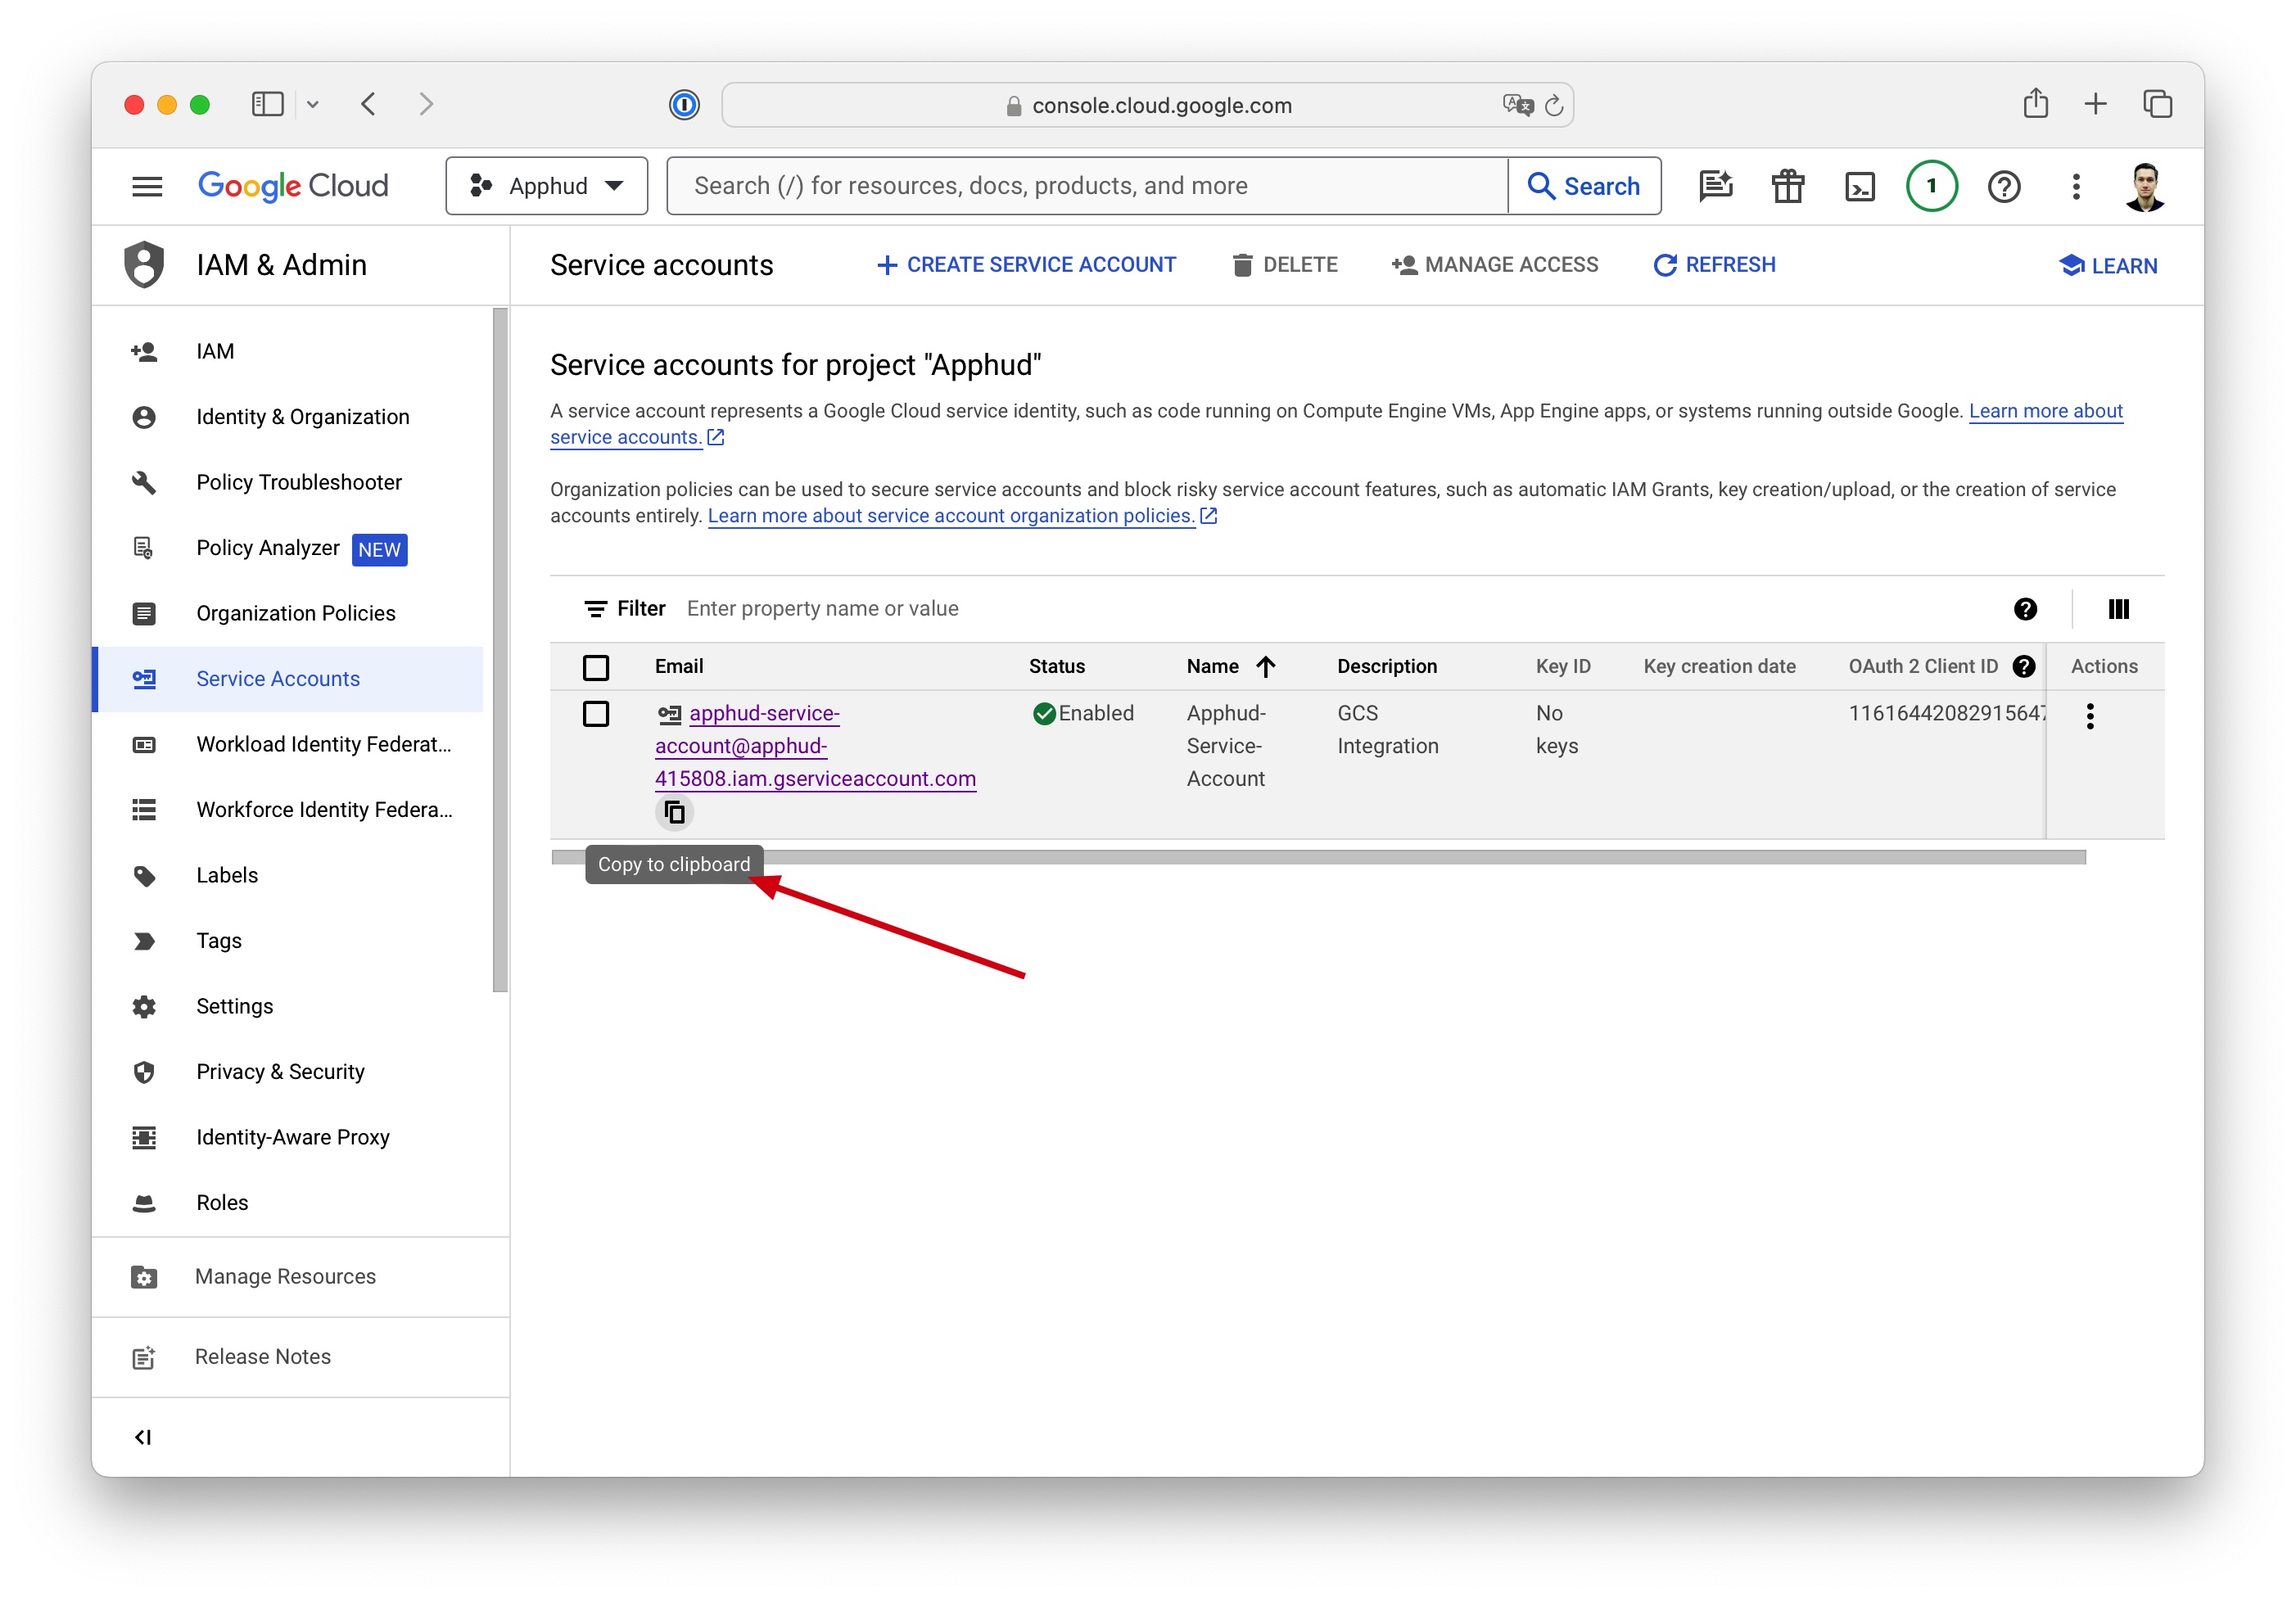
Create a Private Key (JSON)
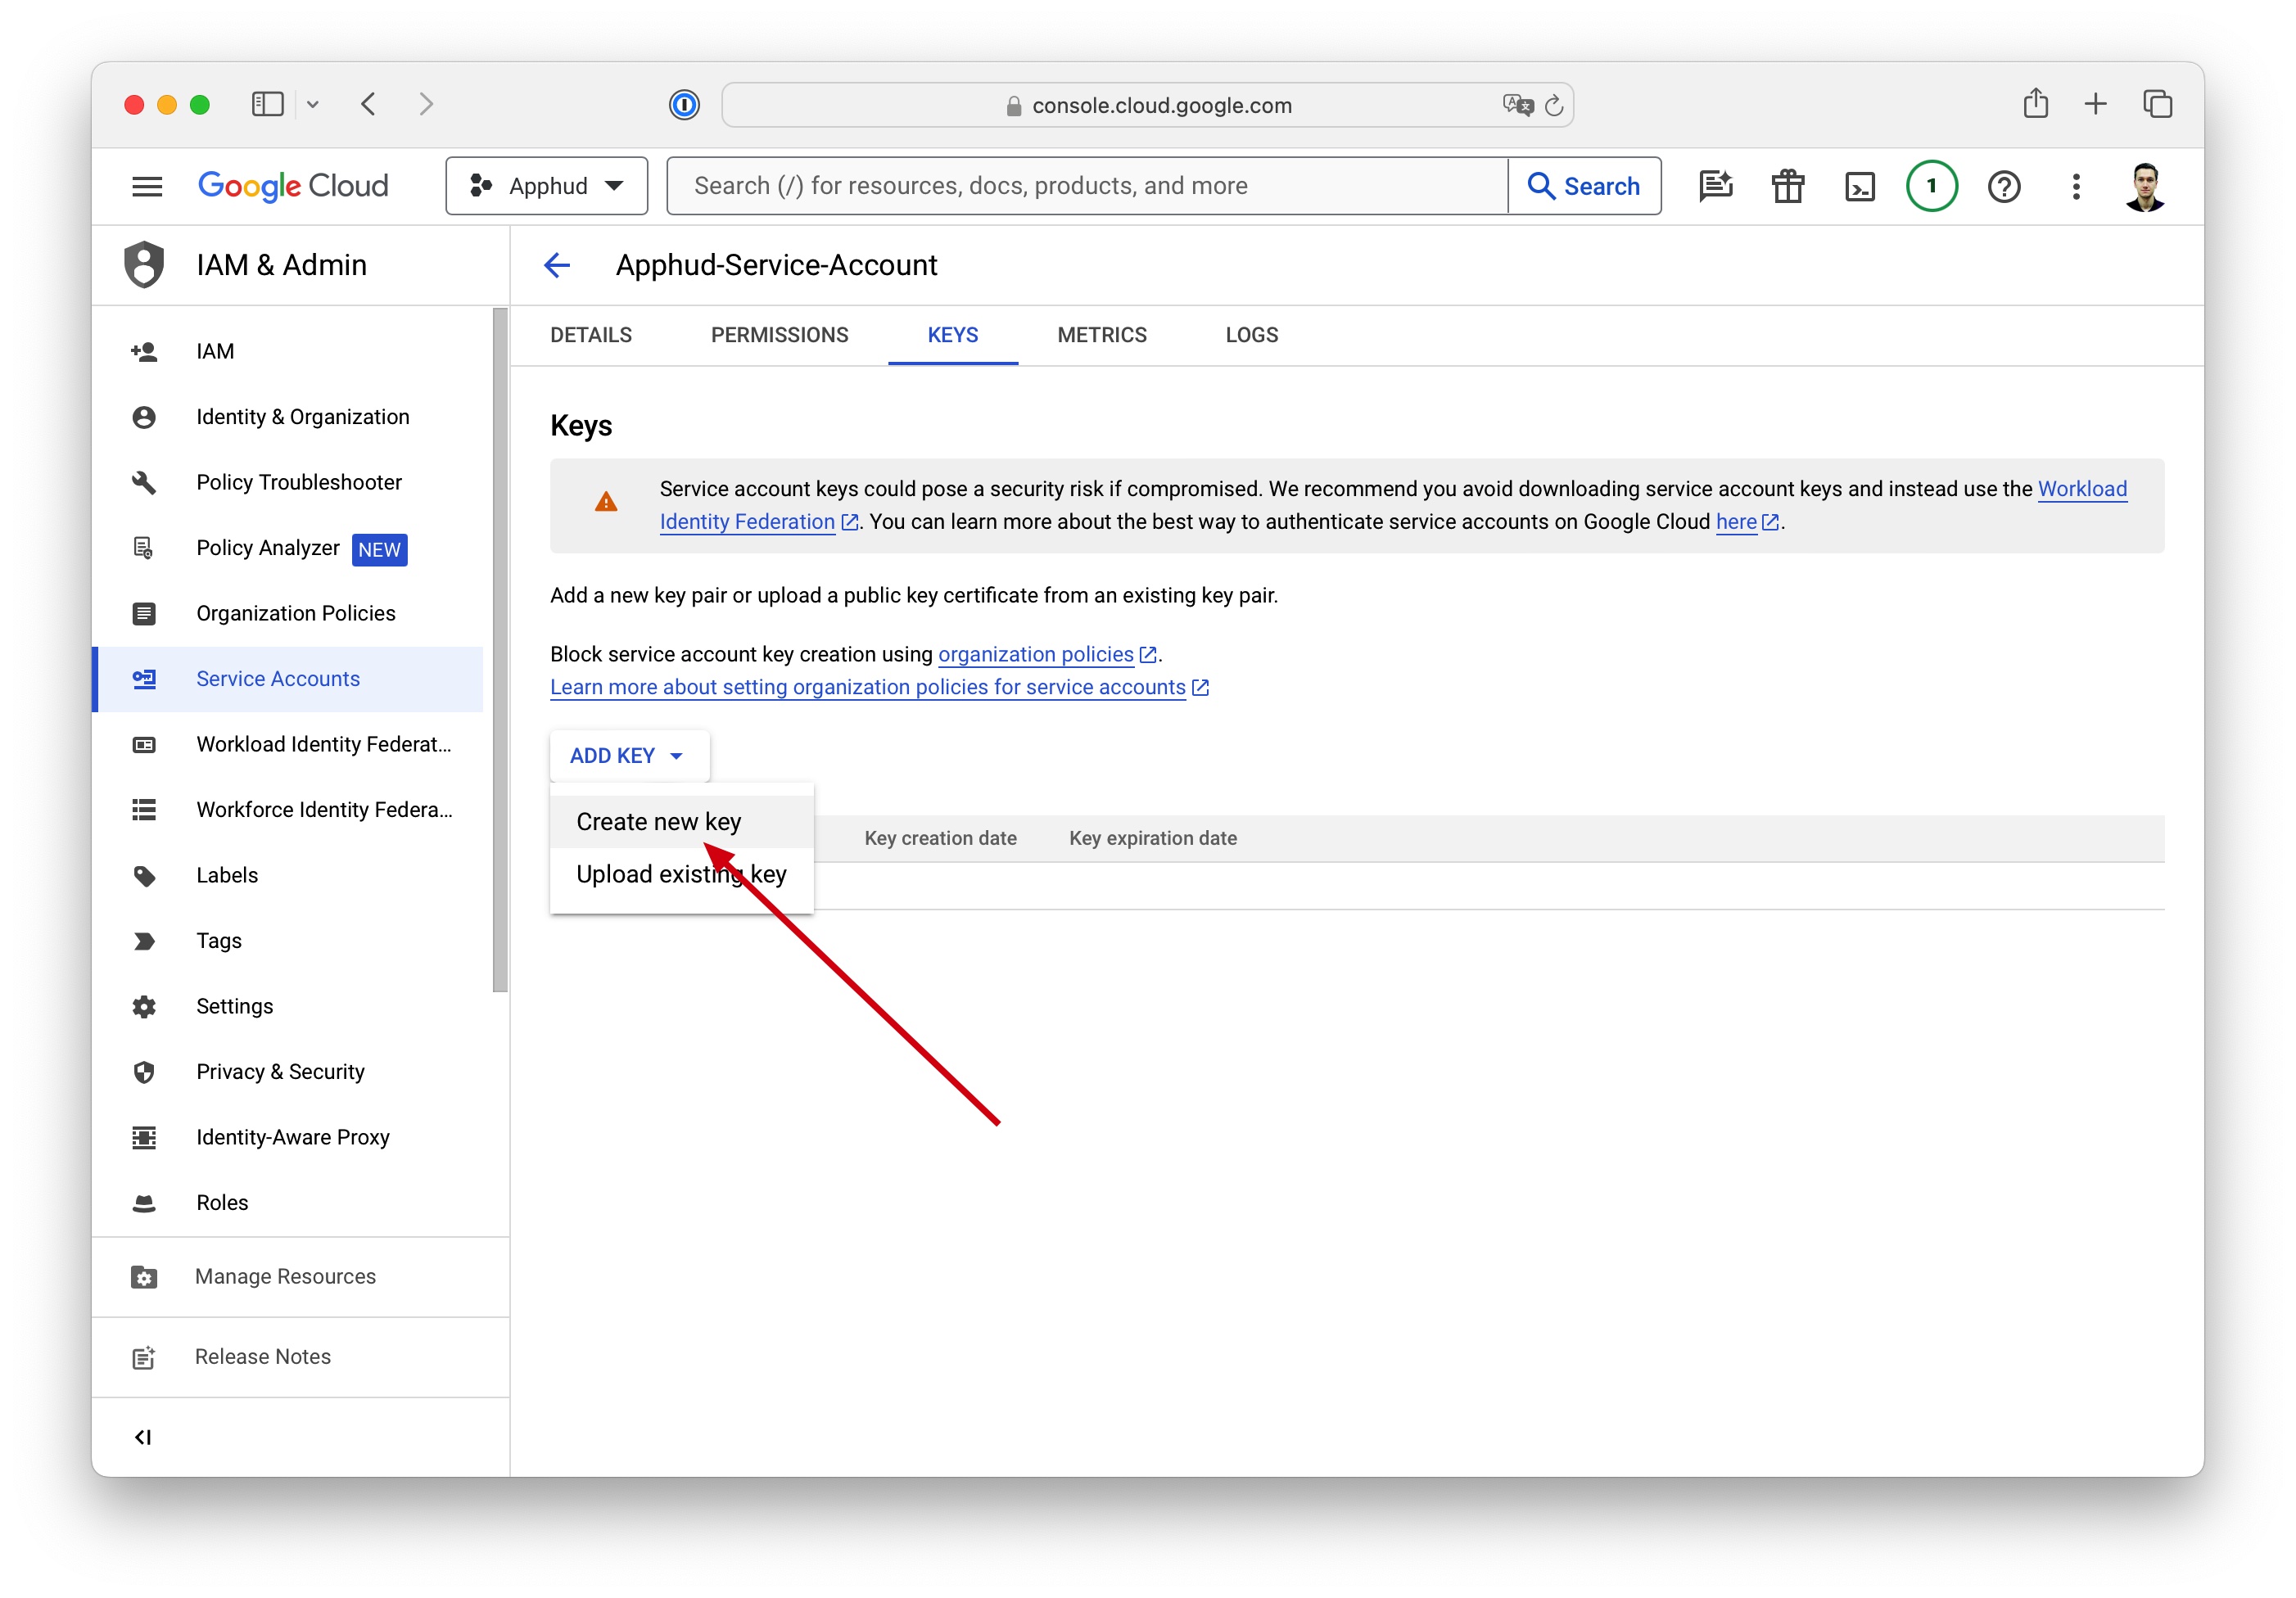
Go to Service Account details → Keys and select Create new key:
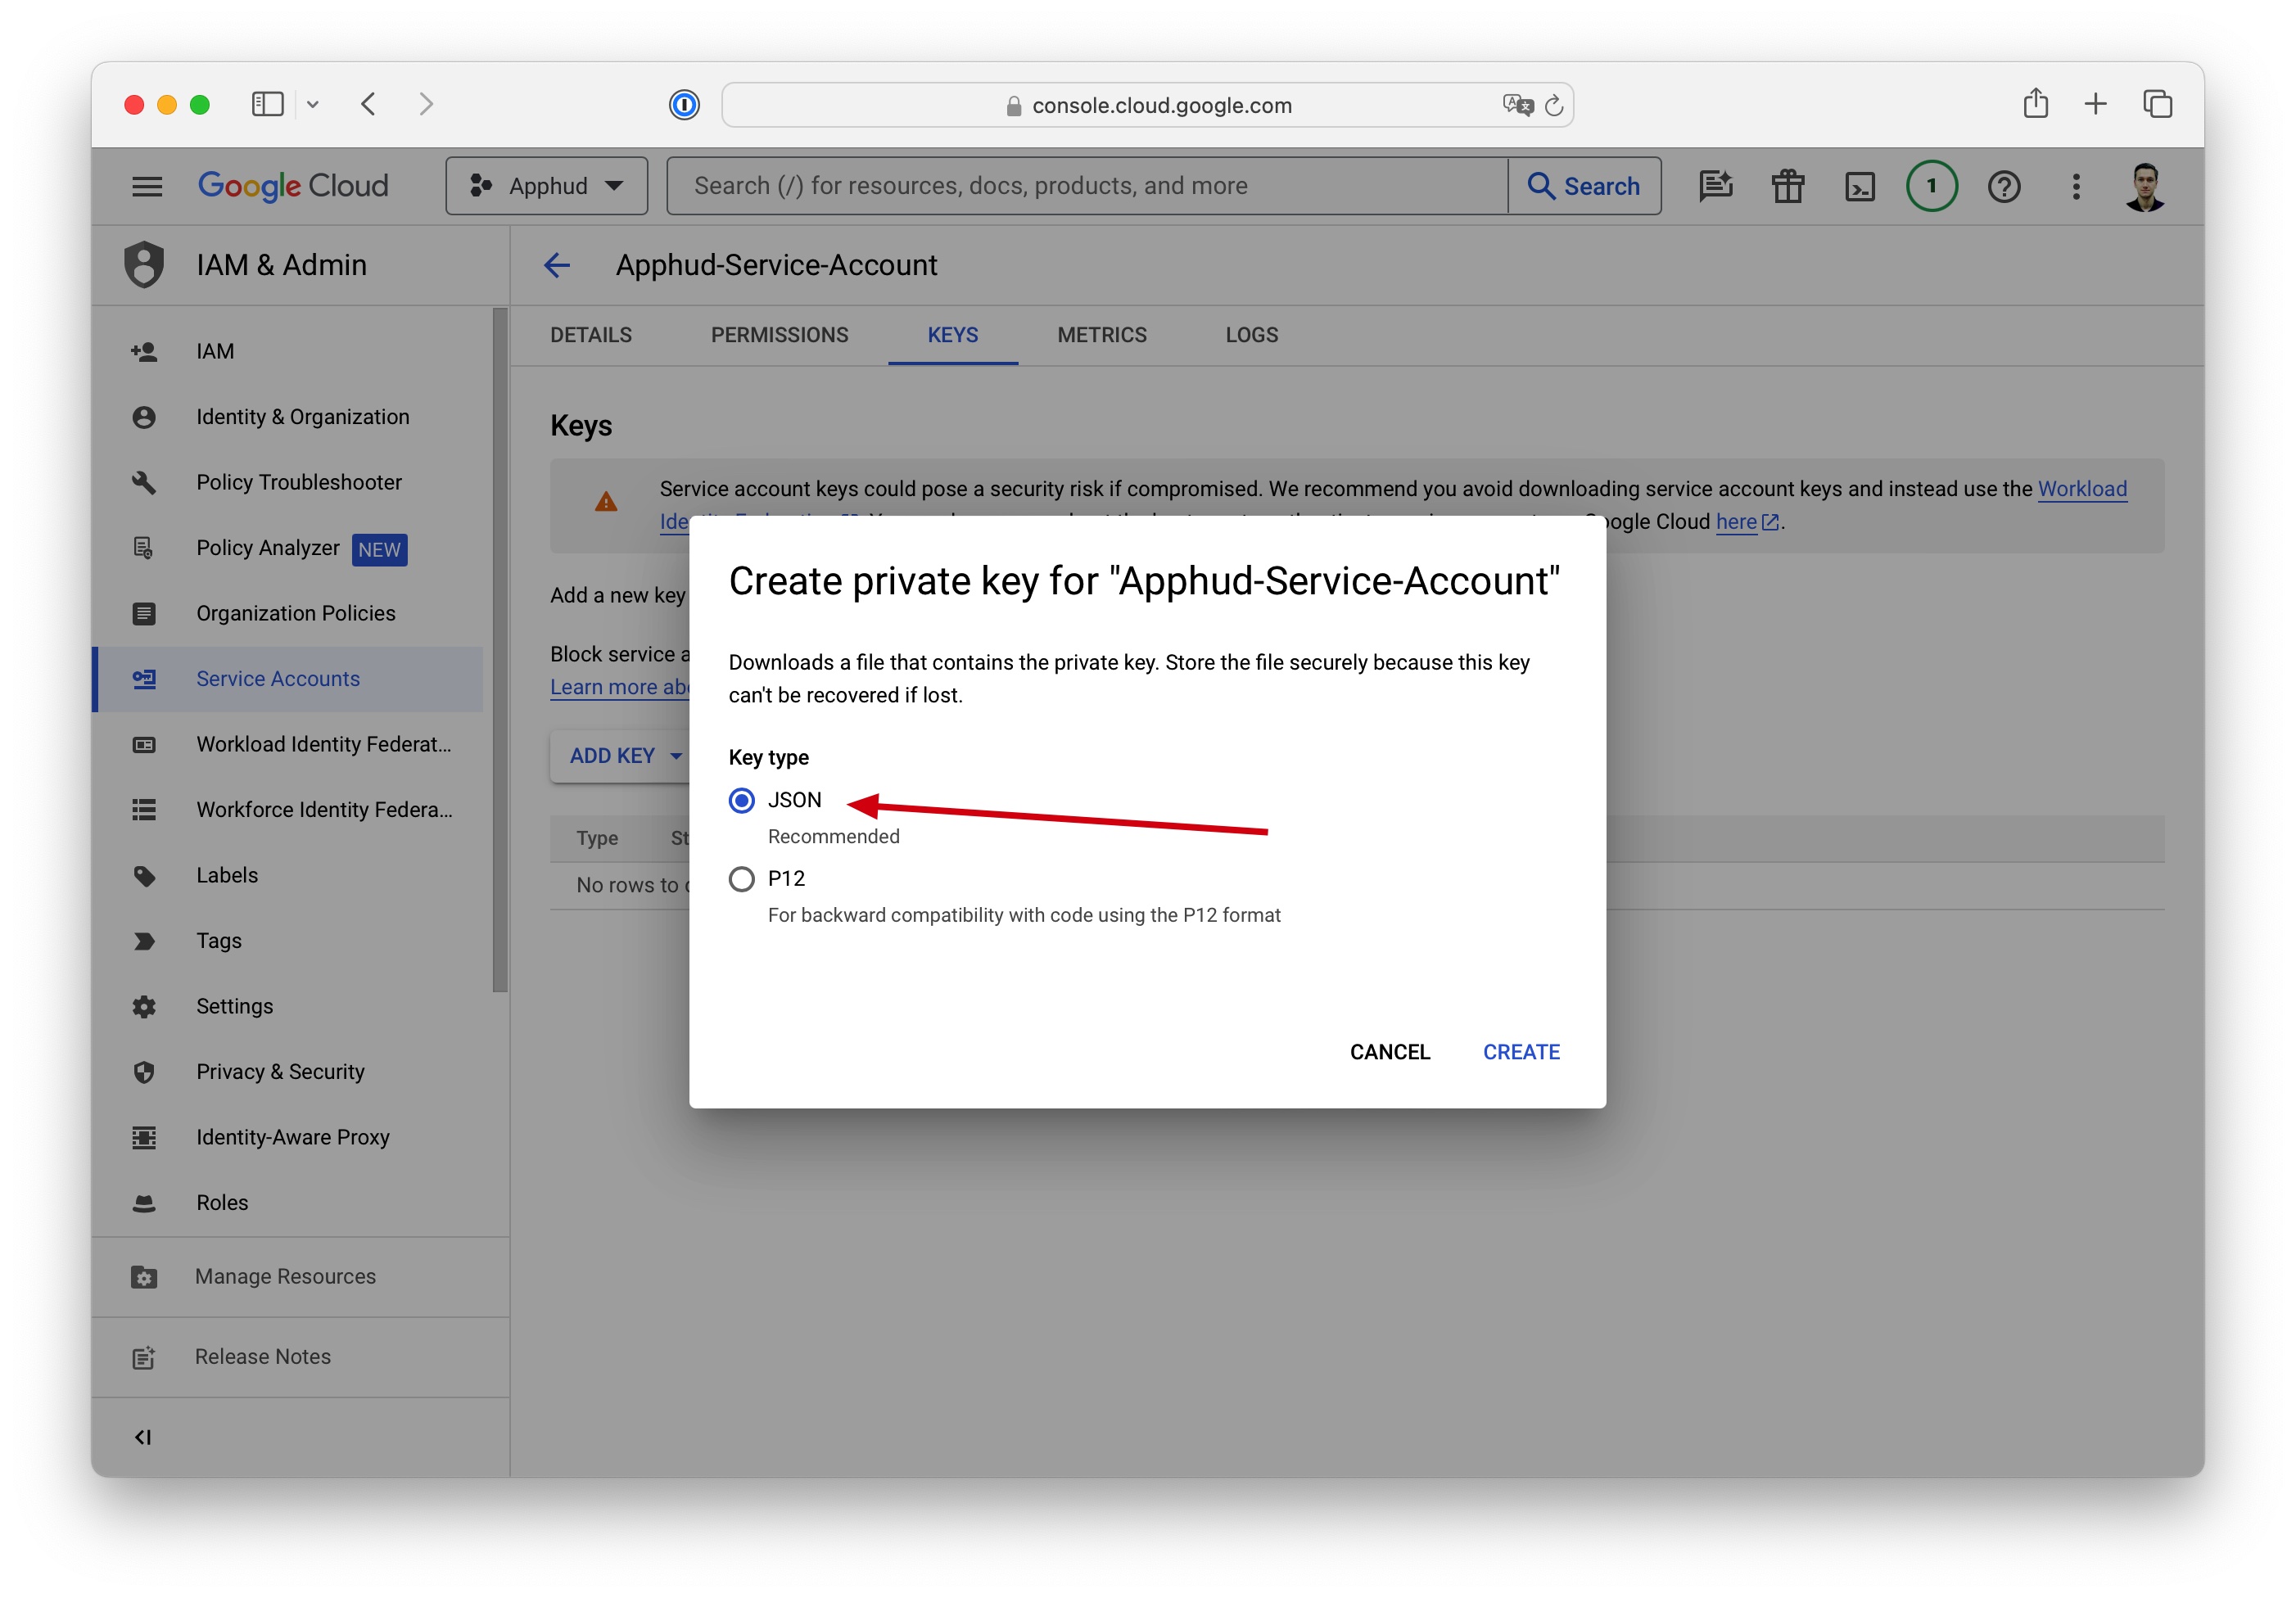
Create a Private Key as JSON file. It will be downloaded to your computer.
Create the GCS bucket and grant access
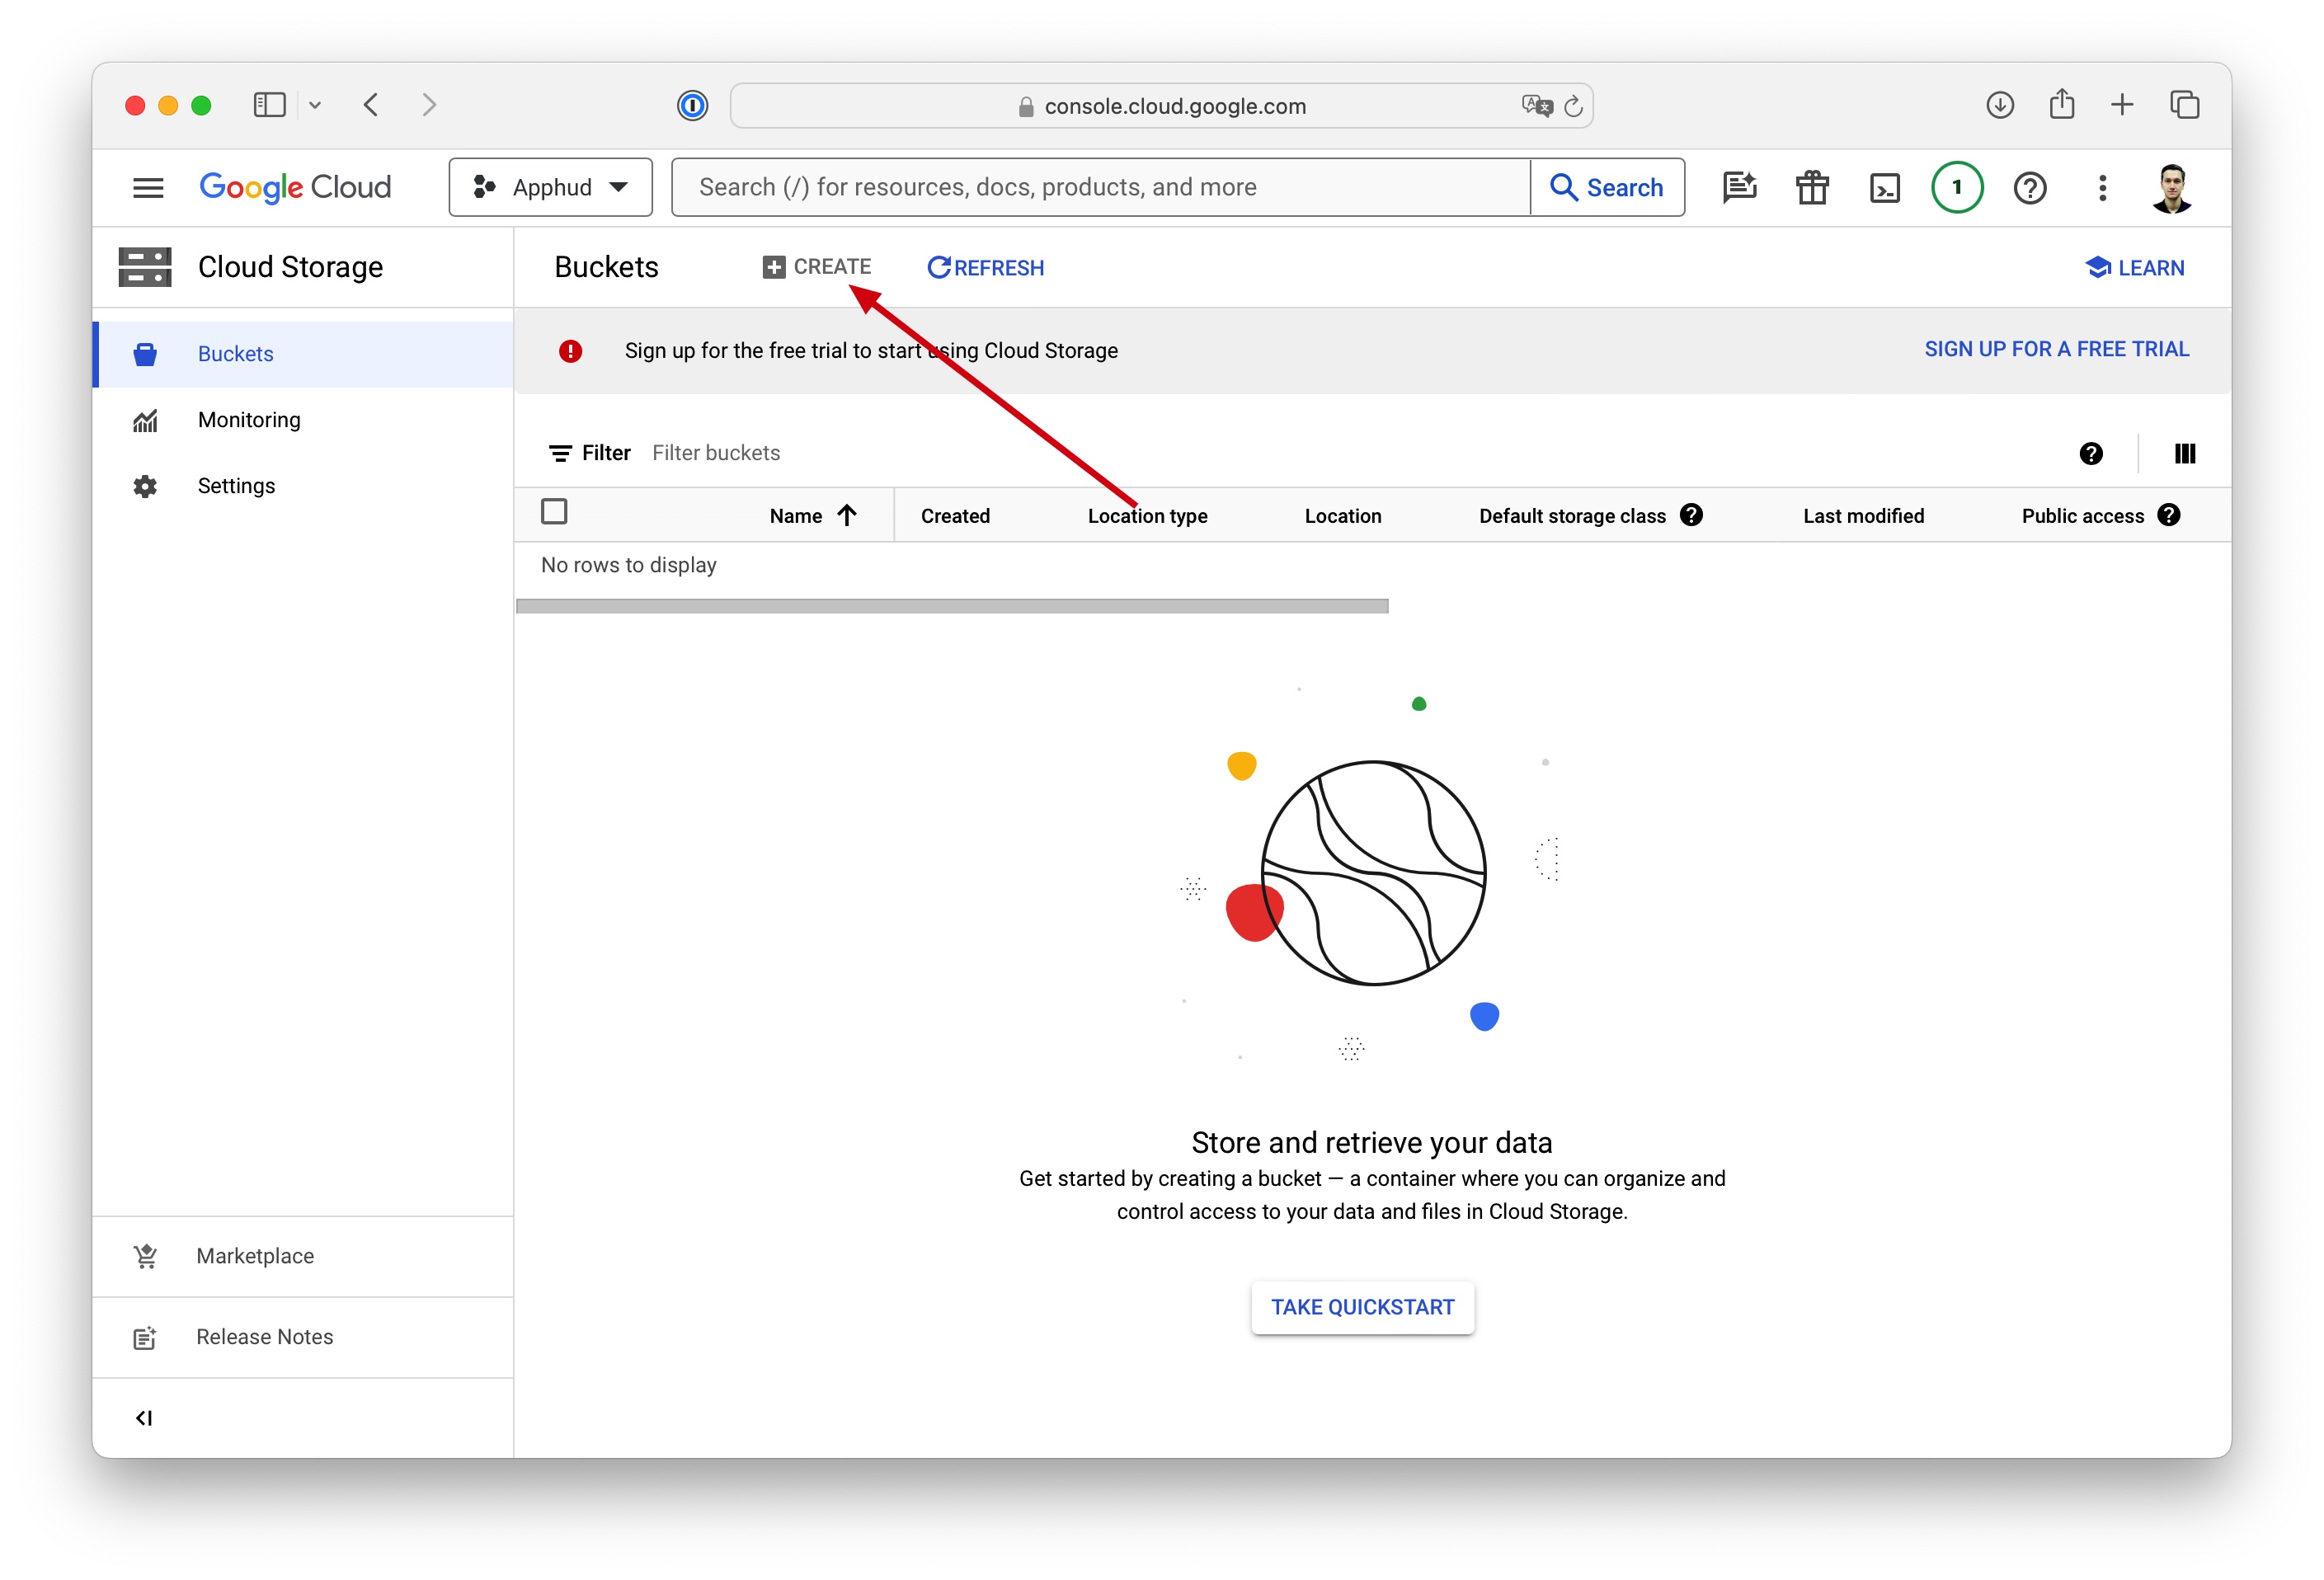
Go to Google Cloud Buckets and create a new Bucket:
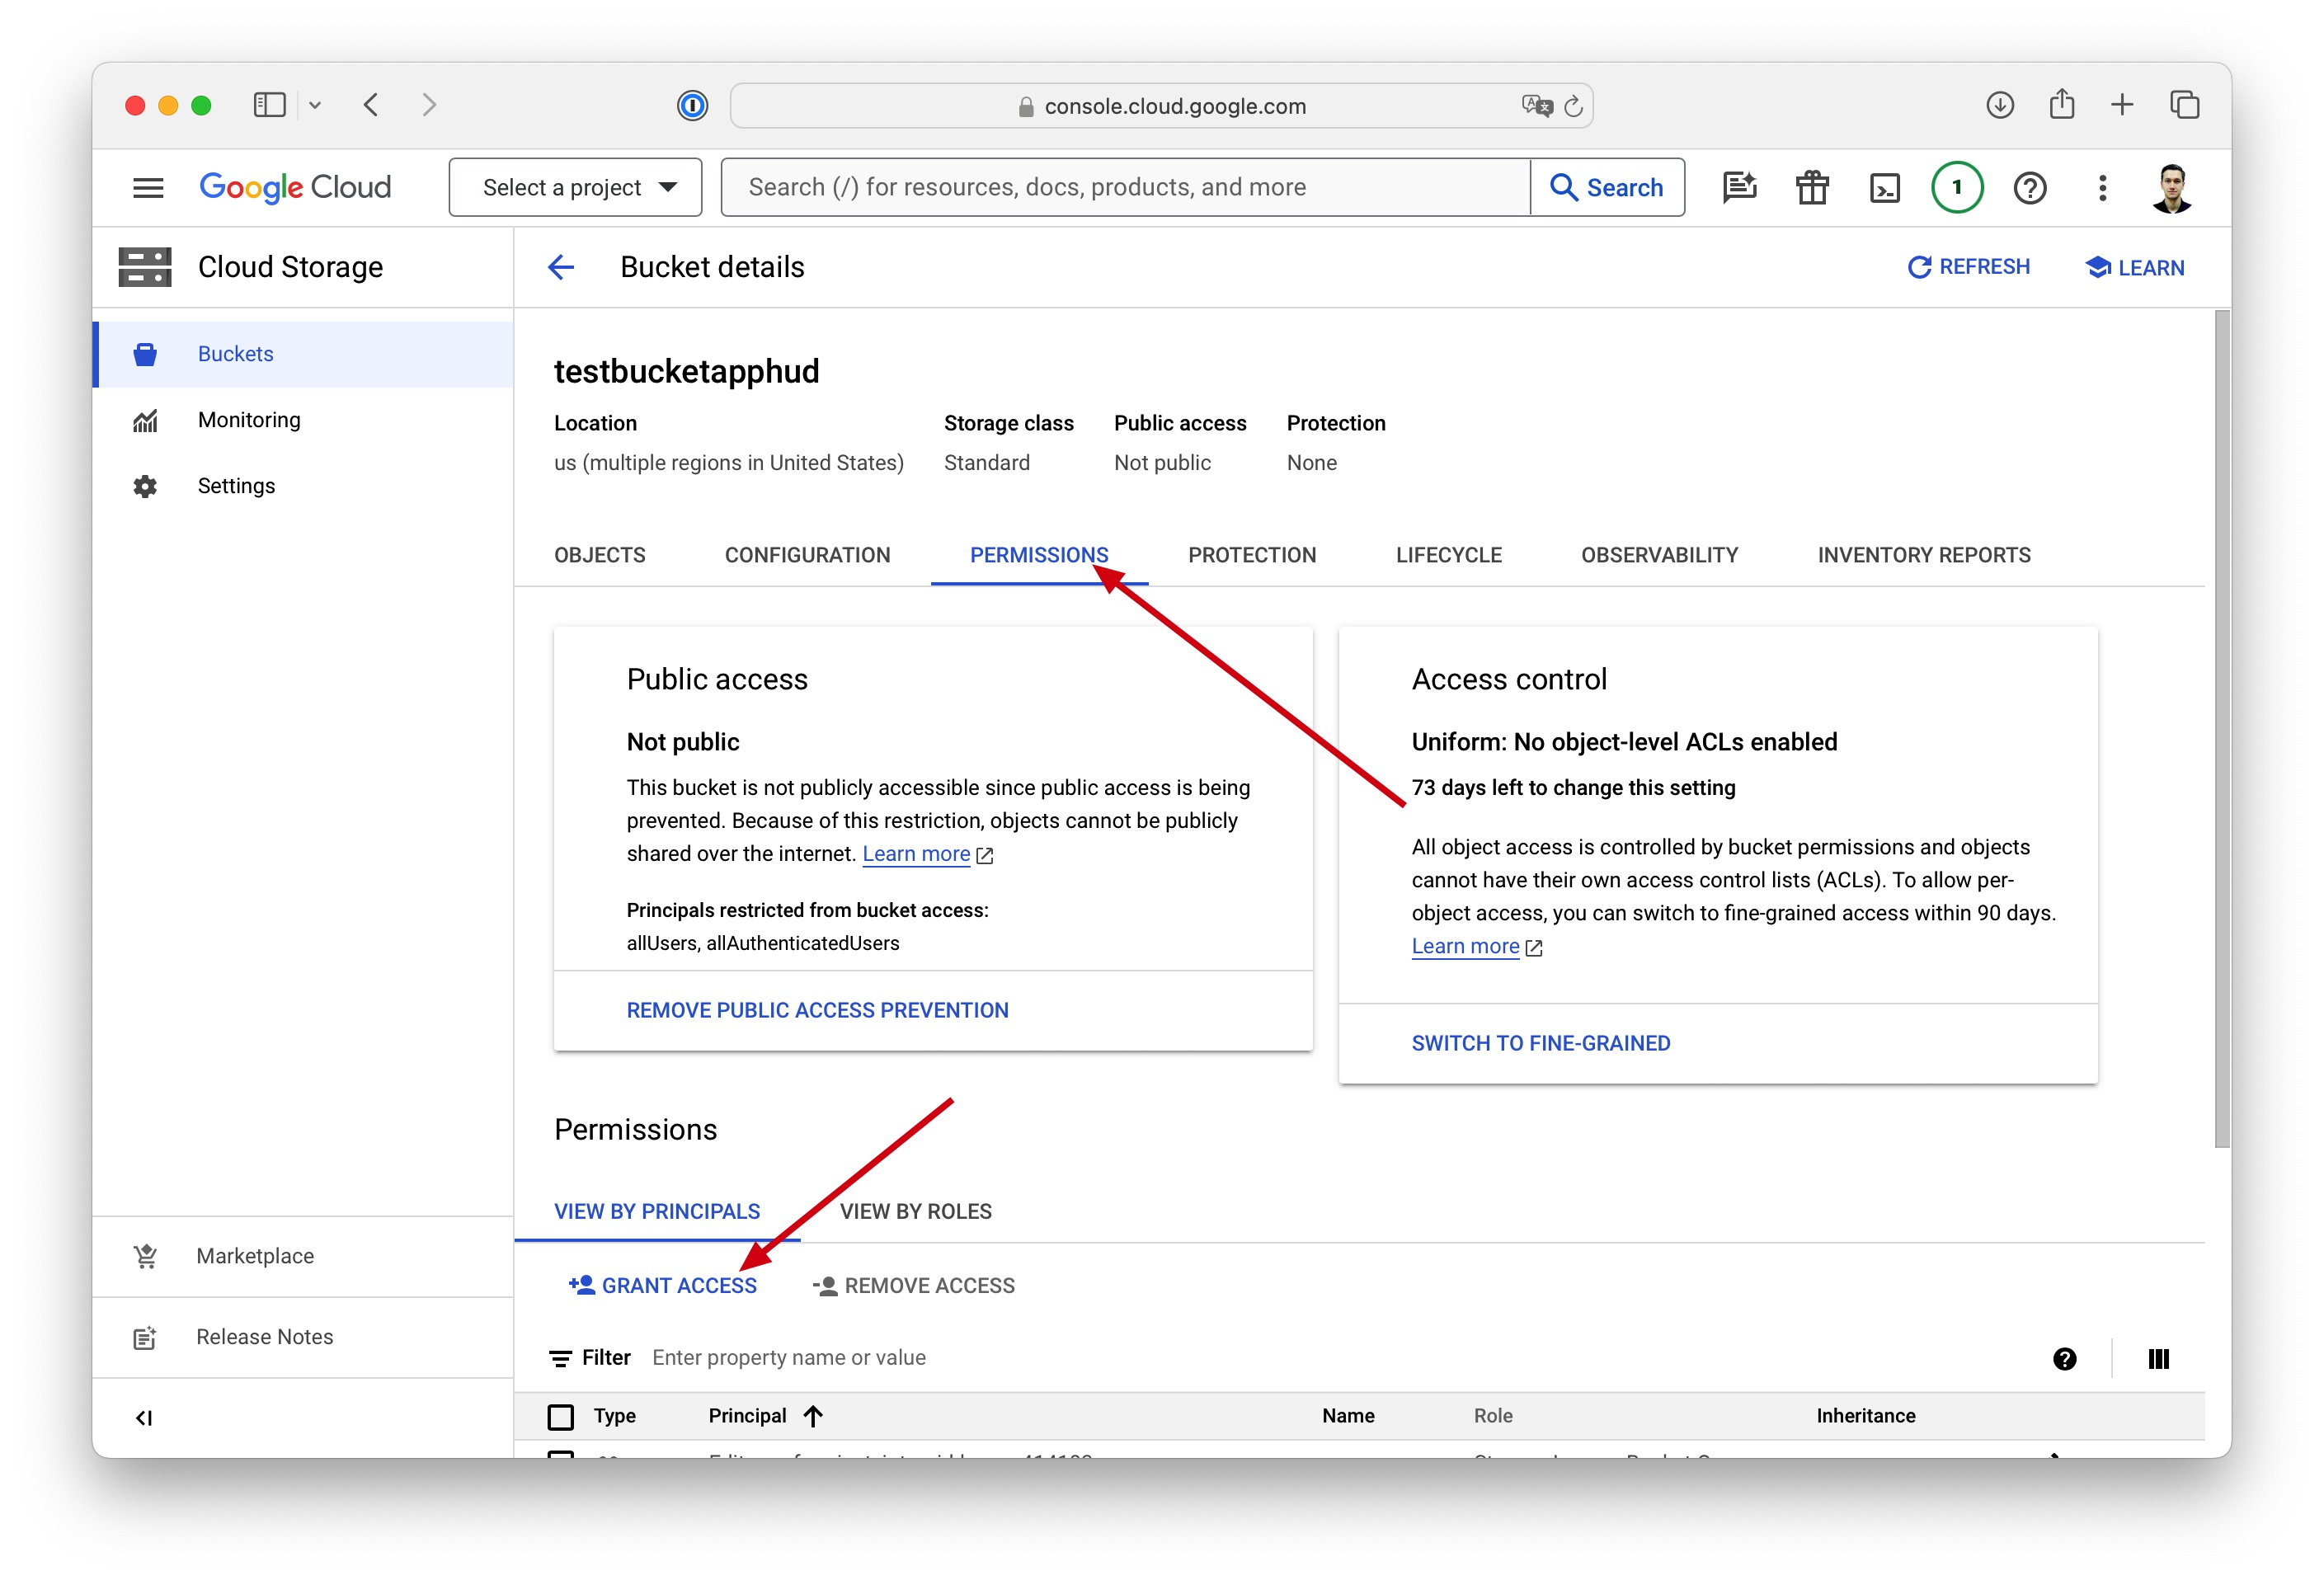
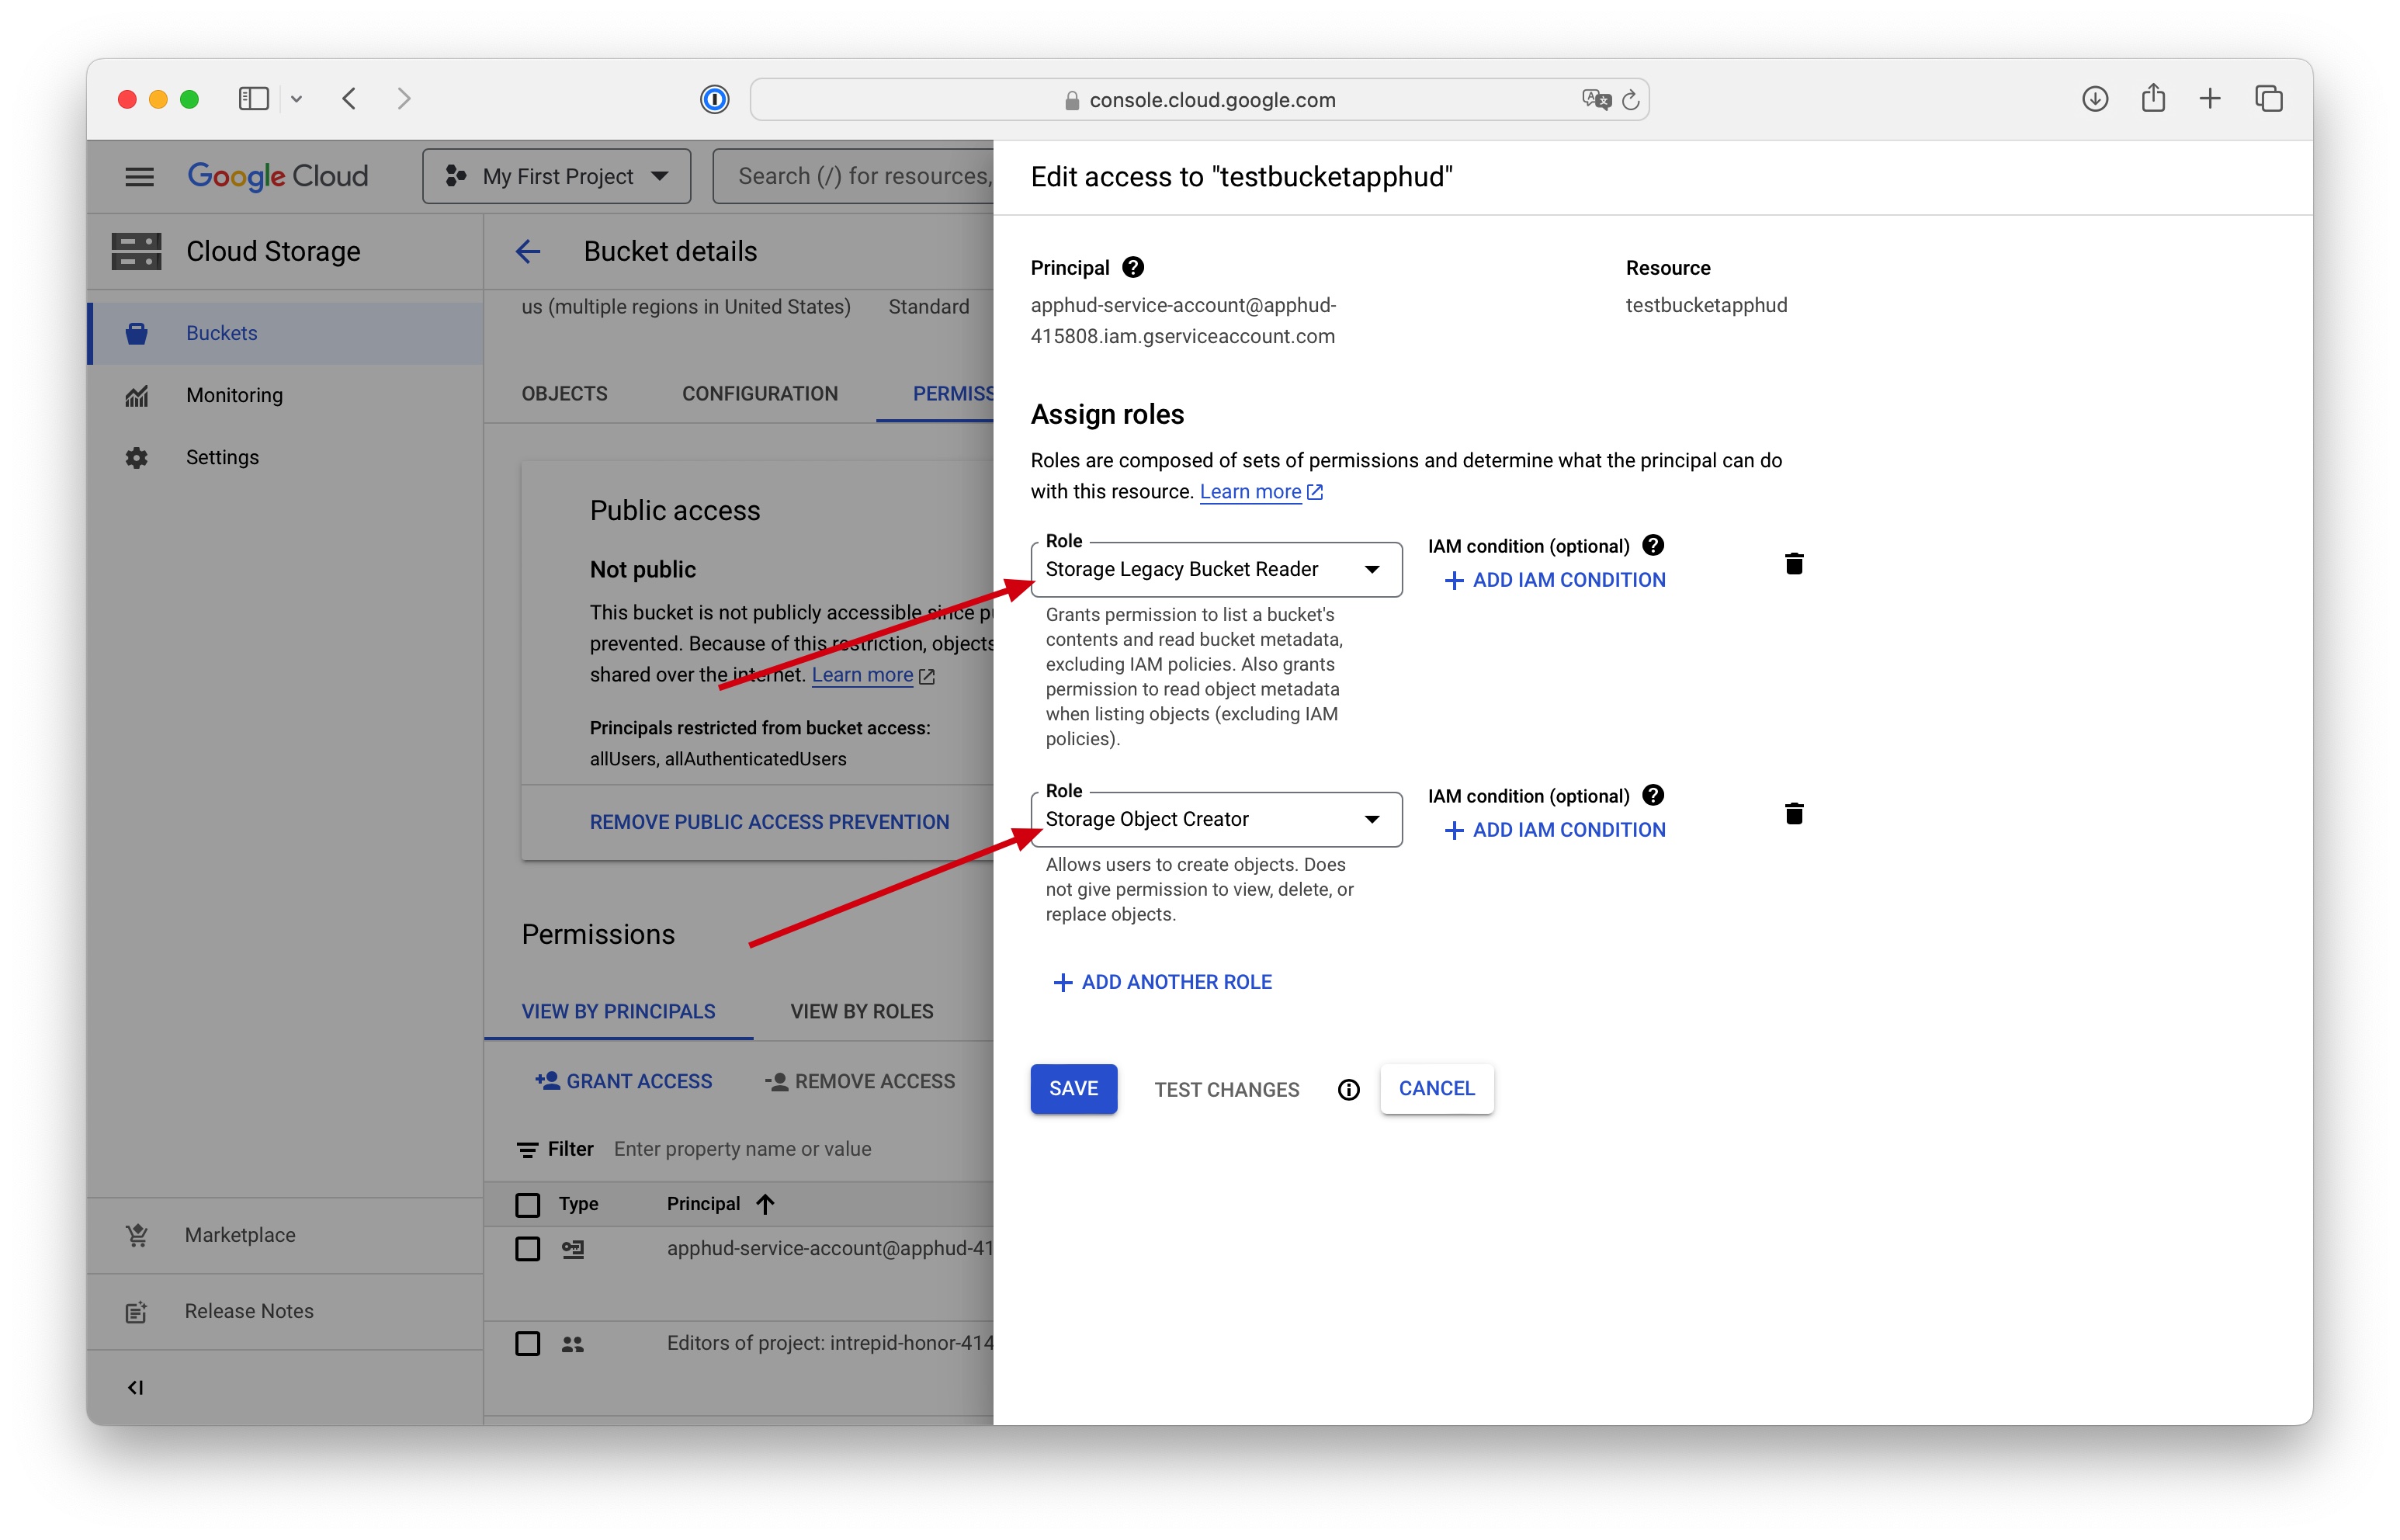
Once the bucket is created, go to Permissions and click Grant Access:
Enter the Email of the Service Account copied earlier and assign two roles:
- Storage Legacy Bucket Reader
- Storage Object Creator
Step 2 - Authentication
In Apphud, open Connections → Integrations (the All or ETL tab). Find GCS ETL and click Add Connection.
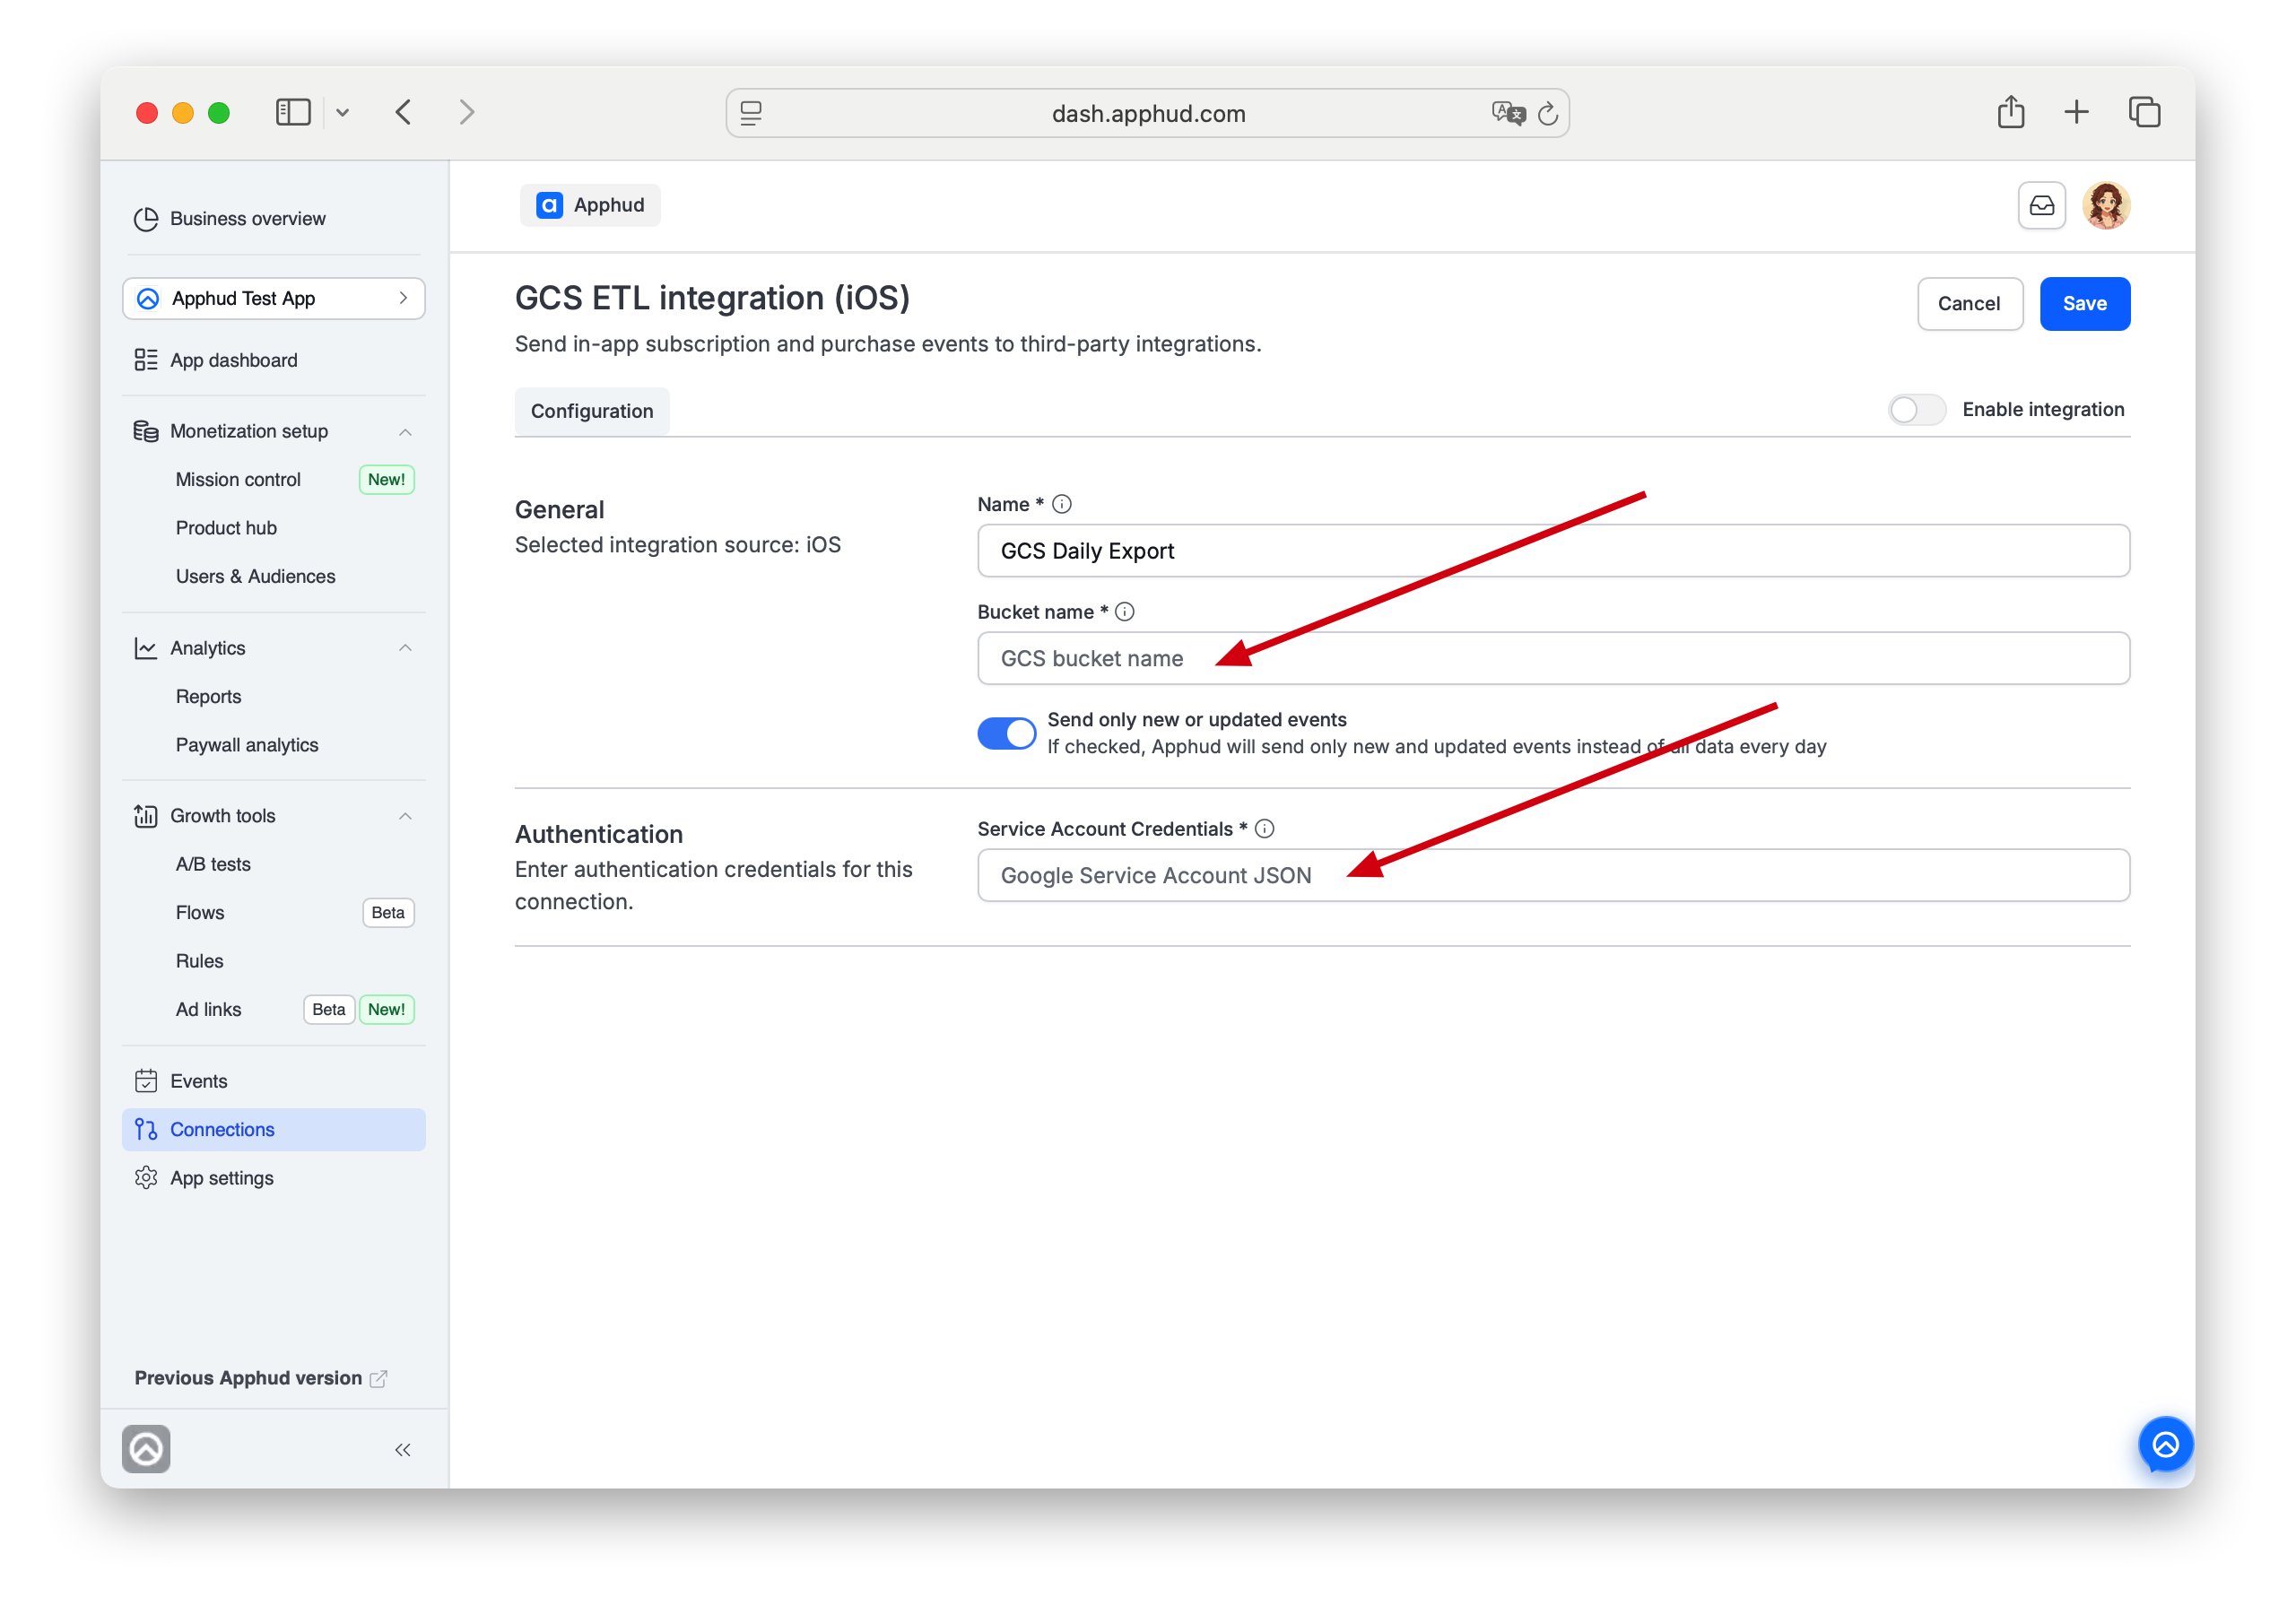
Choose source. Enter connection Name.
Enter:
- Bucket name — the name of the GCS bucket created in Step 1.
- Service Account Credentials — contents of your Service Account JSON file (open it in a text editor and paste the entire JSON).
Step 3 - Additional Configuration
Send only new or updated events
You can receive only new and updated transactions since the last export instead of the full dataset. The default value is ON, which is the recommended value.
Step 4 - Enable and save
Enable integration and click Save.
You'll start receiving your first CSV data within 24 hours.
What gets exported
See Daily Data Exports → Data Format for the full list of CSV columns. Files are delivered as gzip-compressed .csv once per day.
Important NoteAttribution data is not part of the export.
Updated 5 months ago