
Configure Web Products
Configure web (Stripe/Paddle) products, paywalls, and targetings for Flows in Mission Control — products, macros, introductory offers, and a web-users audience.
Overview
Configuring products for web funnels involves several steps:
- Set up products in your web payment provider's dashboard.
- Add products in Product Hub.
- Build a paywall with those products in Mission Control.
- Create a placement and a targeting to serve the paywall to your web users.
Before You Begin
Ensure the following prerequisites are complete before working with products in Flows:
- You have connected your Stripe or Paddle accounts via App settings → Web → Payment providers.
- All relevant products have been added in their respective dashboards. Refer to our guides for Stripe and Paddle.
Adding Products in Product Hub
Adding New Products
- Navigate to the Product Hub.
- Click Add Product in the desired permission group.
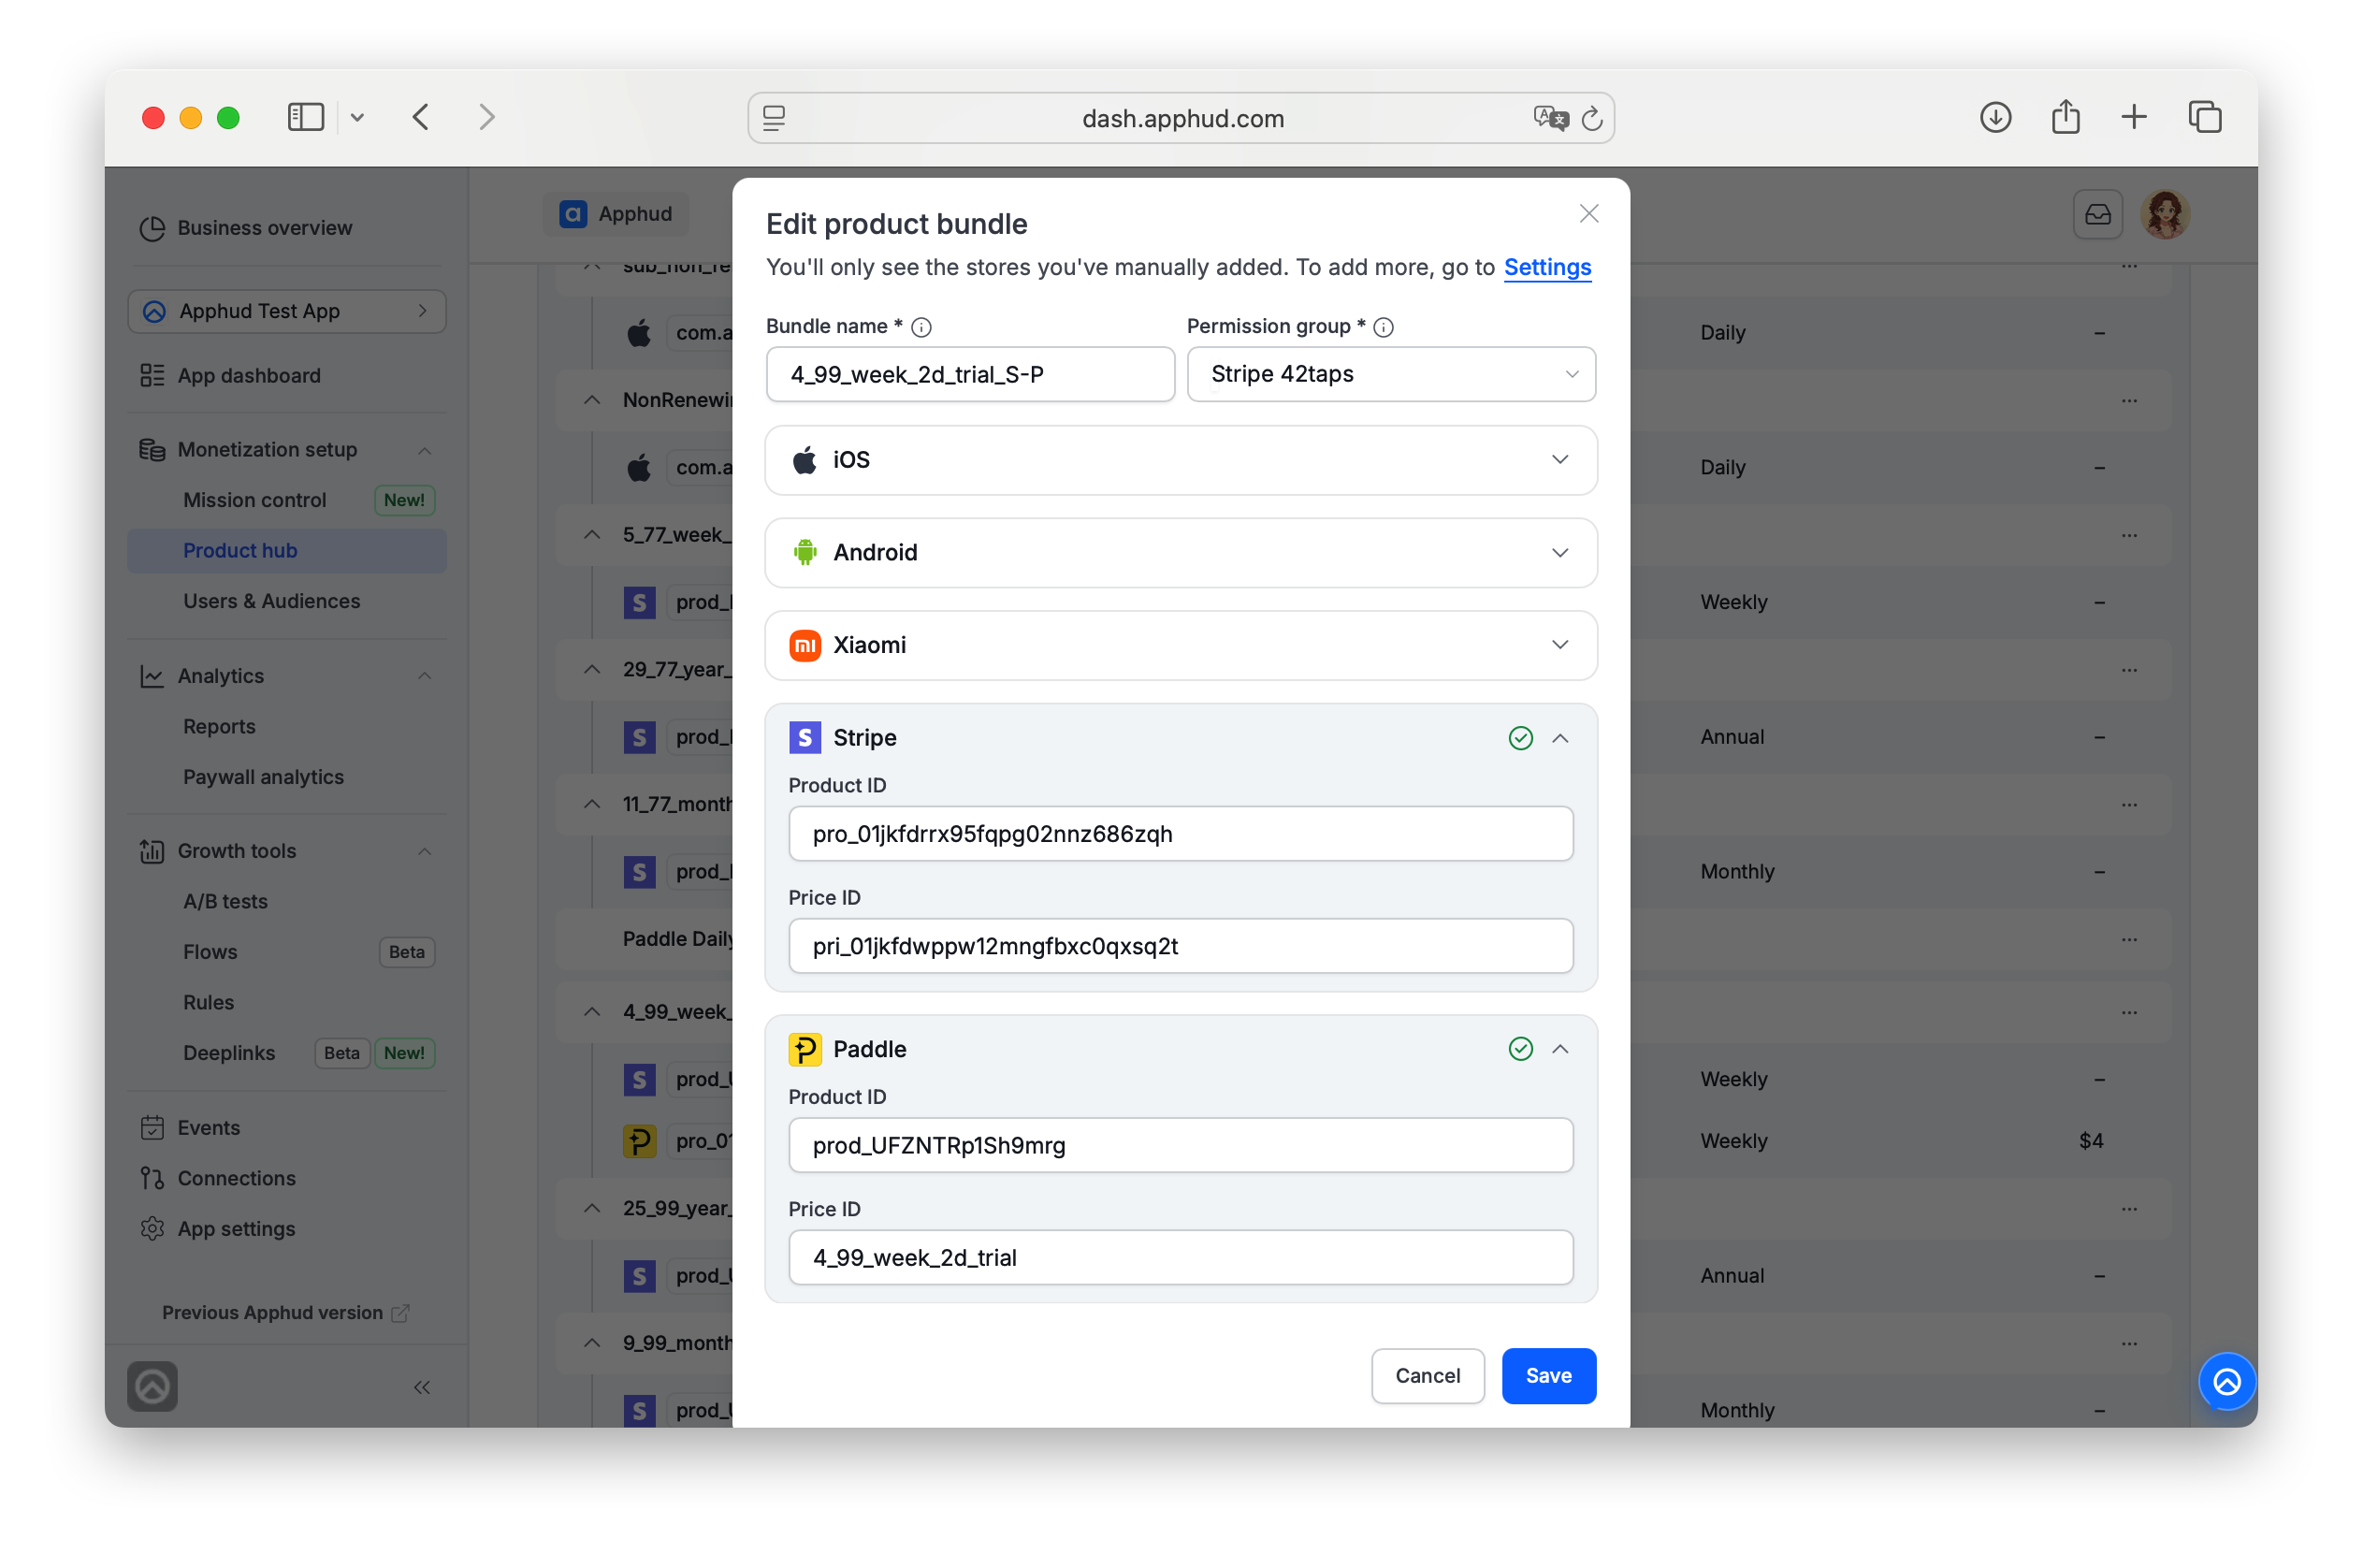
- Enter the following information:
- Product Name
- Product ID and Price ID (as defined in Stripe or Paddle).
- Click Save.
Build the Paywall in Mission Control
Create your paywall in Mission Control → Paywalls — see the Paywalls guide for the full walkthrough. Create a paywall, add your web products, and order them.
Web-specific configuration lives on the paywall editor's tabs:
Macros tab
Define the values injected into your funnel's screen — full-price, new-price, old-price, discount, duration, and custom-1…custom-5. Set values per product via the ⋯ → Set macros values menu, choosing variables (e.g. product.price, product.title, today) and optional Liquid modifiers (e.g. today | add_days: 5). Only define the macros actually used in your screen design; leave the rest empty. The full list is in Product macros below.
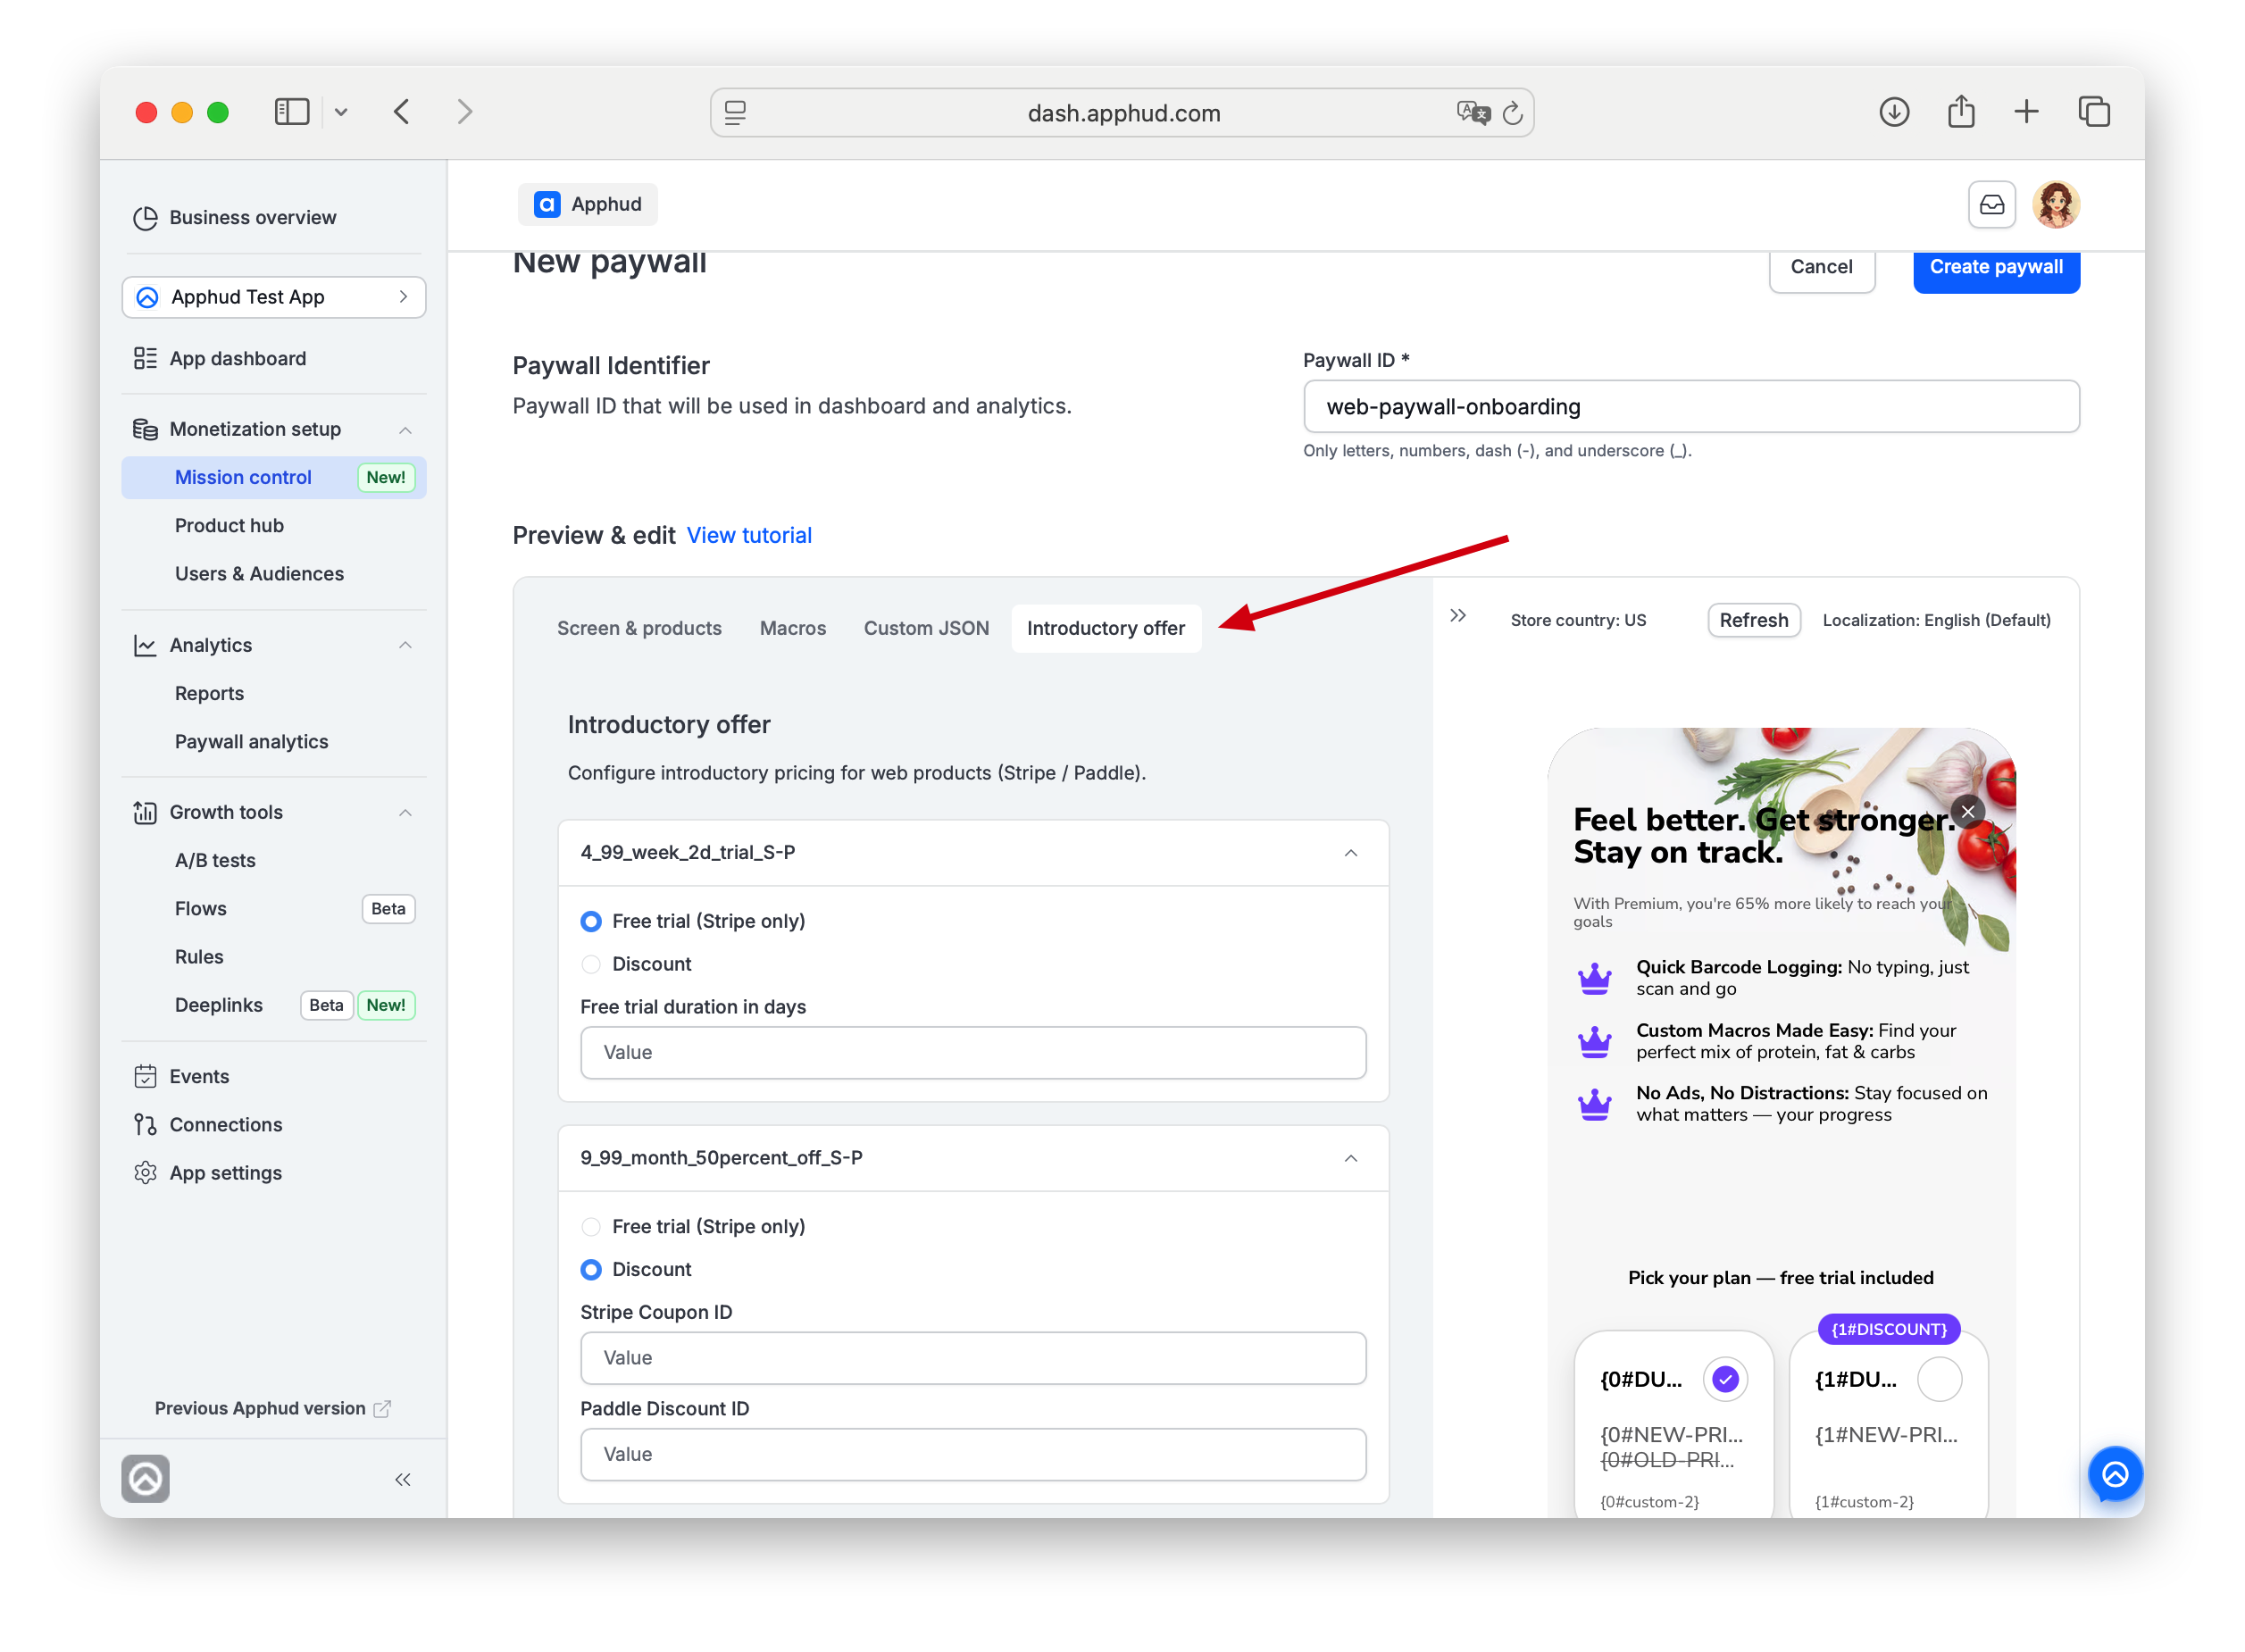
Introductory offer tab (Stripe / Paddle)
Introductory pricing for web products is configured on the paywall's Introductory offer tab — "Configure introductory pricing for web products (Stripe / Paddle)." For each product choose one:
- Free trial (Stripe only) — select Free trial and set Free trial duration in days.
- Discount — select Discount and enter the Stripe Coupon ID or Paddle Discount ID, depending on your provider.
Serve the Paywall to Web Users
A paywall reaches users through a placement plus a targeting. To show it to people who arrive through your web funnel, create a web-users audience and a high-ranked targeting.
Step 1 — Create a placement
In Mission Control → Placements, create a placement (e.g. web_onboarding). See the Placements guide.
Step 2 — Create a web-users audience
In Users & Audiences, create a custom audience that matches your web users. There are two ways:
- All Flow users — add the Install Source filter and select Flows.
- A specific flow (more precise) — use the Install Source Identifier filter set to your flow's identifier, so only users from that exact flow match.
See the Audiences guide.
Step 3 — Create a targeting with a high rank
In Mission Control → Targetings, create a targeting that binds the web-users audience to your placement and web paywall, then move it to the top of the list (high rank). Apphud evaluates targetings on every fetch and serves the first one whose audience matches, checking the most-recently-launched / highest-ranked targeting first. A top-ranked web targeting ensures web users get the web paywall before any broader (e.g. Default) targeting. See the Targetings guide.
Product macros
Macros let you set static values per product that your funnel component injects into the paywall, replacing placeholders. Only static macros are supported (dynamic macros aren't available yet).
| Macro | Description | Example |
|---|---|---|
| full-price | Full price | $9.99 |
| new-price | Discounted price | $2.99 |
| old-price | Previous (strikethrough) price | $4.99 |
| discount | Discount percentage | 30% |
| duration | Subscription duration | month |
| custom-1…5 | Custom labels for additional messaging | Sale, Limited Time, Exclusive |
Testing: Sandbox and Production Together
You can serve both sandbox and production web products at once to test on a live site, using two paywalls served by ranked targetings:
-
Create test and production products in Product Hub.
-
Create two paywalls — one with only test products, one with only production products.
-
Add a placement, then create two targetings on it:
- A targeting with the Sandbox Users audience → the test paywall, ranked at the top.
- The Default targeting (All Users) → the production paywall.
-
Update your website init script to pass the
debugflag:const debugParam = new URLSearchParams(window.location.search).get('debug') === 'true'; apphud.init({ apiKey: "YOUR_API_KEY", version: "1.0", debug: debugParam }); -
Test by appending
?debug=trueto your URL — the user then matches the Sandbox Users audience, and the top-ranked test targeting returns the test paywall. -
Tip: make the test paywall visually distinct (different macros or prices) so you can tell test vs production at a glance.
FAQ
Can I offer a paid trial, for example $0.99 for 3 days and then $19.99 per month?
Not with Stripe at the moment. An introductory offer on a web product is either a Free trial or a Discount, and you choose one per product. A discount uses a Stripe Coupon ID and applies to the whole first billing period, so on a monthly product it prices the first month, not the first three days. A paid trial of a few days followed by the regular price is not supported.
If you need this offer today, you can build the checkout on your side with the Stripe API and connect the same Stripe account to Apphud. Apphud then syncs subscriptions, renewals, cancellations and refunds from Stripe. To link purchases to users, see Matching Stripe Customers with Apphud Users.
Updated 12 days ago