
Amplitude
This guide describes how to add and configure Amplitude integration.
Amplitude is a powerful mobile analytics service. Send events to Amplitude via Apphud, analyze your users behavior and make necessary decisions.
How to Add Integration?
Step 1 - Install the SDKs
- Integrate Apphud SDK.
- Integrate Amplitude SDK.
- Match User IDs between Apphud and Amplitude. If you set your custom User ID keep in mind that Amplitude requires user id to be minimum 5 characters.
Step 2 - Add the connection
In Apphud, open Connections → Integrations tab, pick Amplitude ("All" or "Analytics" tab), and click Add Connection. Choose a Source (iOS, Android, or Flows). For platform-agnostic concepts — Connection, Source, Environment, Revenue, Filters, Events — see Integrations overview.
Step 3 - Authentication
Enter Amplitude API Key at the "Amplitude production app API Key" field:
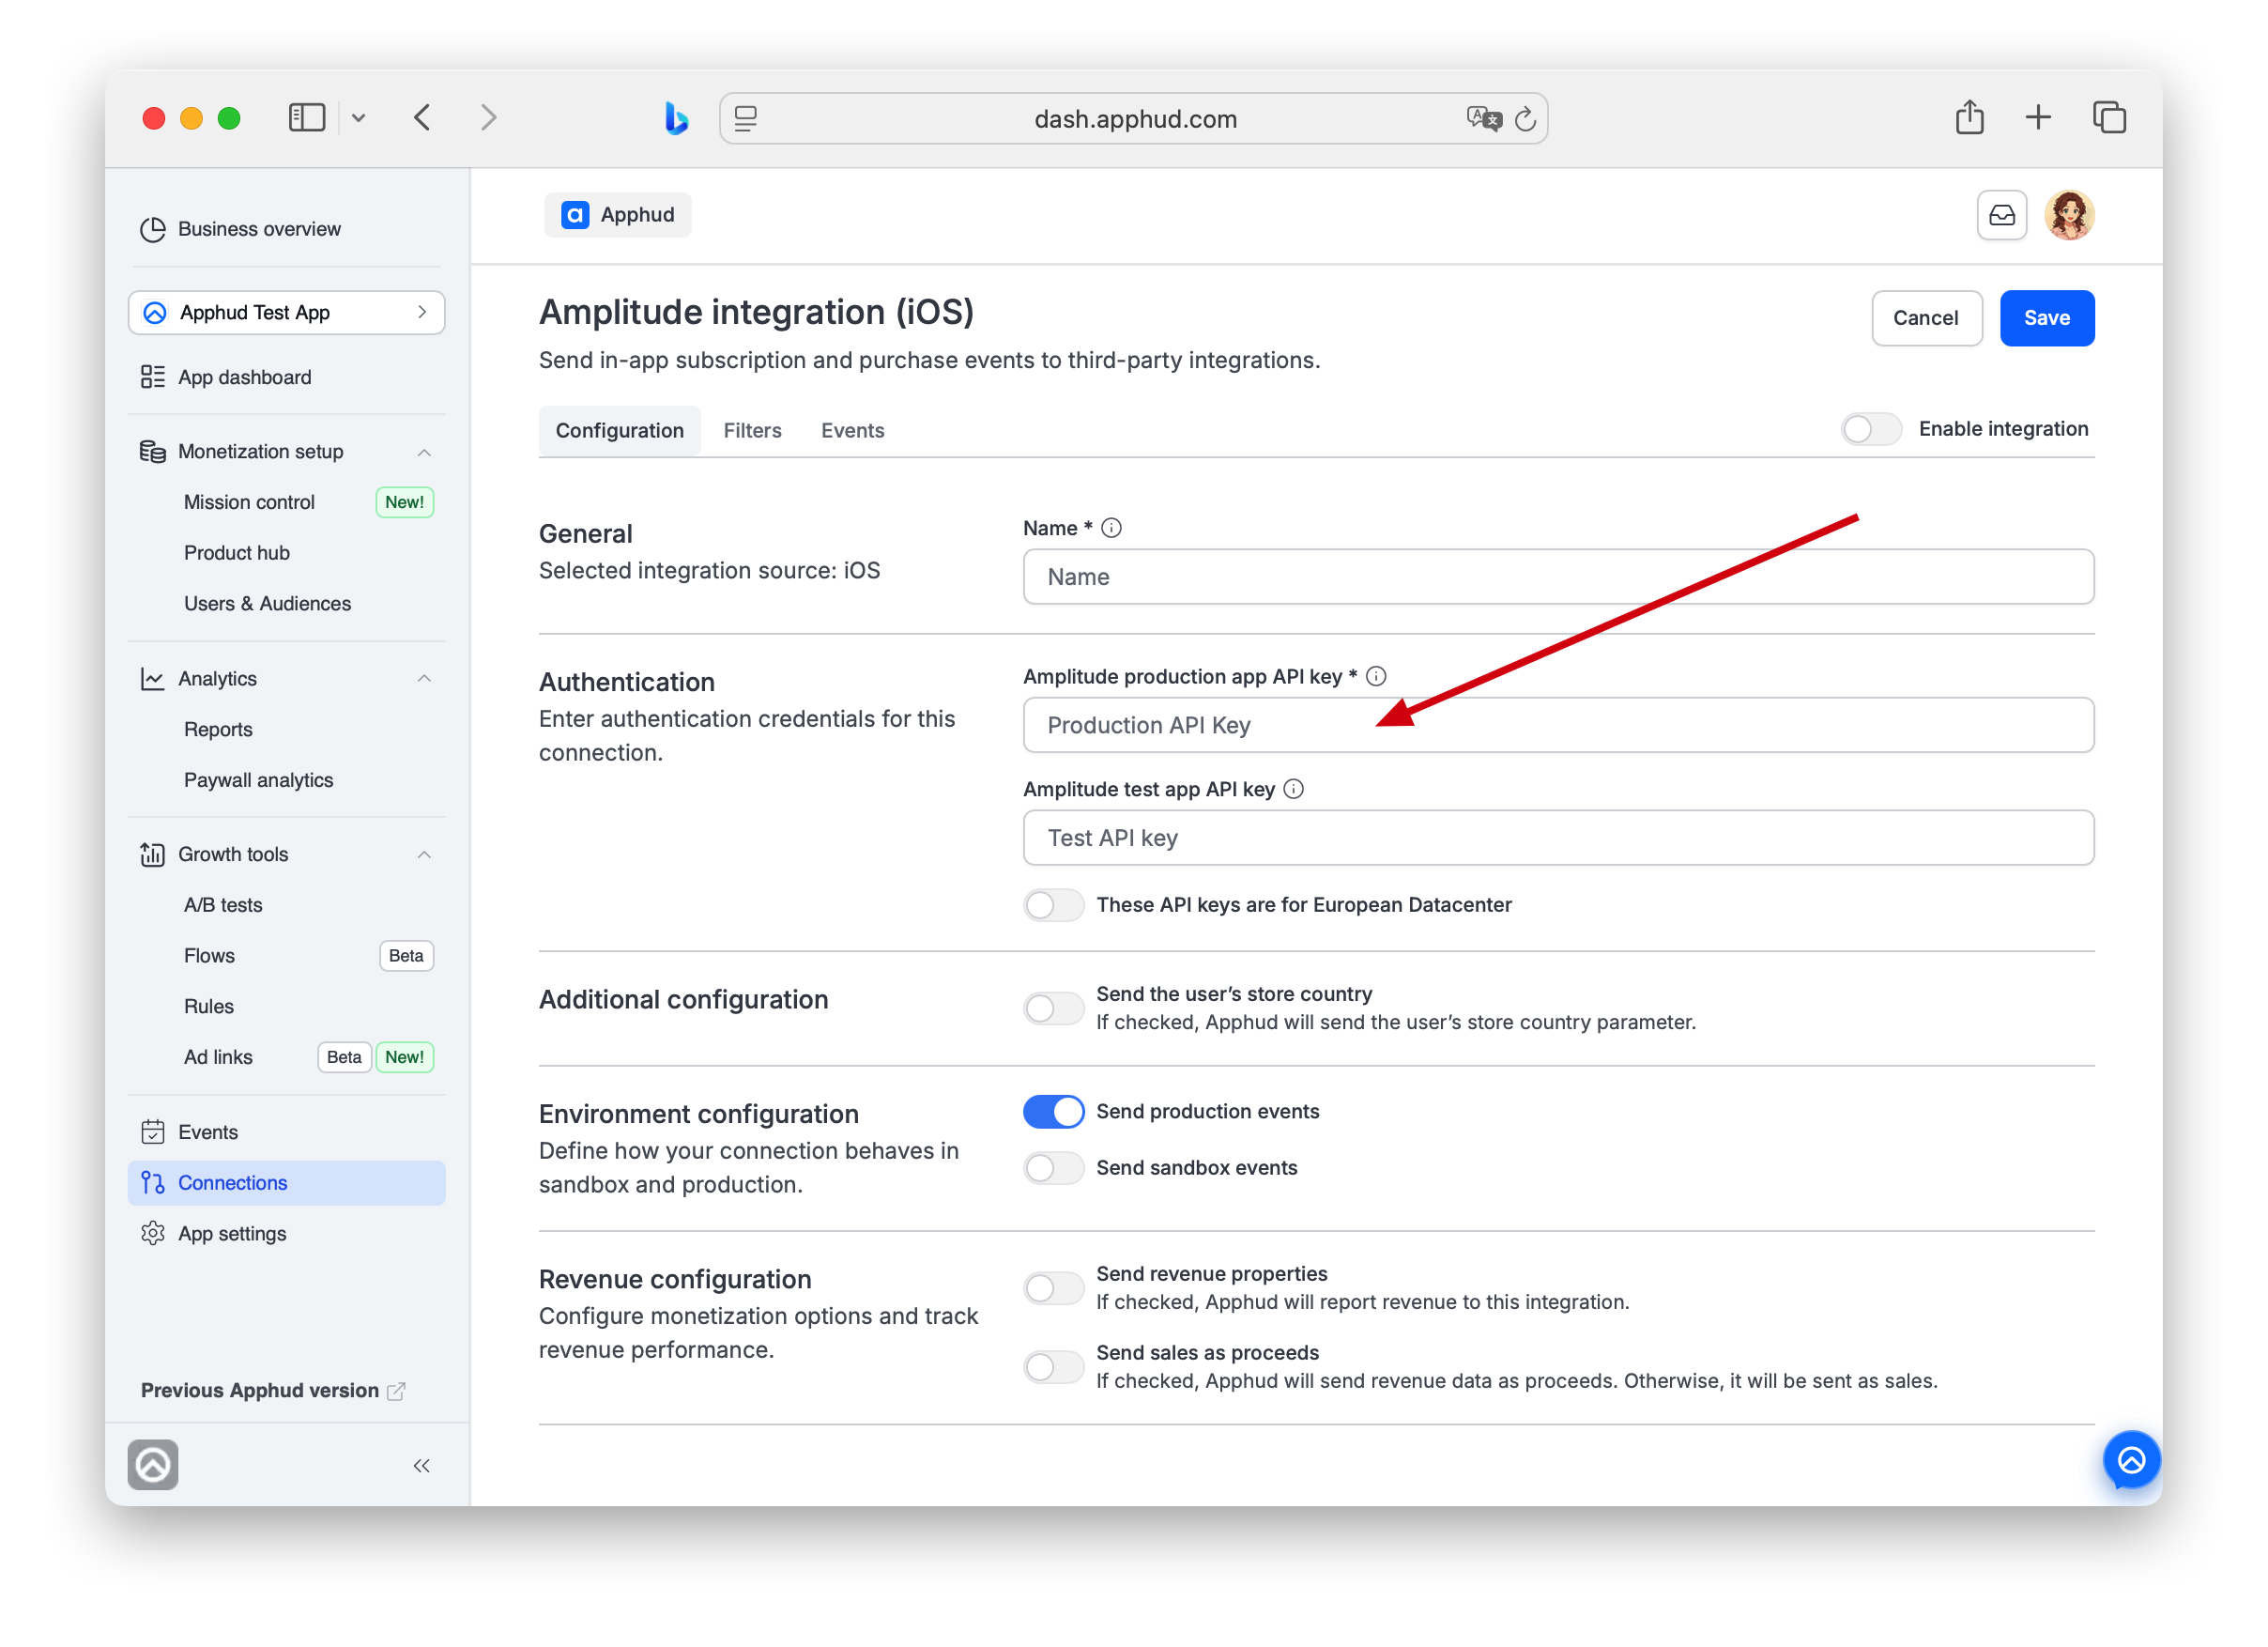
You may have one more app created in Amplitude, used for testing purposes, not to mix test and live data. If you have such an app you can paste its Amplitude API Key into the "Amplitude test app API key" field.
These API keys are for European Datacenter
Enable this option if your Amplitude project is hosted in Amplitude's EU datacenter. When enabled, Apphud will send all events to https://api.eu.amplitude.com instead of the default US endpoint https://api2.amplitude.com.
Important Note on EU Datacenter settingsThis setting must match where your Amplitude project is hosted. If your project is in the EU datacenter but this toggle is off (or vice versa), events will not appear in your Amplitude dashboard. You can check your project's data residency in Amplitude → Settings → Projects.
Typically needed for companies with GDPR or data residency requirements that store user data within the EU.
Step 4 - Additional configuration
Send the user's store country
When enabled, Apphud will send an additional user property [Apphud] store_country with every event. This is the country of the user's App Store or Google Play account — i.e., the storefront from which they make purchases.
Send events from anonymous users
OFF by default. Turn it on to also forward events from anonymous users — customers Apphud auto-created from an App Store or Google Play event before your SDK identified them (the SDK isn't integrated yet, or the app hasn't been updated). See the Integrations overview.
Environment and Revenue
Configure generic Environment and Revenue settings as described on Integrations overview → Configuration tab.
Step 5 - Set up filters
Navigate to Filters tab. Set up filters if needed as described on Integrations overview -> Filters tab.
Step 6 - Set up events list
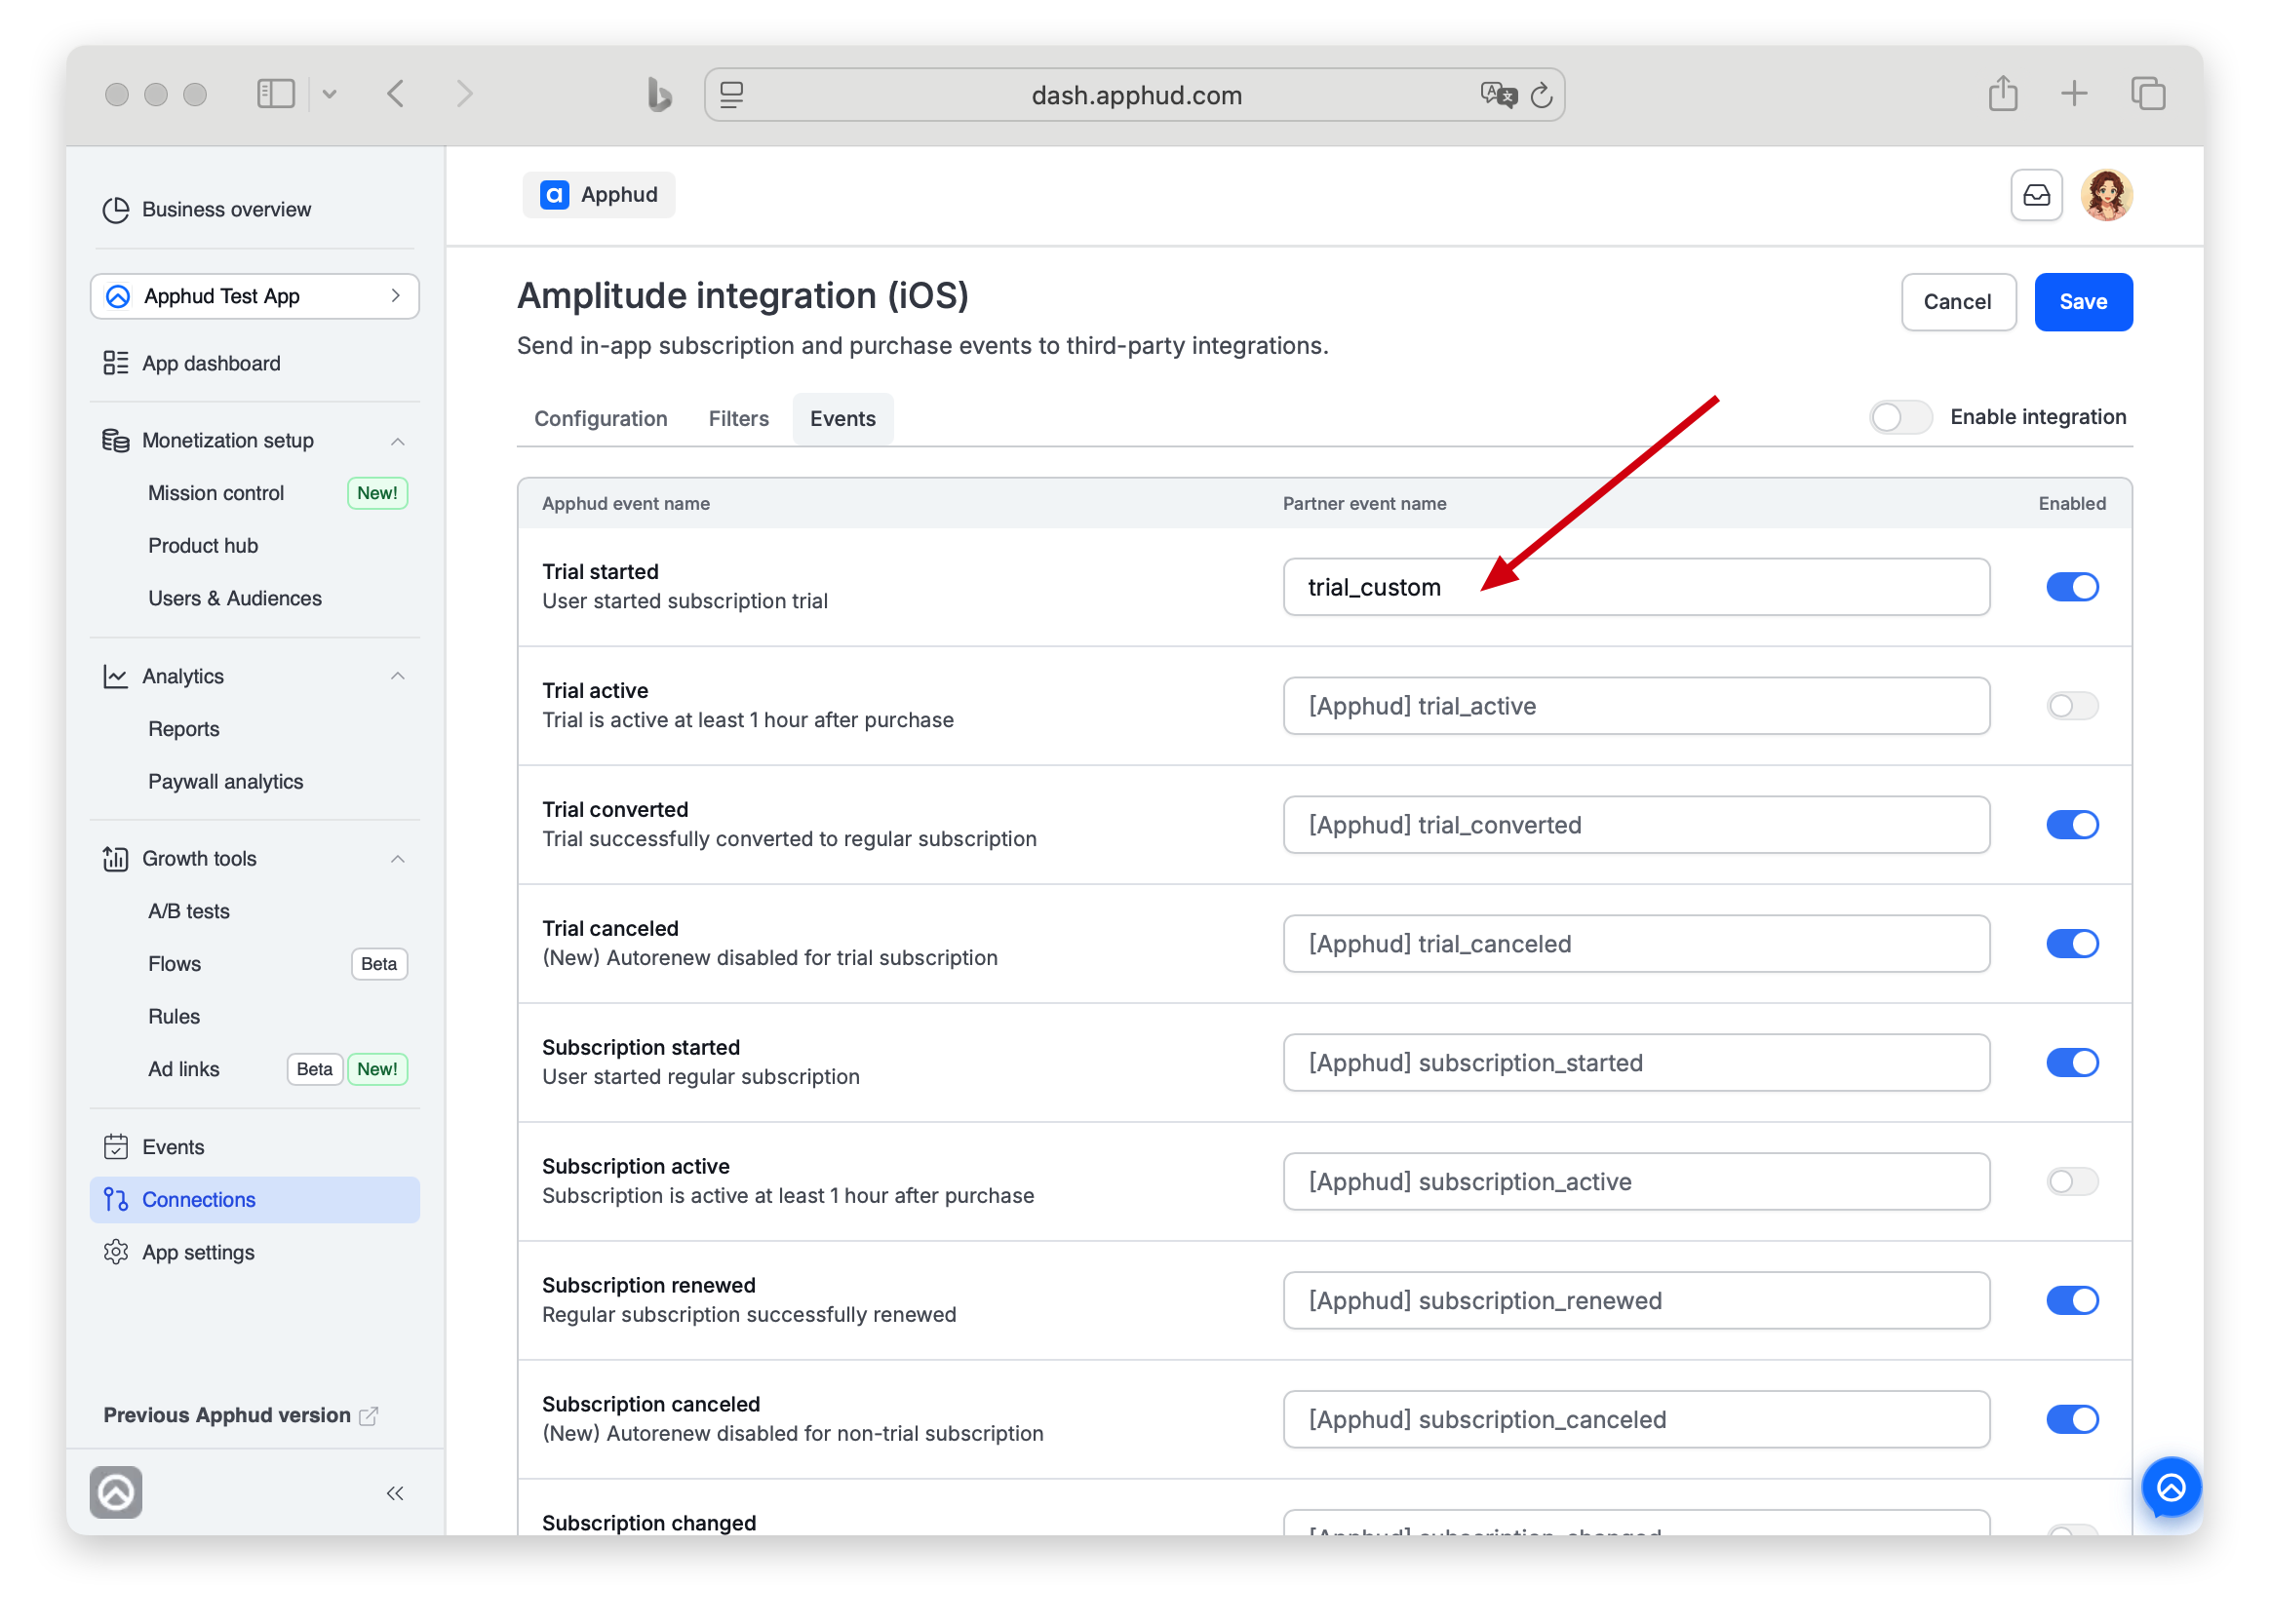
Navigate to Events tab. Review the default configuration of enabled events and their names.
You can enter your custom event names or disable some:
Step 7 - Test connection (optional)
Save the connection.
After the configuration is saved, You may send test event to Amplitude to check if integration is set up correctly before enabling it to react to all events. Check general guide here.
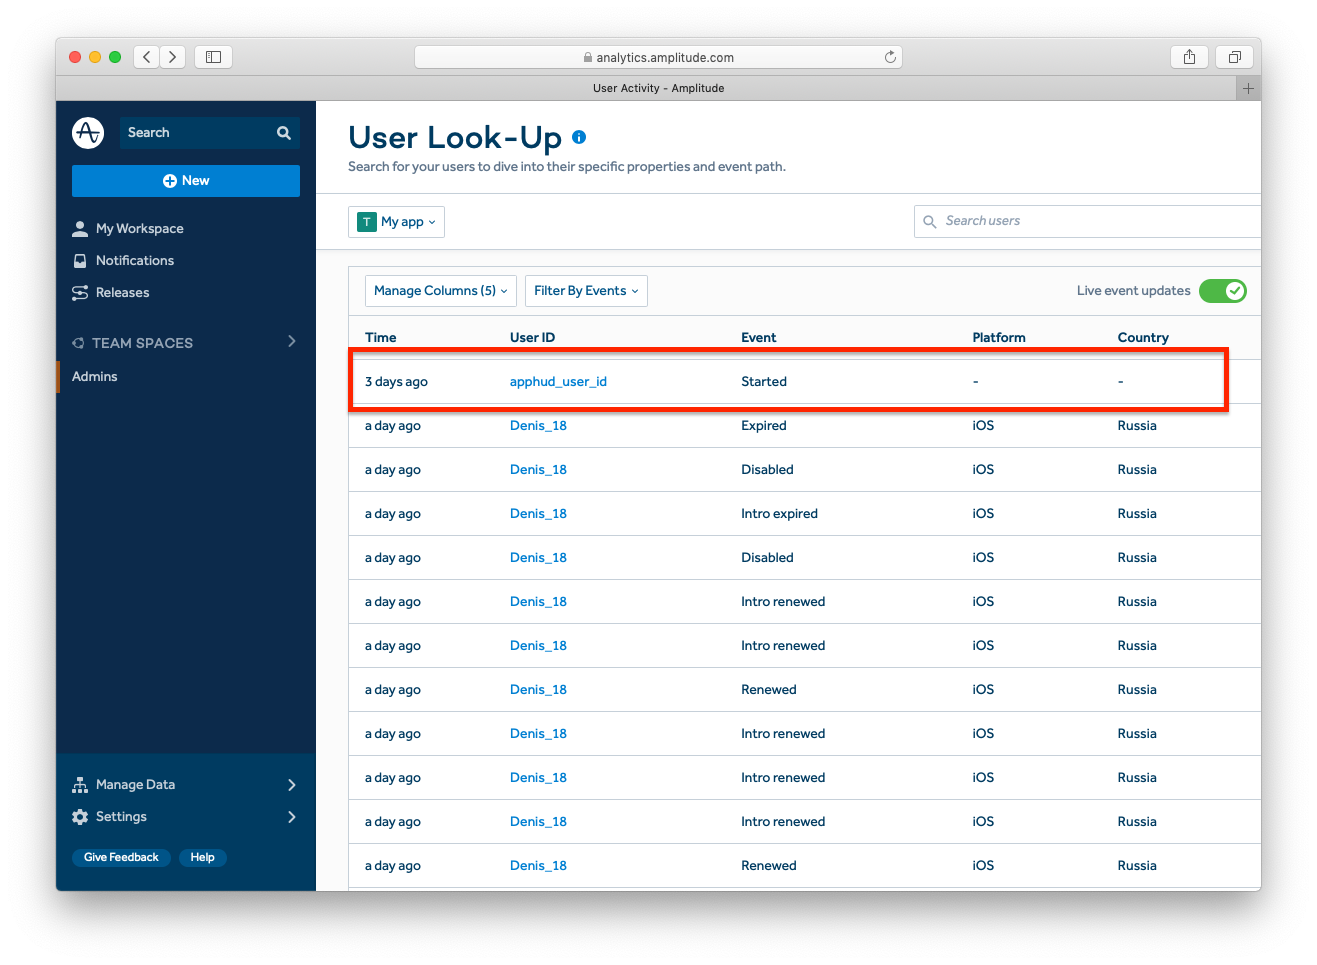
Once a test event is sent, You will see new user under "User Look-Up" report in Amplitude:
Step 8 - Enable and save connection
Once you ensured that everything works as expected - Enable connection and Save it.
Match user IDs
Here is an example of initialising both SDKs with User IDs matching.
func application(_ application: UIApplication, didFinishLaunchingWithOptions launchOptions: [UIApplication.LaunchOptionsKey: Any]?) -> Bool {

    Apphud.start(apiKey: "YOUR_API_KEY")
    Apphud.setDelegate(self)

    Amplitude.instance()?.initializeApiKey("AMPLITUDE_API_KEY", userId: Apphud.userID())

    return true
}

func apphudDidChangeUserID(_ userID: String) {
    // Match again
    Amplitude.instance()?.setUserId(userID)
}
[Apphud startWithApiKey: @"API_KEY"];
[[Amplitude] instance] initializeApiKey:@"API_KEY" userId:[Apphud userID]];Apphud.start(apiKey: "YOUR_API_KEY")
Amplitude.getInstance().initialize(this, "AMPLITUDE_API_KEY", Apphud.userID());Future<void> _initAmplitude() async {
final analytics = Amplitude.getInstance(instanceName: 'project');
final userId = await Apphud.userID();
await analytics.init('API_key', userId: userId);
}
@override
Future<void> apphudDidChangeUserID(String userId) async {
printAsJson('ApphudListener.apphudDidChangeUserID', userId);
final analytics = Amplitude.getInstance(instanceName: 'project');
final userId = await Apphud.userID();
await analytics.setUserId(userId);
}Events Cheat Sheet
Here is example of some events and their parameters that are being sent to Amplitude.
Trial
Trial period started
Default event name: [Apphud] trial_started
Parameters:
product_id: Stringunit: Stringunits_count: Integer
Successful conversion from trial period to regular subscription
Default event name: [Apphud] trial_converted
Parameters:
product_id: Stringlocal_price: Floatcurrency: Stringusd_price: Float
Cancellations
Trial Canceled
Default event name: [Apphud] trial_canceled
Parameters:
product_id: String
Subscription Canceled
Default event name: [Apphud] subscription_canceled
Parameters:
product_id: String
Regular
Subscription started
Default event name: [Apphud] subscription_started
Parameters:
product_id: Stringlocal_price: Floatcurrency: Stringusd_price: Float
Subscription renewed
Default event name: [Apphud] subscription_renewed
Parameters:
product_id: Stringlocal_price: Floatcurrency: Stringusd_price: Float
Subscription refunded
Default event name: [Apphud] subscription_refunded
Parameters:
product_id: Stringlocal_price: Floatcurrency: Stringusd_price: Floatreason: String
Other Events
Non renewing purchase
Default event name: [Apphud] non_renewing_purchase
Parameters:
product_id: Stringlocal_price: Floatcurrency: Stringusd_price: Float
User Properties
In the table below you can see the list of user properties that are sent to Amplitude.
NoteMore information about user properties can be found here.
| Parameter | Type |
|---|---|
[Apphud] status-group_name | String |
[Apphud] autorenew-group_name | Boolean |
[Apphud] total_spent | Float |
[Apphud] paying | Boolean |
[Apphud] payments_count | Integer |
Updated 3 months ago