Landing Page Editor
This page describes creating landing pages using Web Editor in Apphud.
Go to Screens > Build New Screen and select Landing Page tab.

Select your landing page template. Currently the following templates are available:
- Auto-redirect empty Page. This is a blank page which automatically redirects to the specified URL.
DisclaimerWe do not take responsibility for any ad restrictions or account suspensions that may result from violating ad network platforms policies. If you choose to use an auto-redirect page, you do so at your own risk. To comply with their policies, we recommend using a landing page with a clear call-to-action (CTA) button instead of an immediate redirect.
- Template with call-to-action (CTA) button. This is a generic template that can be edited.
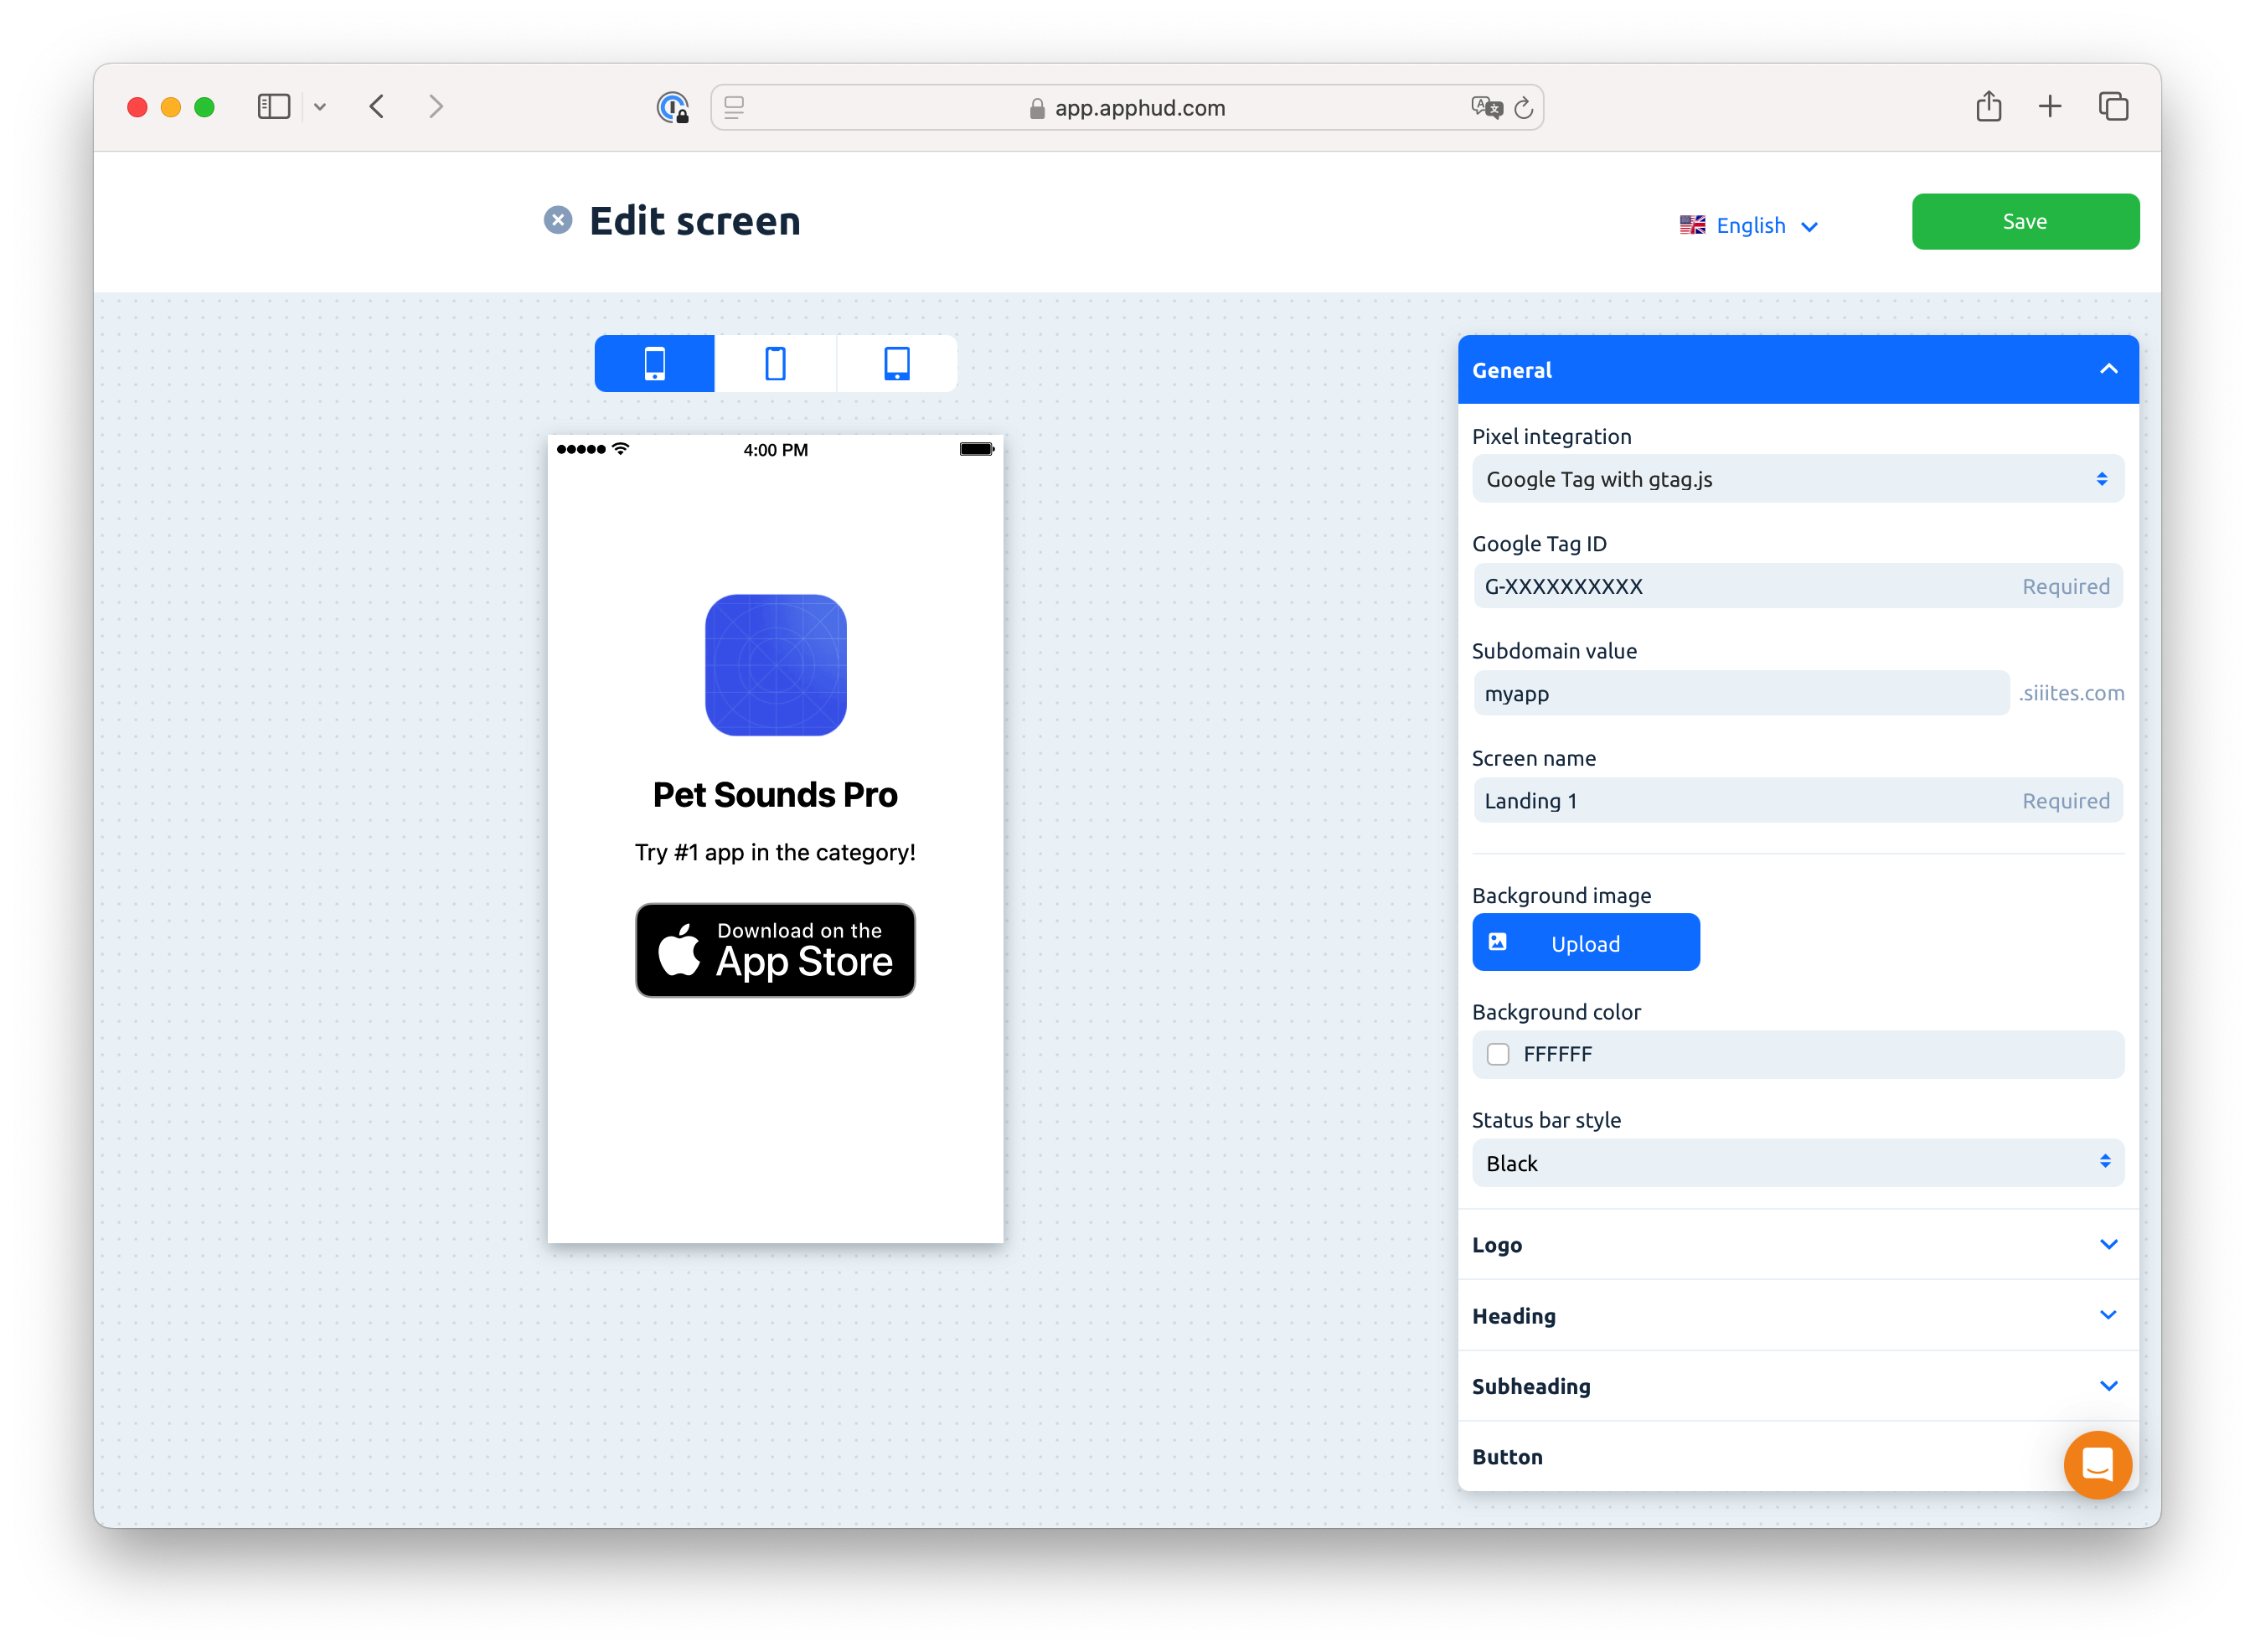
In the editor page you need to choose you pixel integration: Facebook, TikTok or Google Tag with gtag.js.
Landing Page for Facebook
- Facebook Pixel ID. This is your Pixel ID from Facebook Events Manager. It should match one from Facebook Conversions API integration.
- Apphud Pixel. Choose Facebook. At the moment of screen creation, the "Facebook" text may not be available as a drop-down option. If so, ignore and save the screen; the field will be automatically populated upon saving.
- Subdomain value Enter subdomain (lowercase) for your landing page URL. The final URL will look like:
https://yoursubdomain.siiites.com - Screen name. A name of the screen displayed in Apphud.
- URL. It is located in Button or Redirect setup blocks. This is URL where Apphud should navigate. Typically it should be App Store link, but you can also specify another URL, for example, an AppsFlyer's OneLink URL.
- Other setup fields. There are plenty of other fields for landing page setup, like title, subtitle, background image, etc. Their meaning is straightforward and filling in all the fields shouldn't cause any difficulties.
- Click on Save. Your landing page will be published at the following URL:
https://yoursubdomain.siiites.com - Set up complete.

Landing Page for TikTok
- TikTok Pixel ID. This is your Pixel ID from TikTok Ads Manager. It should match one from TikTok Events API integration.
- Apphud Pixel. Choose TikTok.
- Subdomain value. Enter the subdomain (lowercase) for your landing page URL. The final URL will look like:
https://yoursubdomain.siiites.com - Screen name. A name of the screen displayed in Apphud.
- URL. It is located in Button or Redirect setup blocks. This is the URL where Apphud should navigate. Typically it should be an App Store link, but you can also specify another URL, for example, an AppsFlyer's OneLink URL.
- Other setup fields. There are plenty of other fields for landing page setup, like title, subtitle, background image, etc. Their meaning is straightforward and filling in all the fields shouldn't cause any difficulties.
- Click on Save. Your landing page will be published at the following URL:
https://yoursubdomain.siiites.com - Set up complete.

Landing Page for Google Ads
Temporary LimitationGoogle Web-to-App integration is temporarily unavailable.
Currently, Google does not provide sufficient attribution data required for reliable user matching between web and app environments.As a result, this functionality has been disabled until data consistency can be ensured.
We will restore support if and when Google provides the necessary matching signals.
- Google Tag ID. This is your Measurement ID from Google Analytics > Admin > Data Streams > Web > Your stream. Must start with the
G-prefix. Learn more. - Subdomain value. Enter the subdomain (lowercase) for your landing page URL. The final URL will look like:
https://yoursubdomain.siiites.com - Screen name. A name of the screen displayed in Apphud.
- URL. It is located in Button or Redirect setup blocks. This is the URL where Apphud should navigate. Typically it should be an App Store link, but you can also specify another URL, for example, an AppsFlyer's OneLink URL.
- Other setup fields. There are plenty of other fields for landing page setup, like title, subtitle, background image, etc. Their meaning is straightforward and filling in all the fields shouldn't cause any difficulties.
- Click on Save. Your landing page will be published at the following URL:
https://yoursubdomain.siiites.com - Set up complete.