
Segment
This guide describes how to add and configure Segment integration.
The Segment integration forwards Apphud subscription and purchase events to Segment as standard track and identify calls — from there you can fan them out to any destination Segment supports (data warehouses, analytics tools, marketing platforms, etc.) without writing custom code.
About Integration
Apphud can send events to Segment. From there you can resend them to any of Segment's integration partners.
How to Add Integration?
Step 1 - Install SDKs
- Install Apphud SDK.
- Install Segment in your stack — see Segment documentation for source setup.
Step 2 - Preparations in Segment
In Segment, get the Write Key of the Source you want Apphud events to land on. If you maintain a separate sandbox Source for testing, get its Write Key as well.
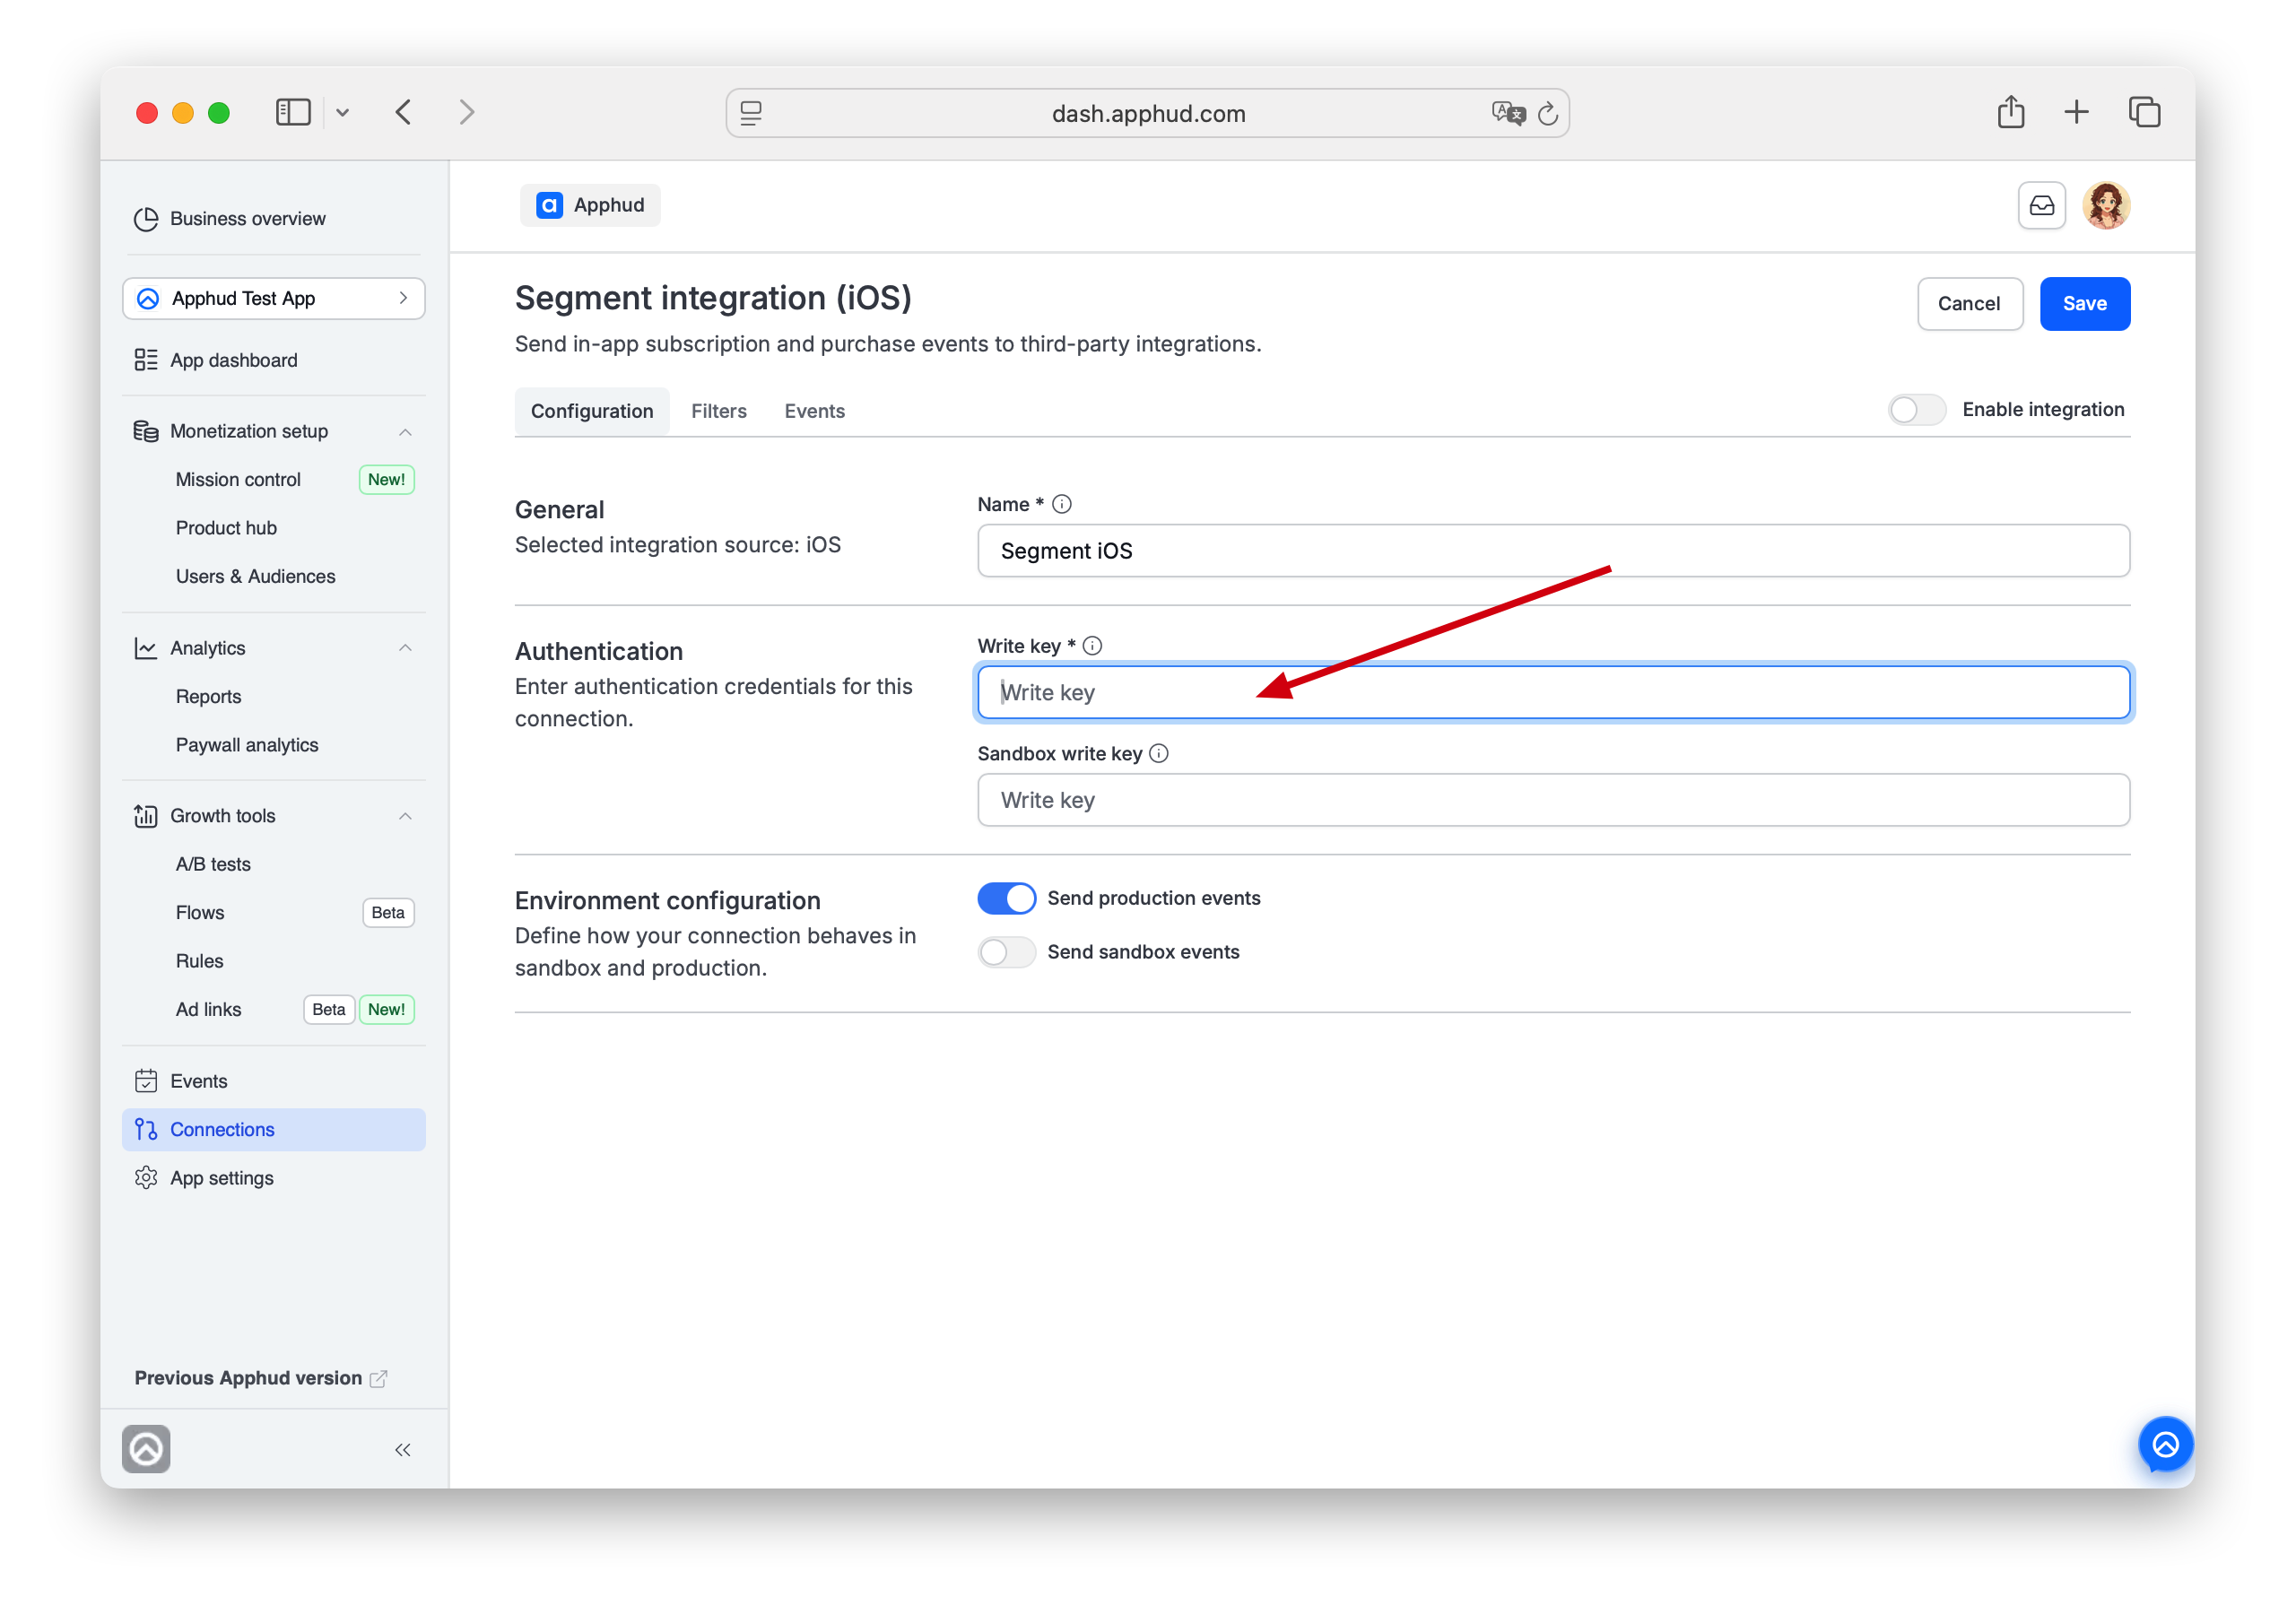
Step 3 - Authentication
In Apphud, open Connections → Integrations (the All or Data Platforms tab). Click Add Connection for Segment and choose a Source in the pop-up. Define the connection Name.
Enter:
- Write Key (required) — your Segment Source Write Key.
- Sandbox Write Key (optional) — if you maintain a separate Segment source for sandbox. You can enter the same key for both, since Apphud includes the
environmentfield in the payload.
Step 4 - Additional Configuration
Environment
Configure generic Environment settings as described on Integrations overview → Configuration tab.
Step 5 - Set up filters (optional)
Navigate to Filters tab. Set up filters if needed as described on Integrations overview → Filters tab.
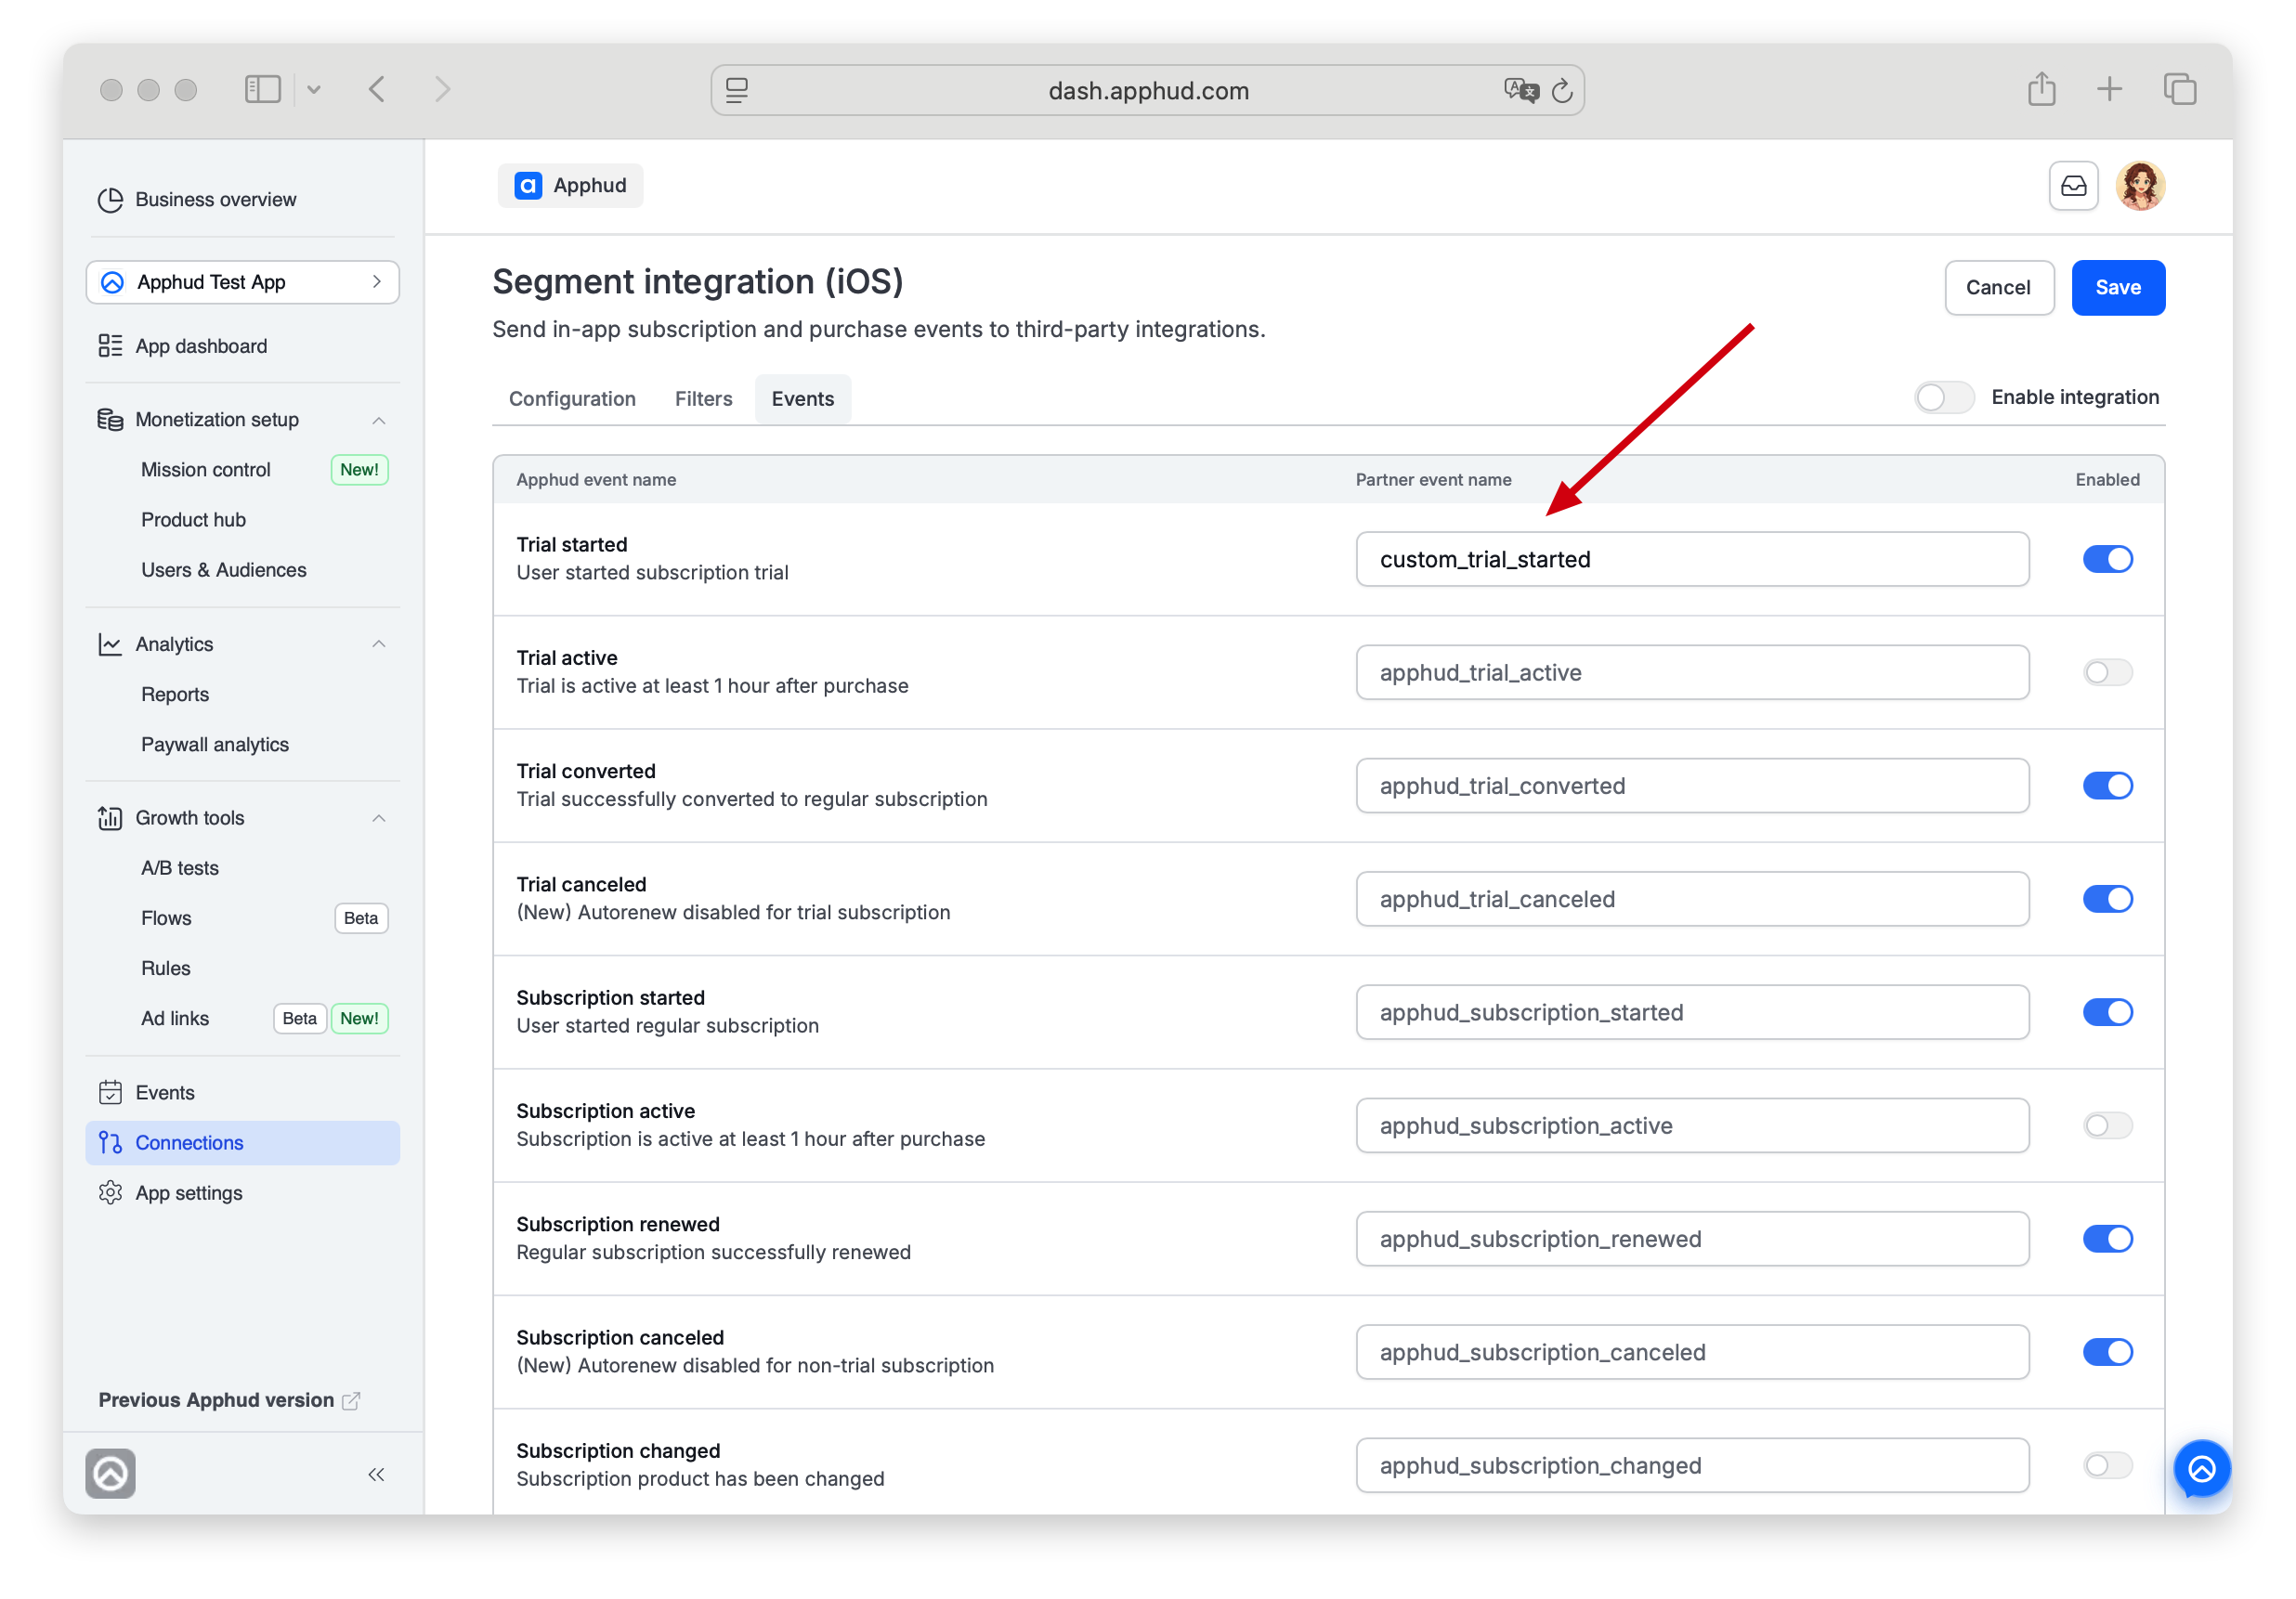
Step 6 - Set up Events list
Open the Events tab of the configuration. You can enter custom event names or disable some.
Step 6 - Test connection (optional)
Save the connection.
For the dashboard Test connection action see Integrations overview → Test connection.
Step 7 - Enable and save
Enable integration and click Save.
Data Payload
Apphud sends two types of payload to Segment — a track call for each event and an identify call for each subscriber.
track event payload
track event payload{
"context": {
"environment": "sandbox",
"library": {
"name": "apphud",
"version": "1.0"
}
},
"event": "subscription_started",
"integrations": {},
"messageId": "api-1hgkJuoUuv76lwoJE1n5nAJHh9r",
"originalTimestamp": "2020-09-18T14:40:53Z",
"properties": {
"currency": "USD",
"local_price": 17.99,
"product_id": "com.apphud.weeklytrial",
"usd_price": 17.99
},
"receivedAt": "2020-09-18T14:40:53.445Z",
"timestamp": "2020-09-18T14:40:53.000Z",
"type": "track",
"userId": "test_user_id"
}identify subscriber payload
identify subscriber payload{
"context": {
"environment": "sandbox",
"library": {
"name": "apphud",
"version": "1.0"
}
},
"integrations": {},
"messageId": "api-1hgkJsgDKPp9GyIxMTUVqFXKiCd",
"originalTimestamp": "2020-09-18T14:40:52Z",
"receivedAt": "2020-09-18T14:40:53.223Z",
"timestamp": "2020-09-18T14:40:52.000Z",
"traits": {
"age": null,
"email": null,
"gender": null,
"name": null
},
"type": "identify",
"userId": "test_ren6_4"
}You can set age, email, gender, and name properties using the User Properties feature — see the Apphud mobile SDK documentation.
Updated 4 months ago