Amazon S3
This page describes how to add integration with Amazon S3 storage
Amazon S3 is one of the largest cloud storage providers. Set up your own bucket and receive Daily Data Export - gzip compressed .csv files there.
How to Add Integration?
Step 1
Sign in to your Amazon Console and navigate to Identity and Access Management (IAM).
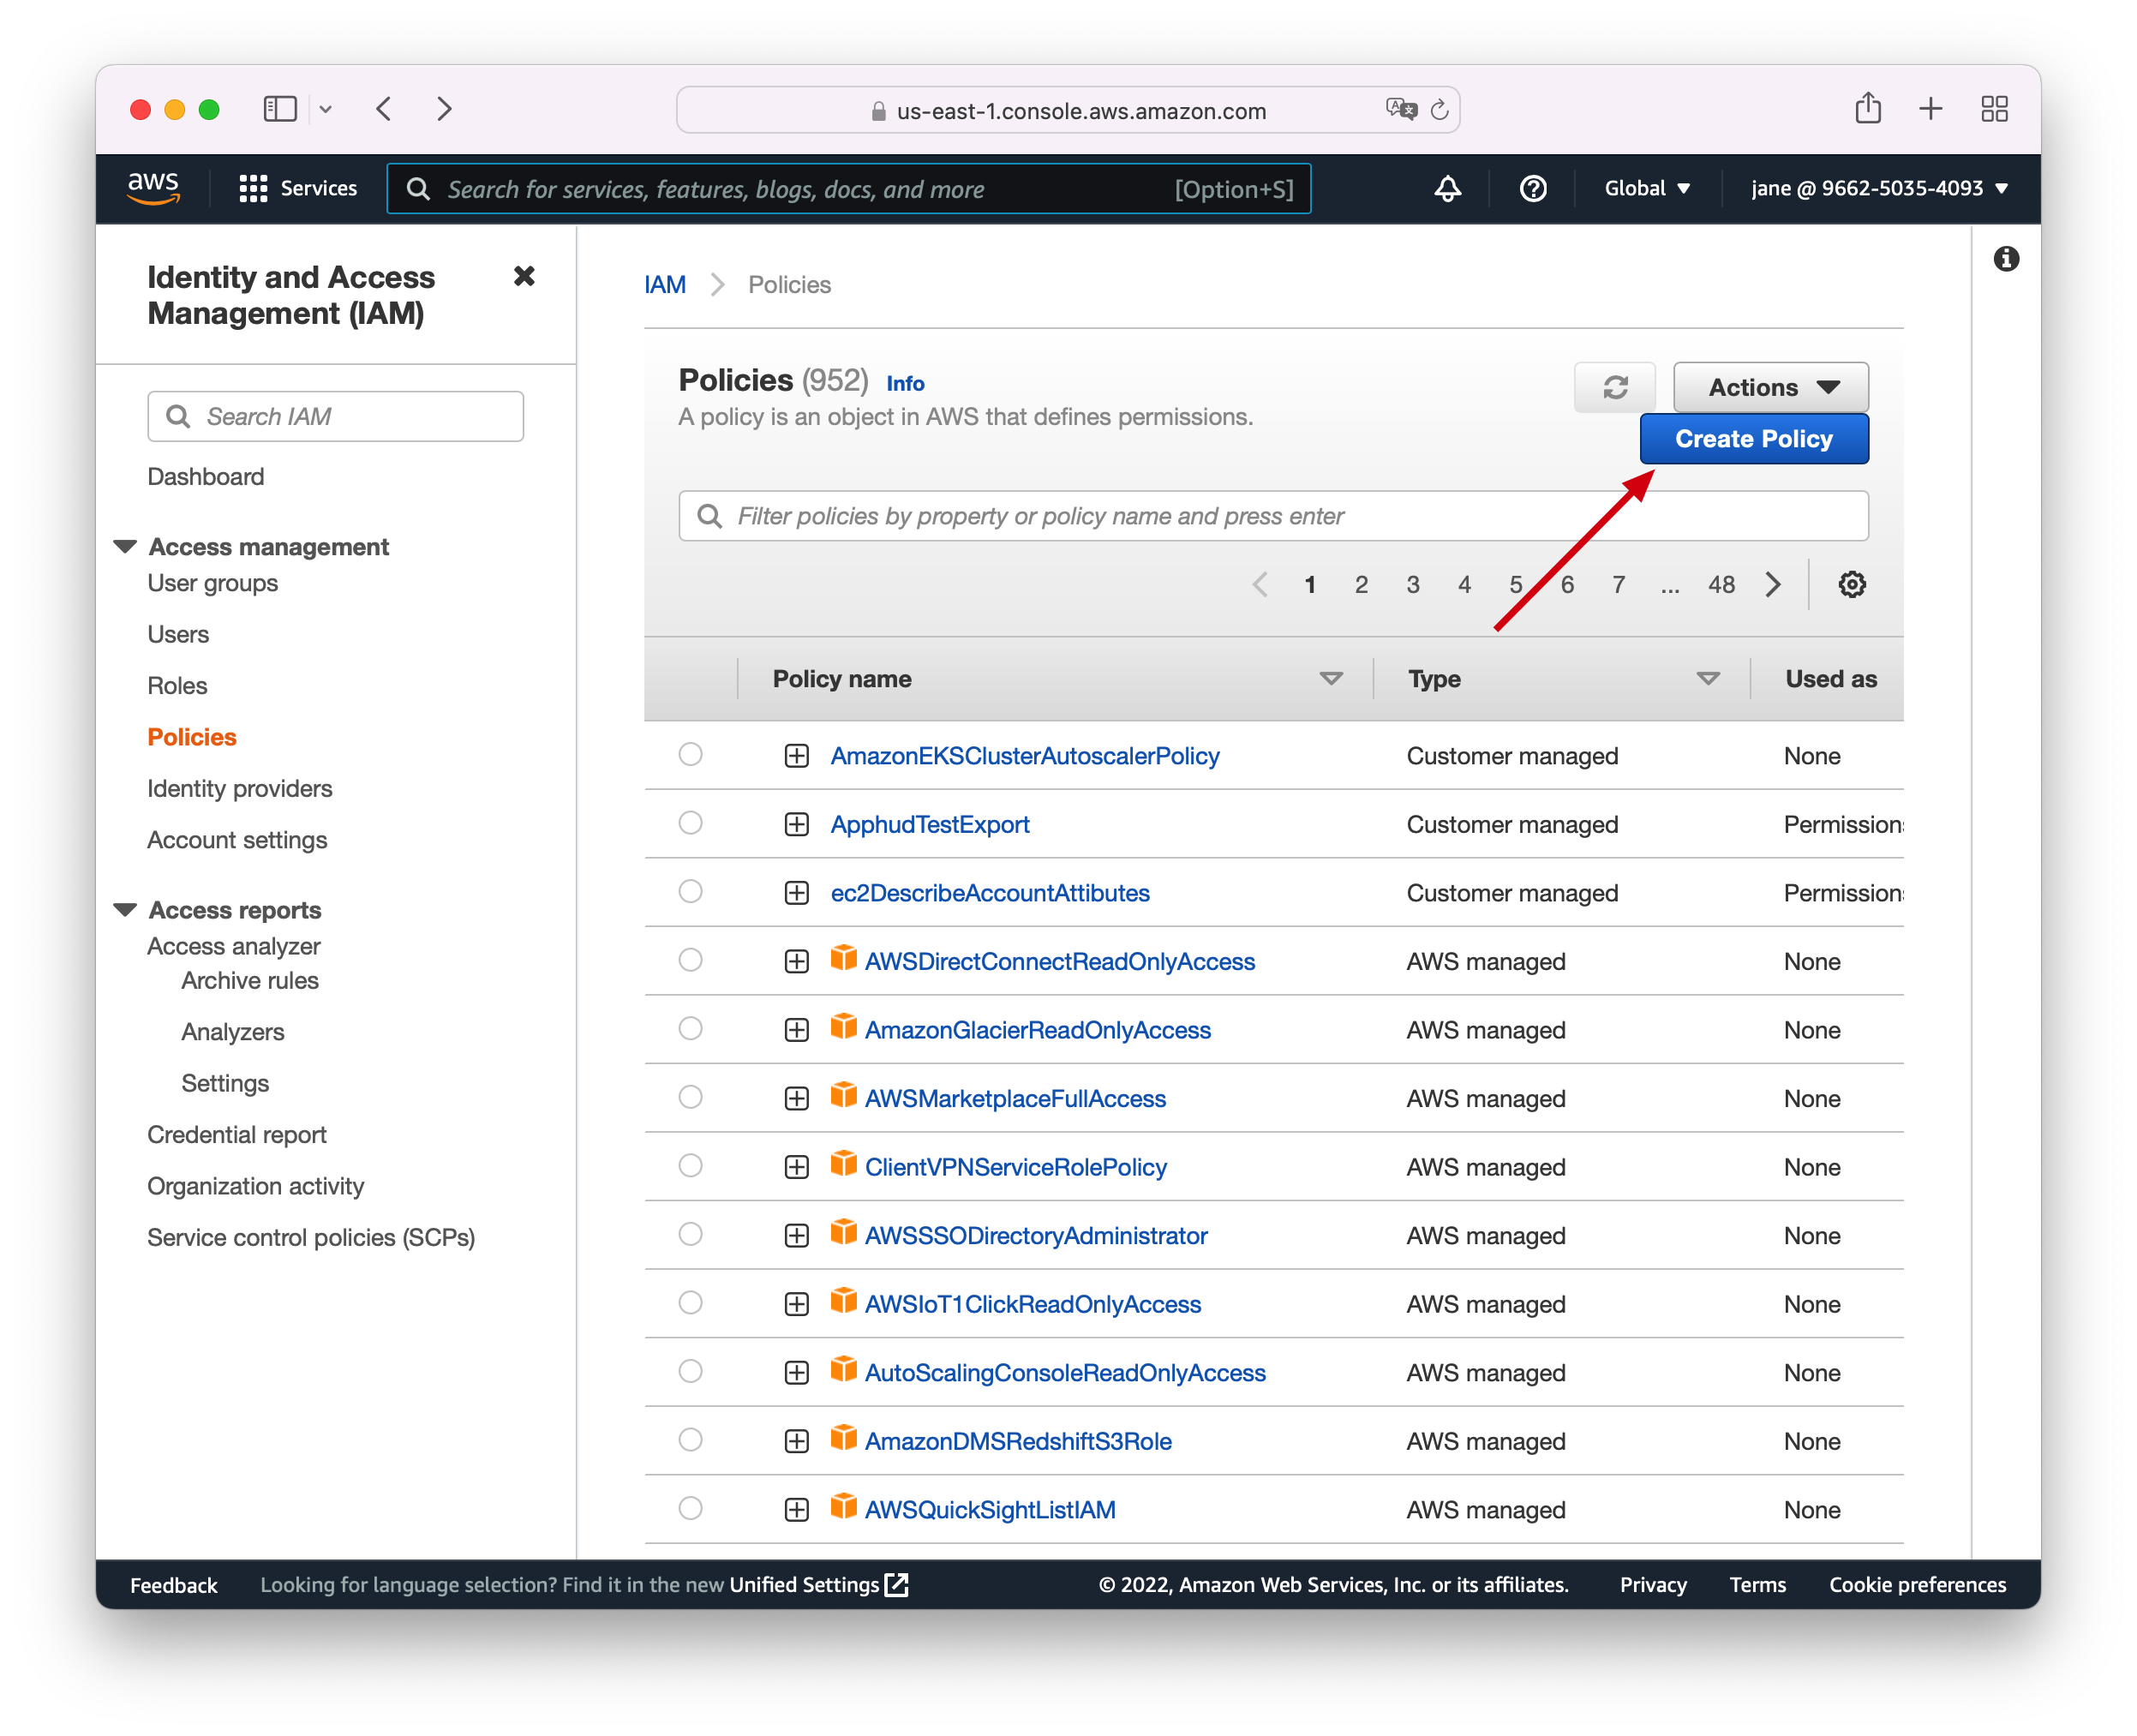
Go to Policies section and click on Create Policy:
Step 2
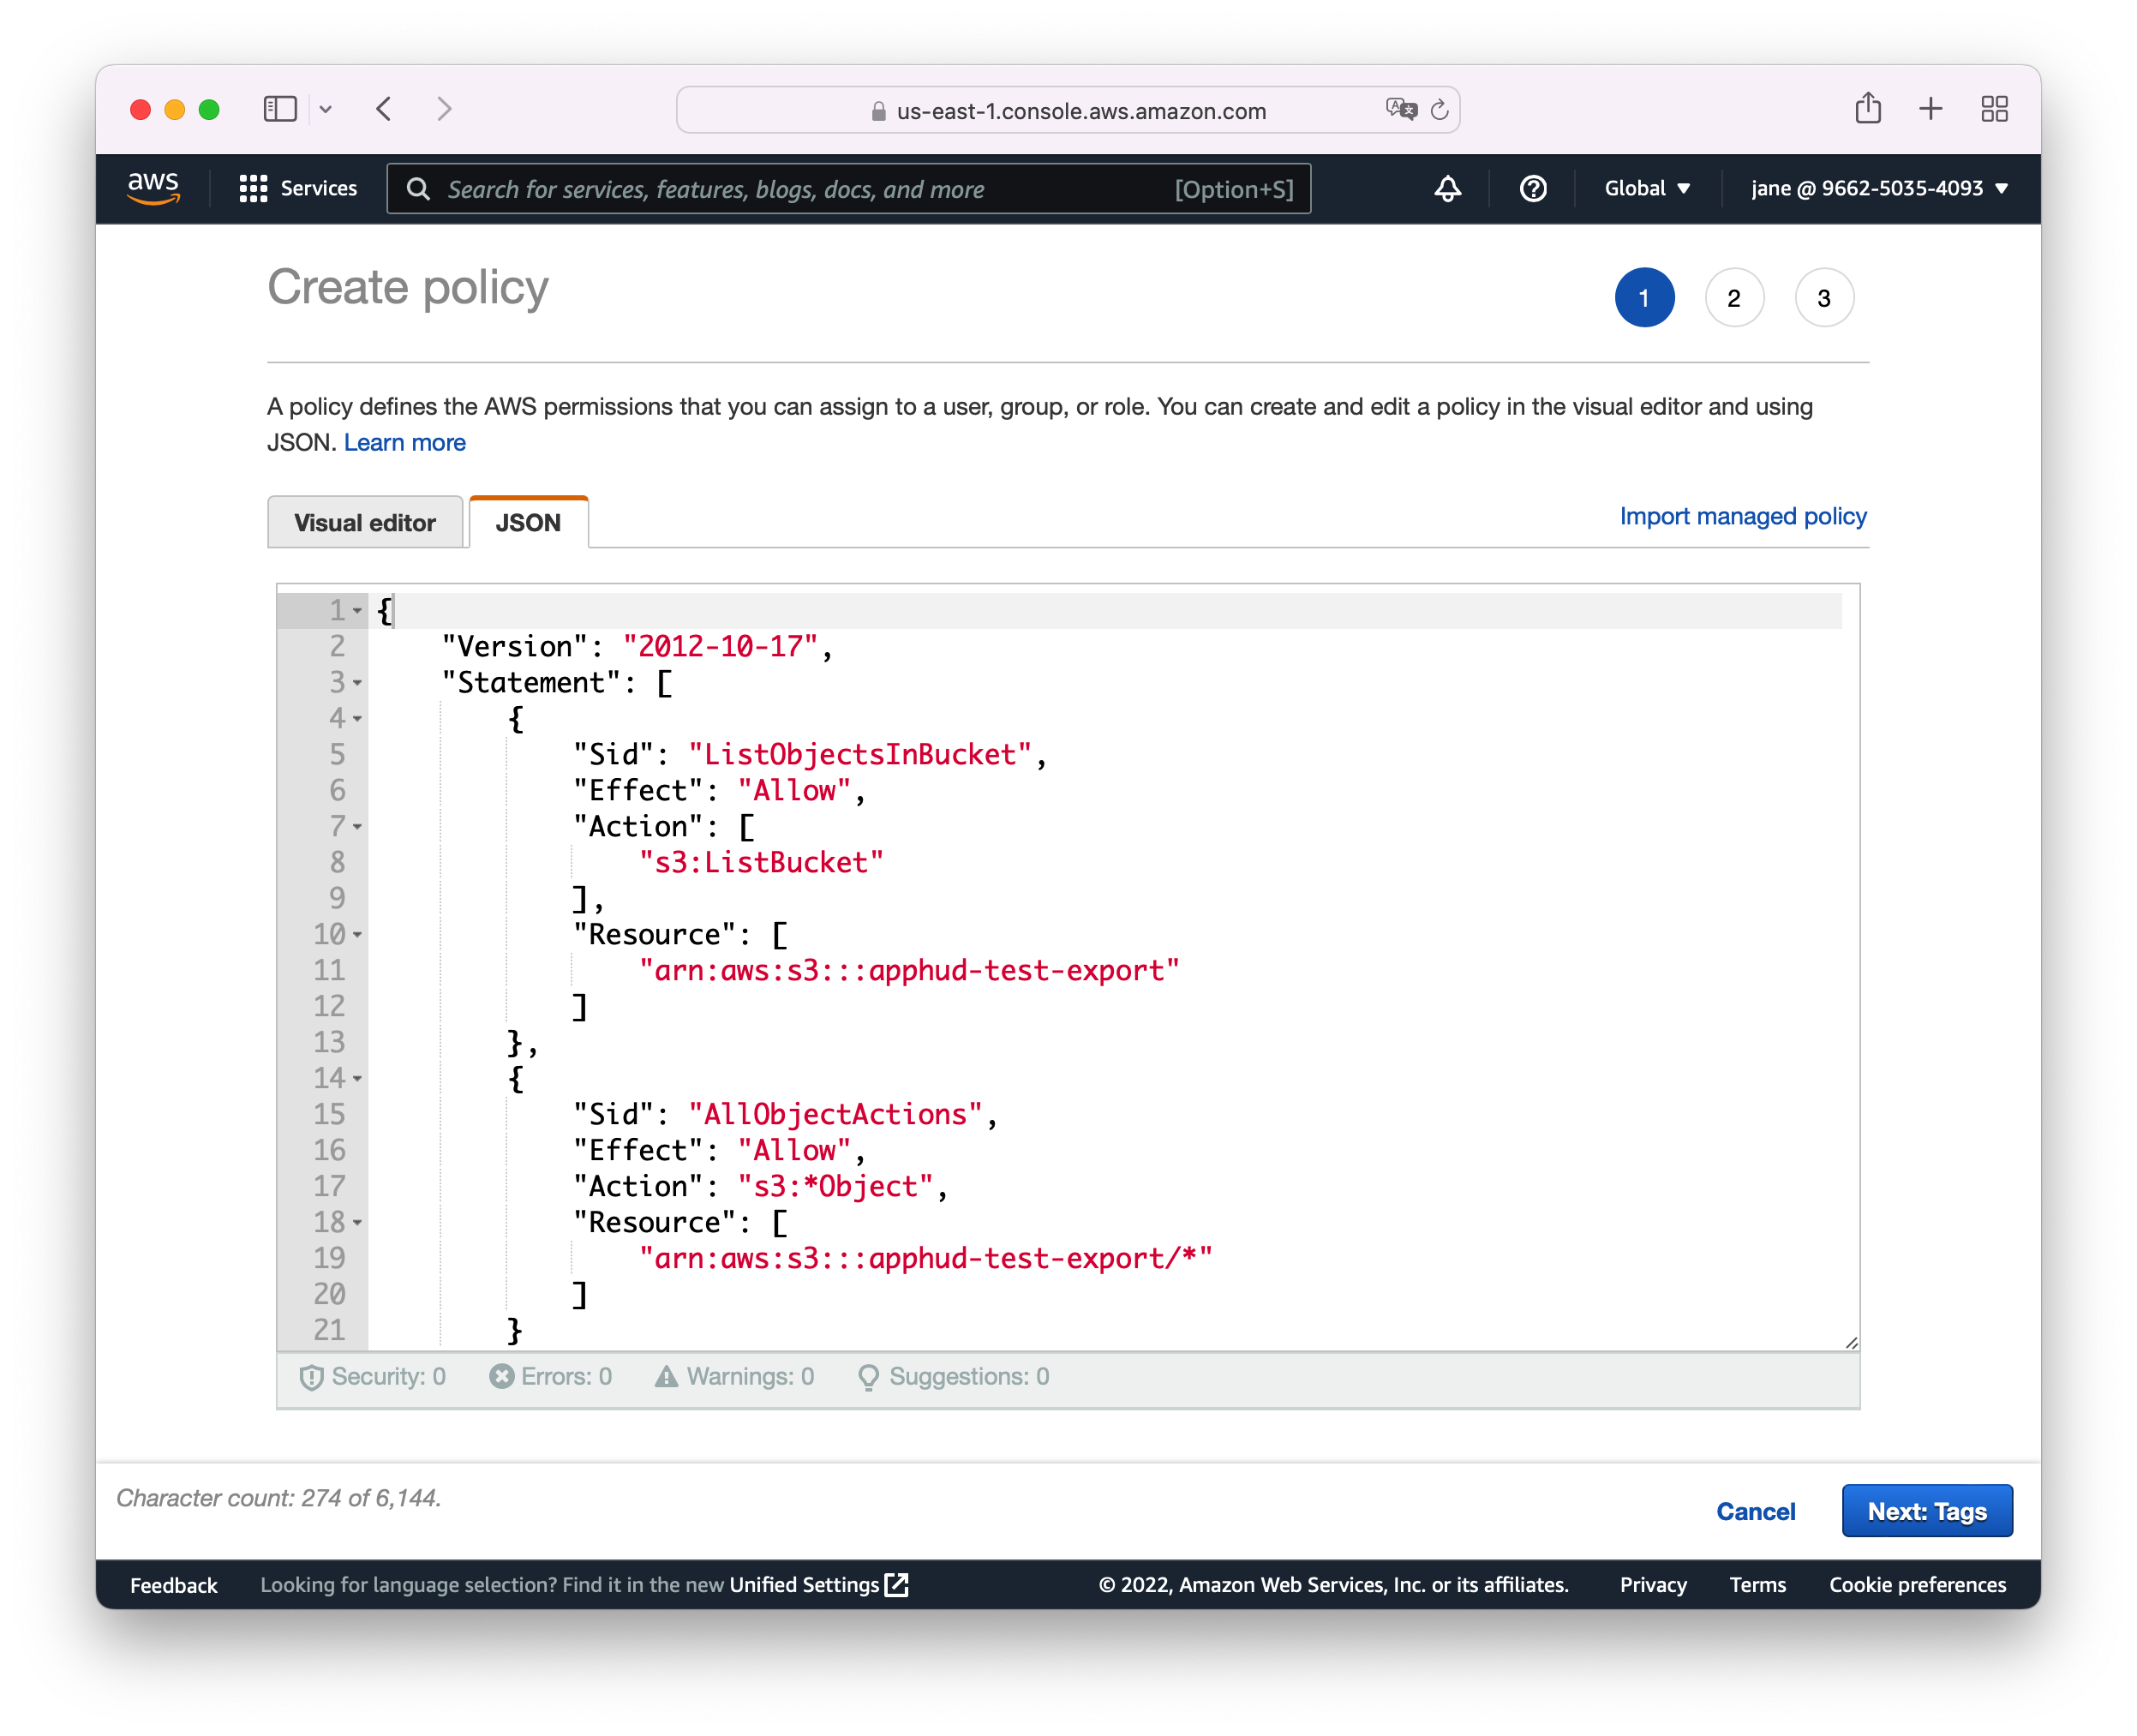
Copy contents of the following JSON to JSON tab of the policy permissions and replace apphud-test-export with your custom bucket name:
{
    "Version": "2012-10-17",
    "Statement": [
        {
            "Sid": "ListObjectsInBucket",
            "Effect": "Allow",
            "Action": [
                "s3:ListBucket"
            ],
            "Resource": [
                "arn:aws:s3:::apphud-test-export"
            ]
        },
        {
            "Sid": "AllObjectActions",
            "Effect": "Allow",
            "Action": "s3:*Object",
            "Resource": [
                "arn:aws:s3:::apphud-test-export/*"
            ]
        }
    ]
}
Step 3
Here is what policy permissions should look like:
Step 4
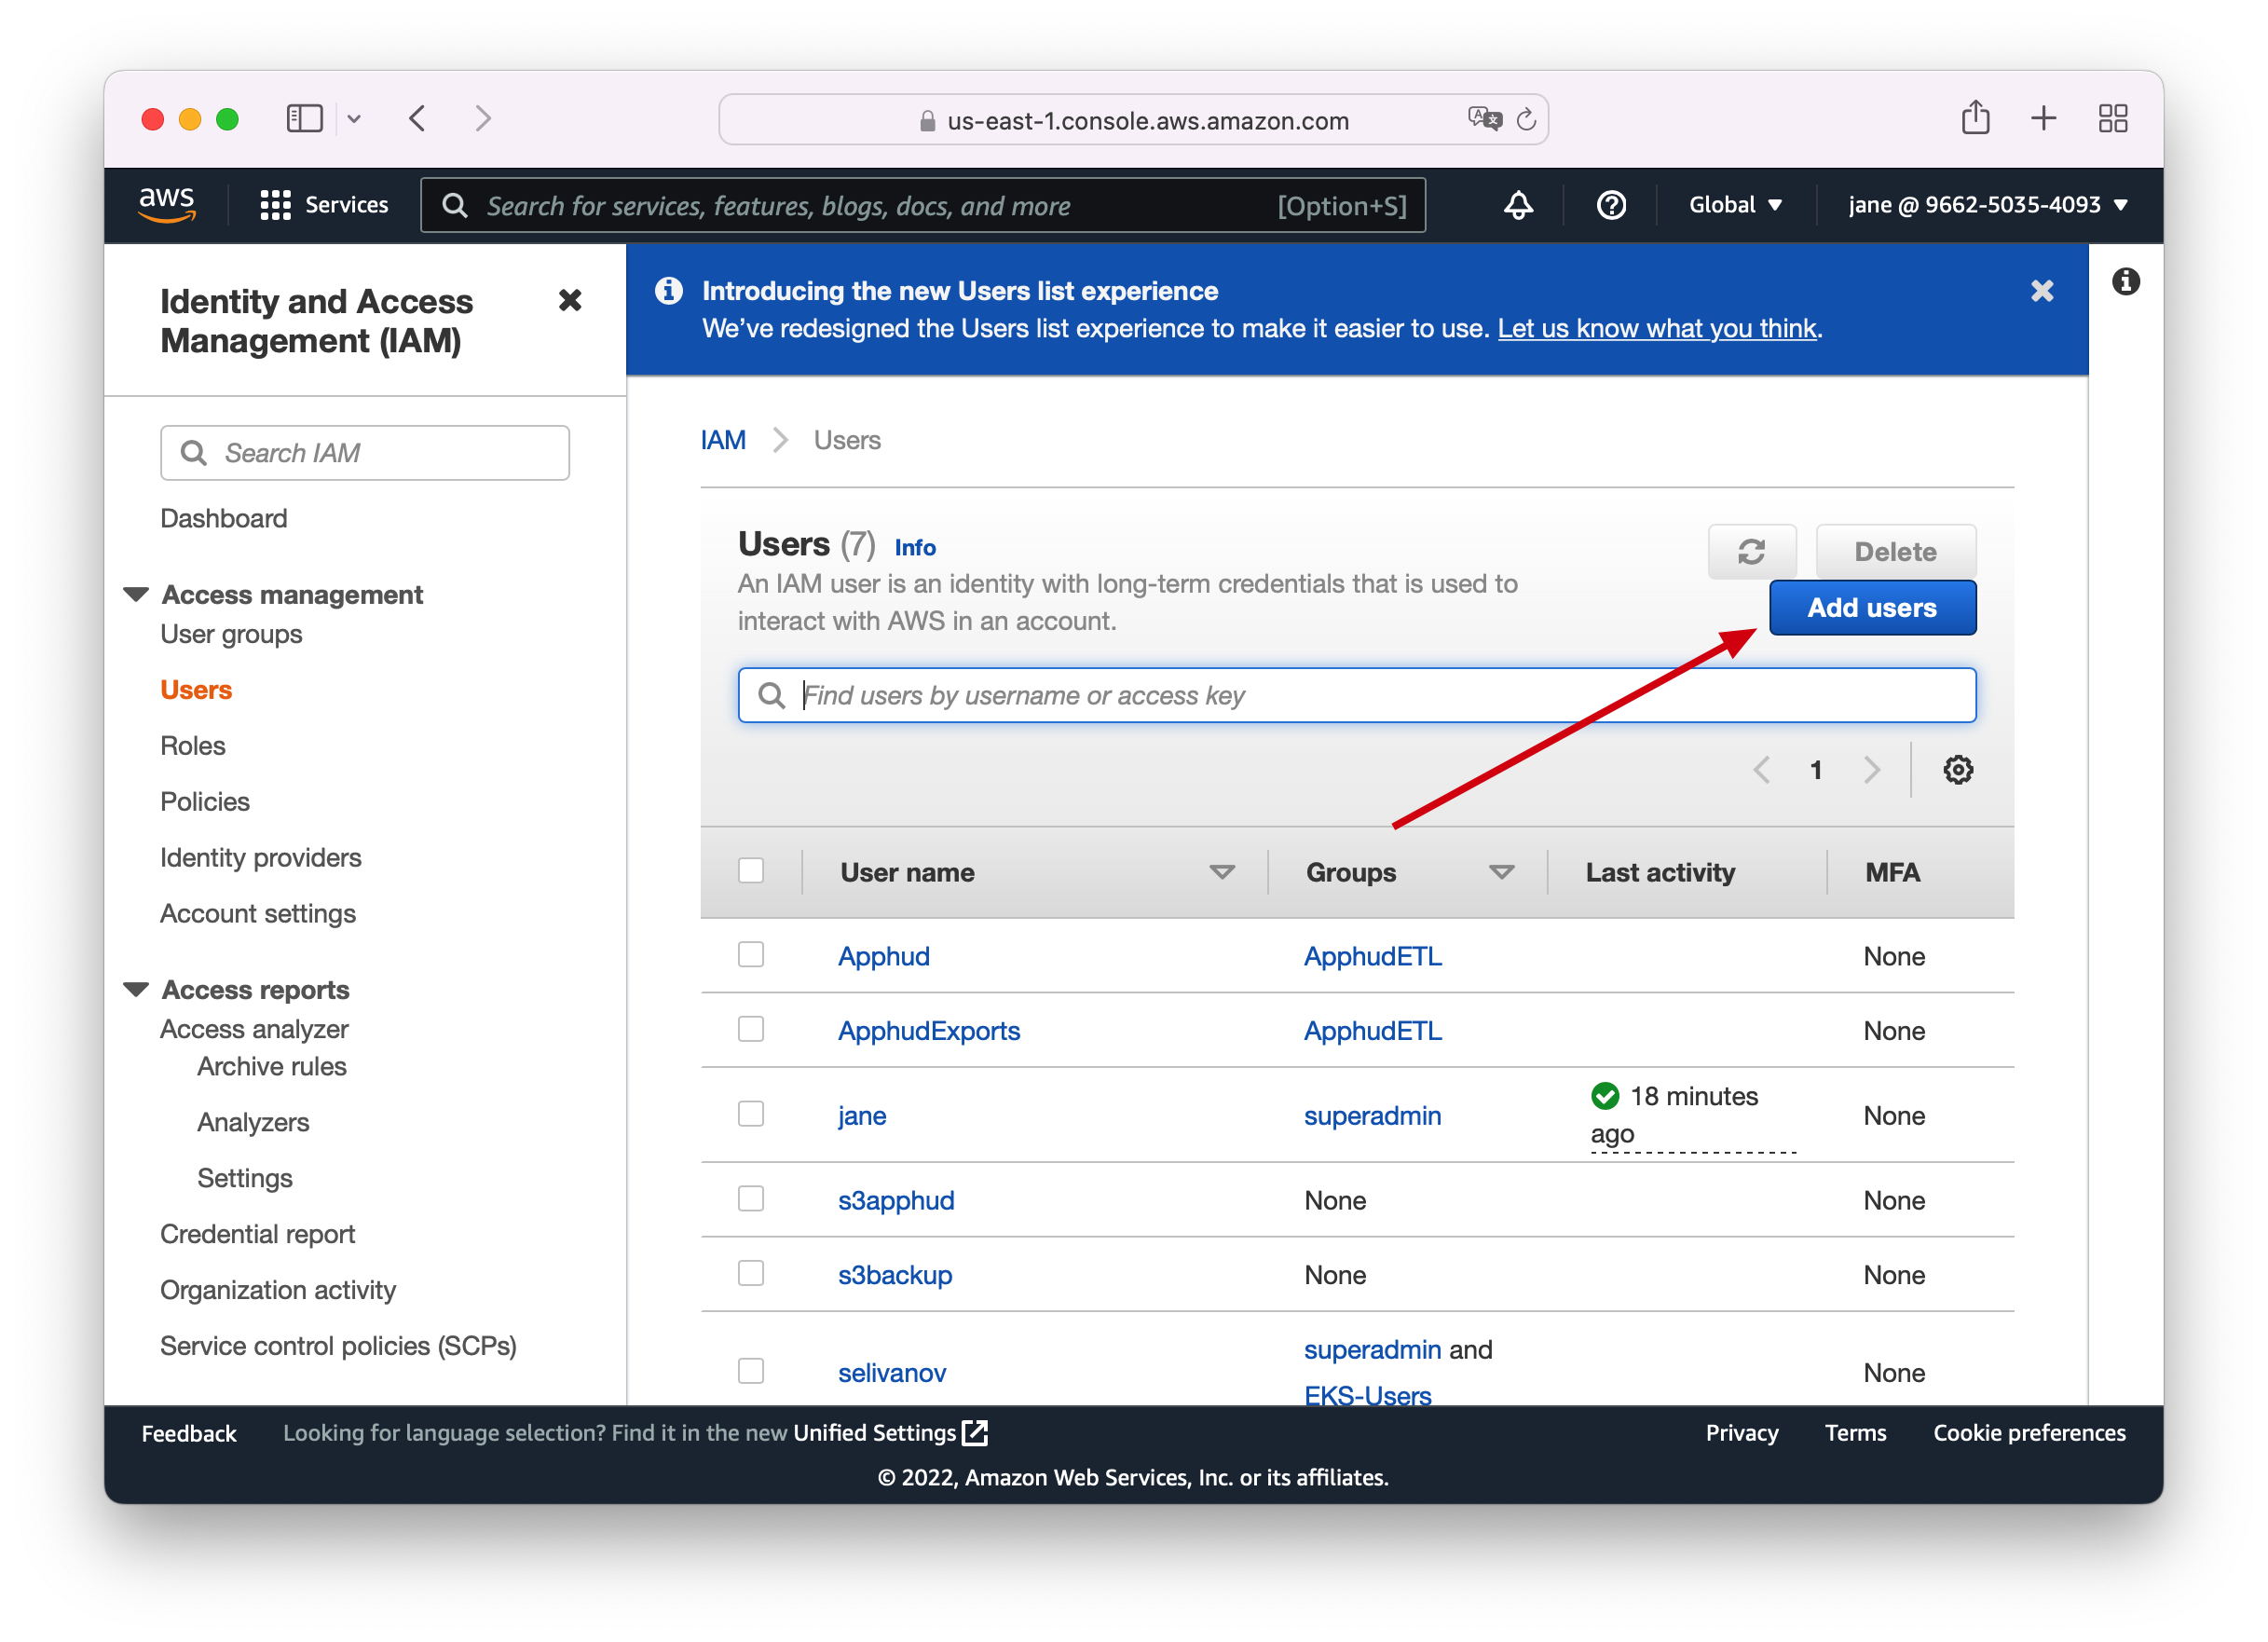
Now it's time to create a User for this policy. Go to Users section and click on Add Users:
Step 5
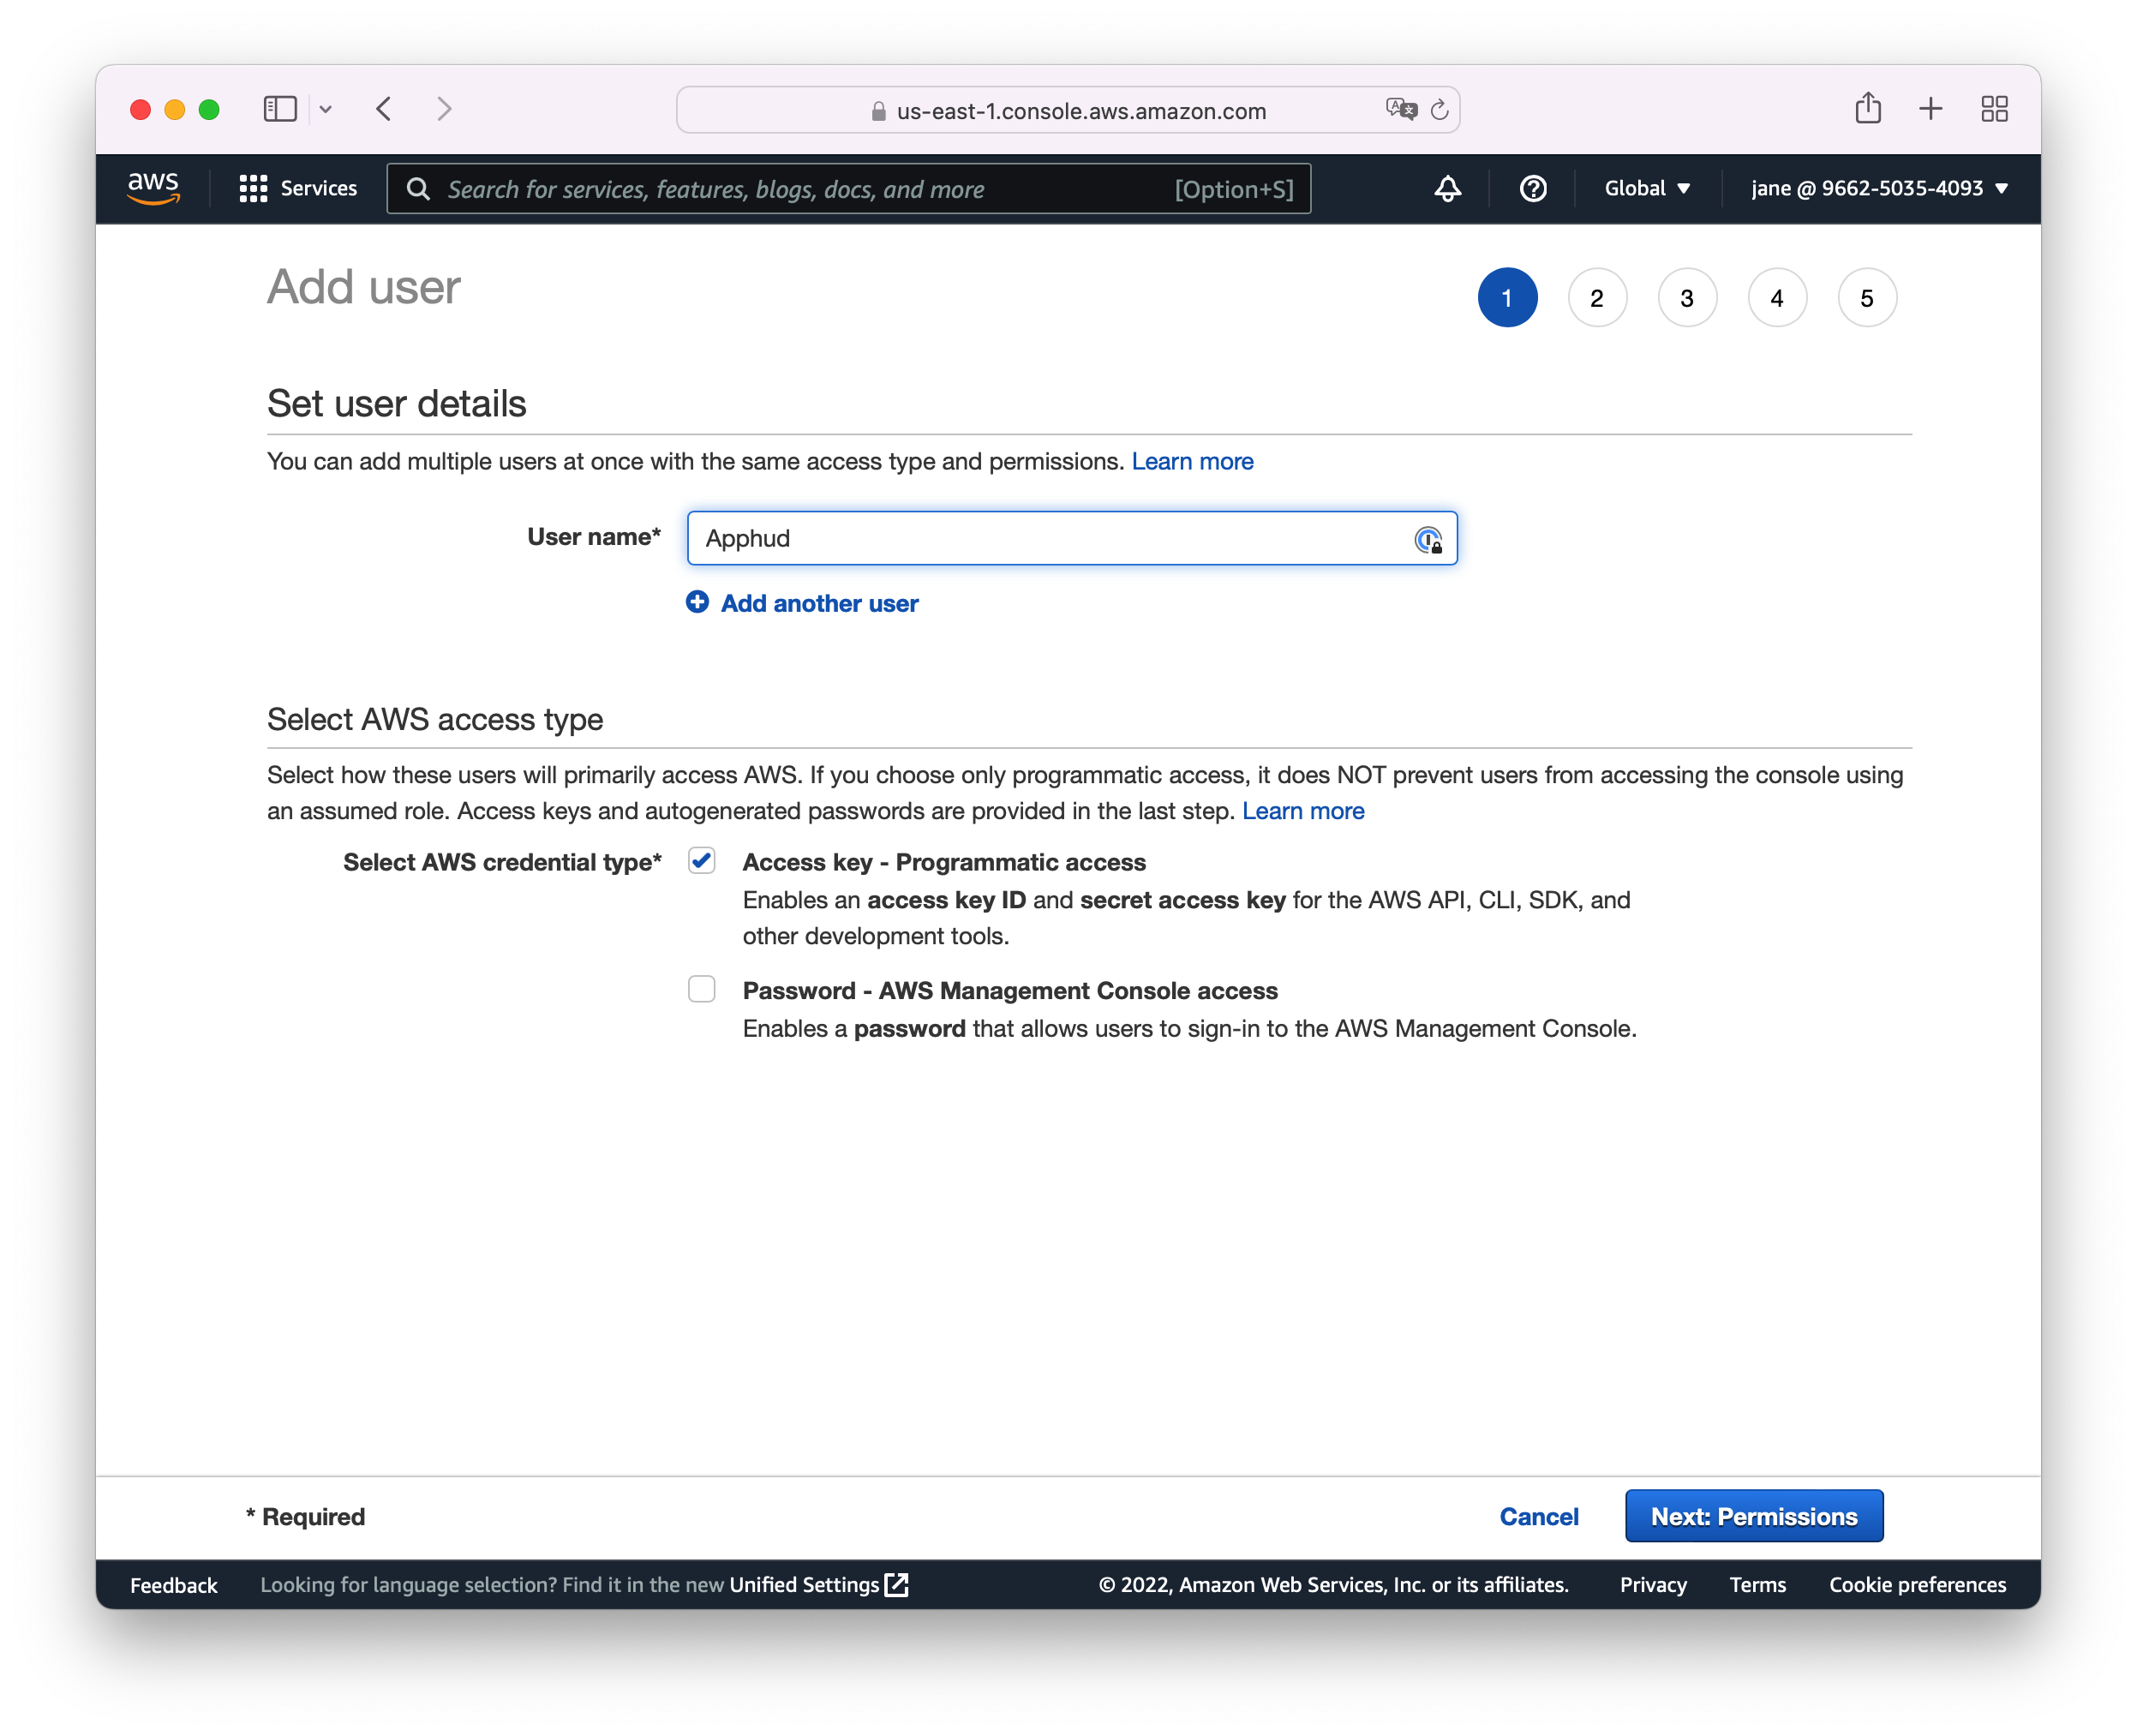
Enter user name (for example, Apphud) **and** select Programmatic access type:
Step 6
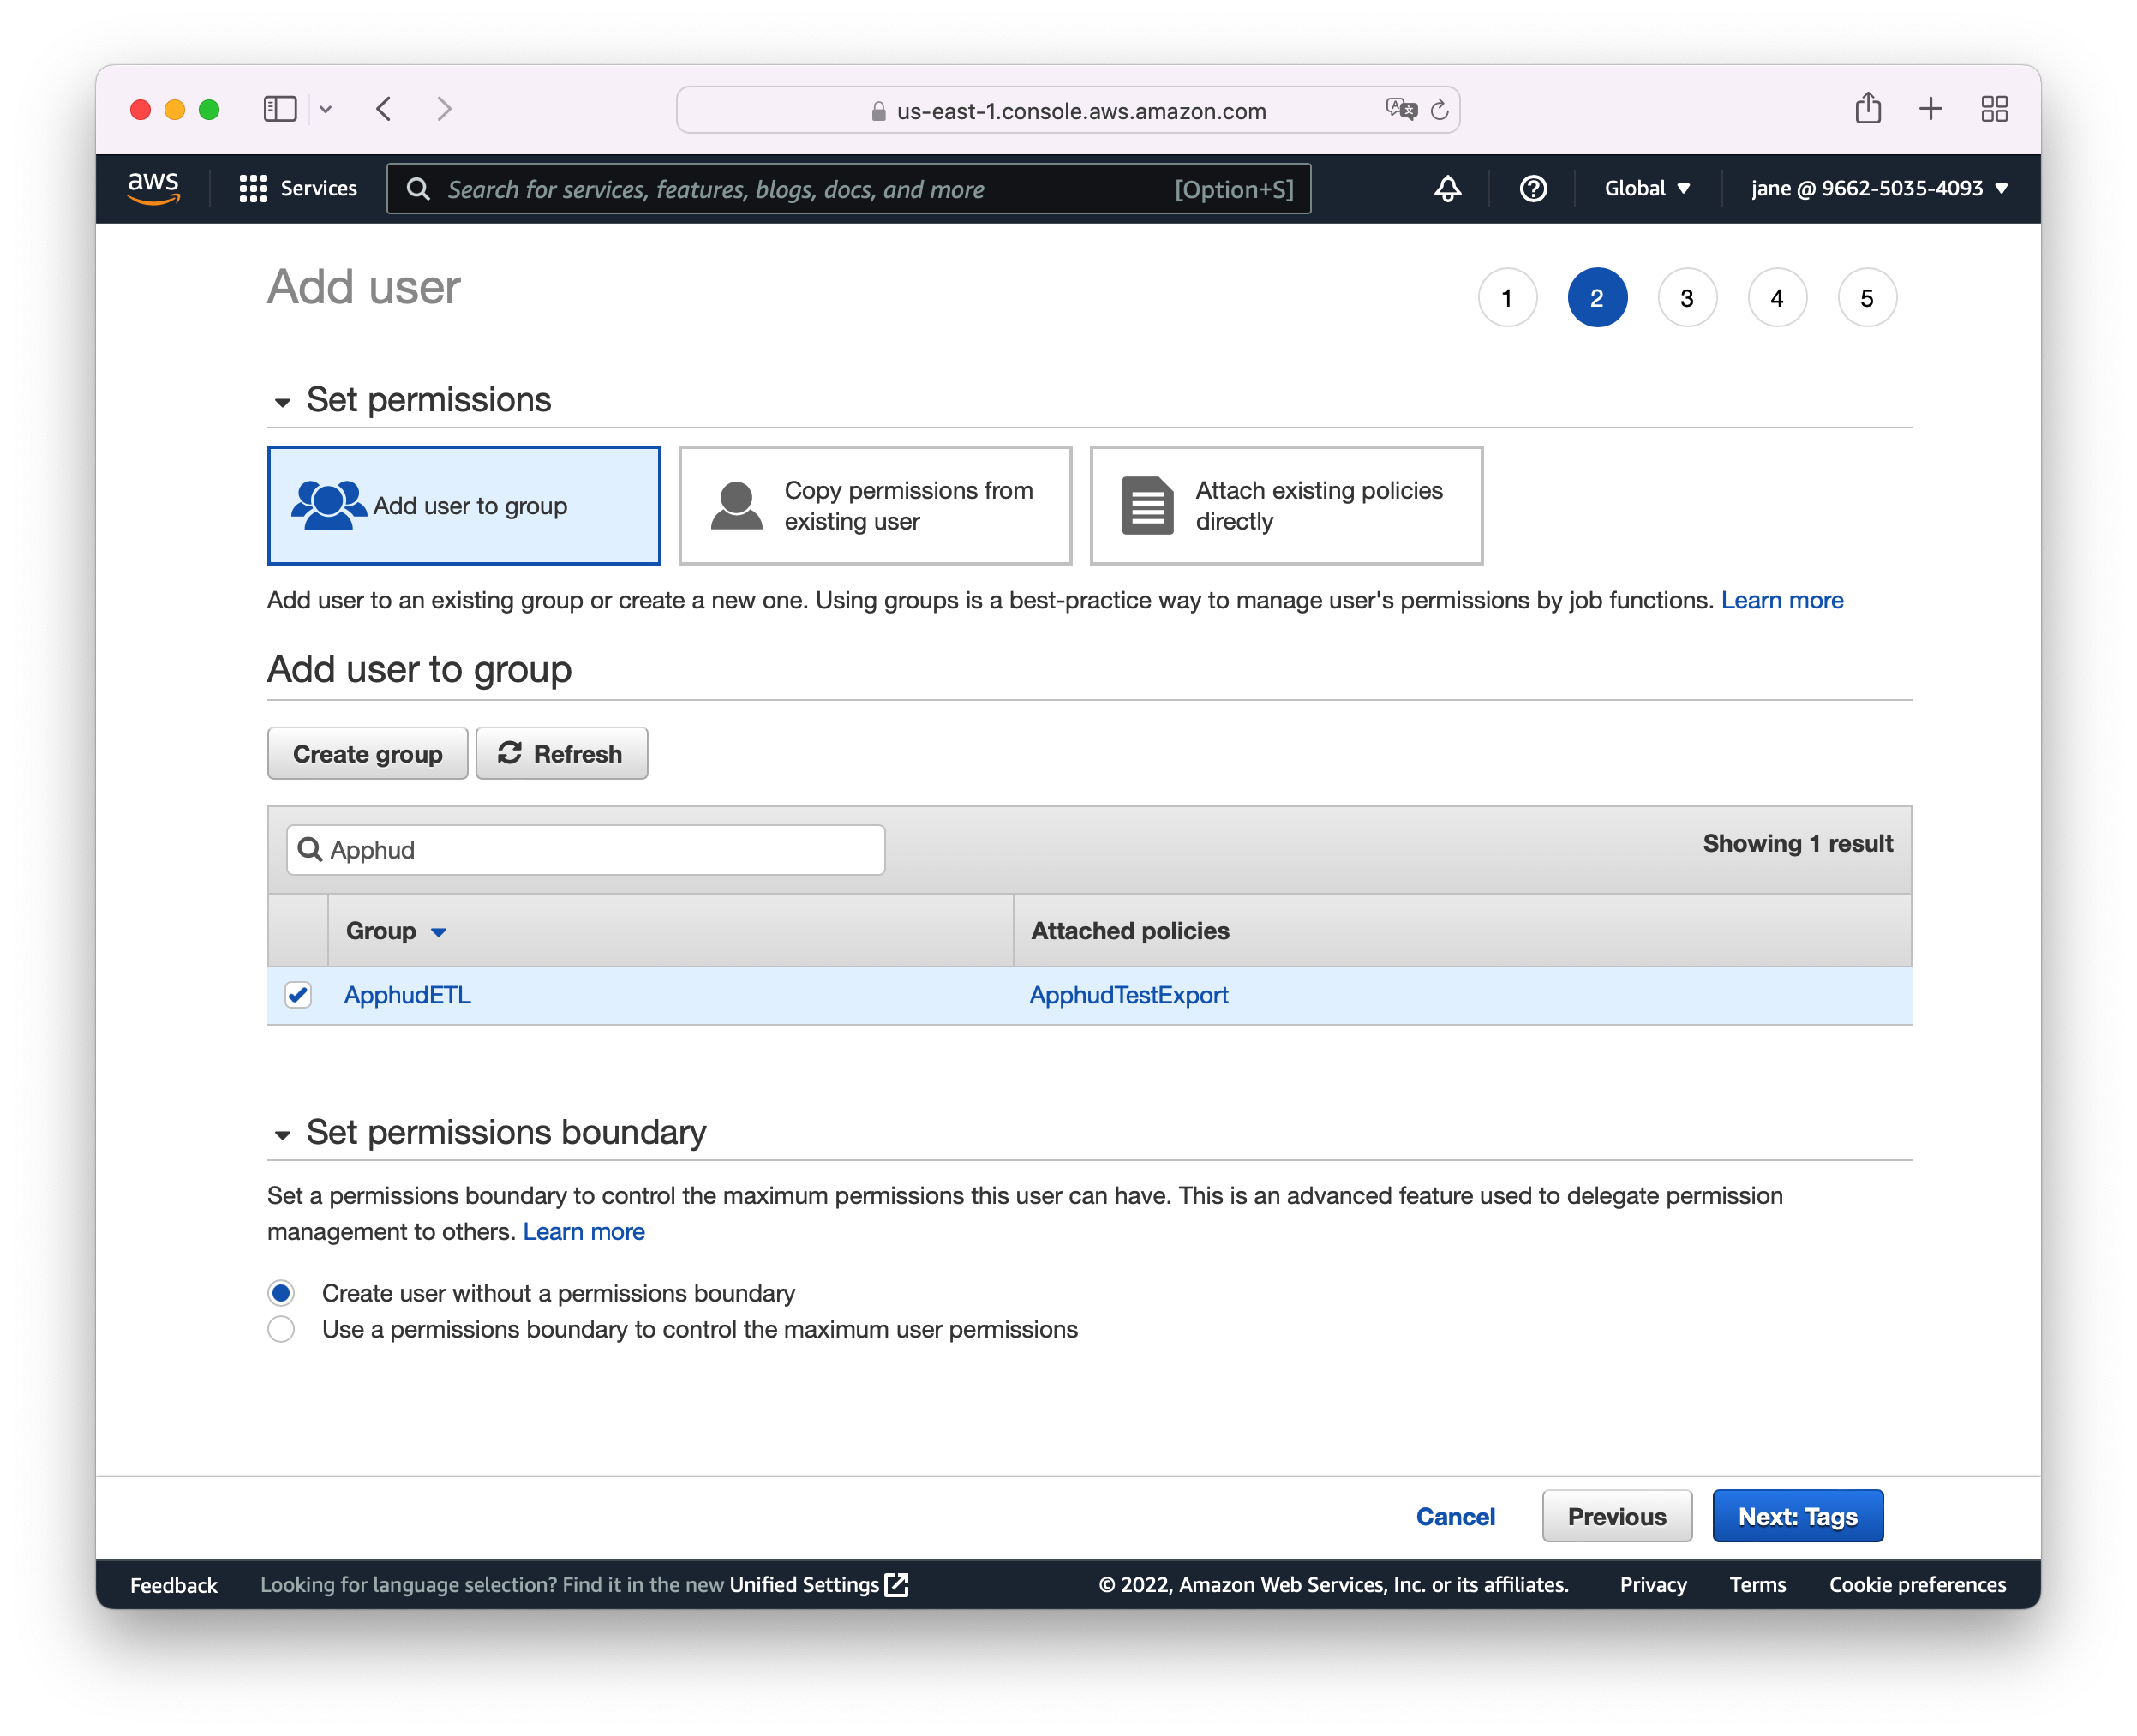
Create a group with the recently created Policy and add your user to this group:
Step 7
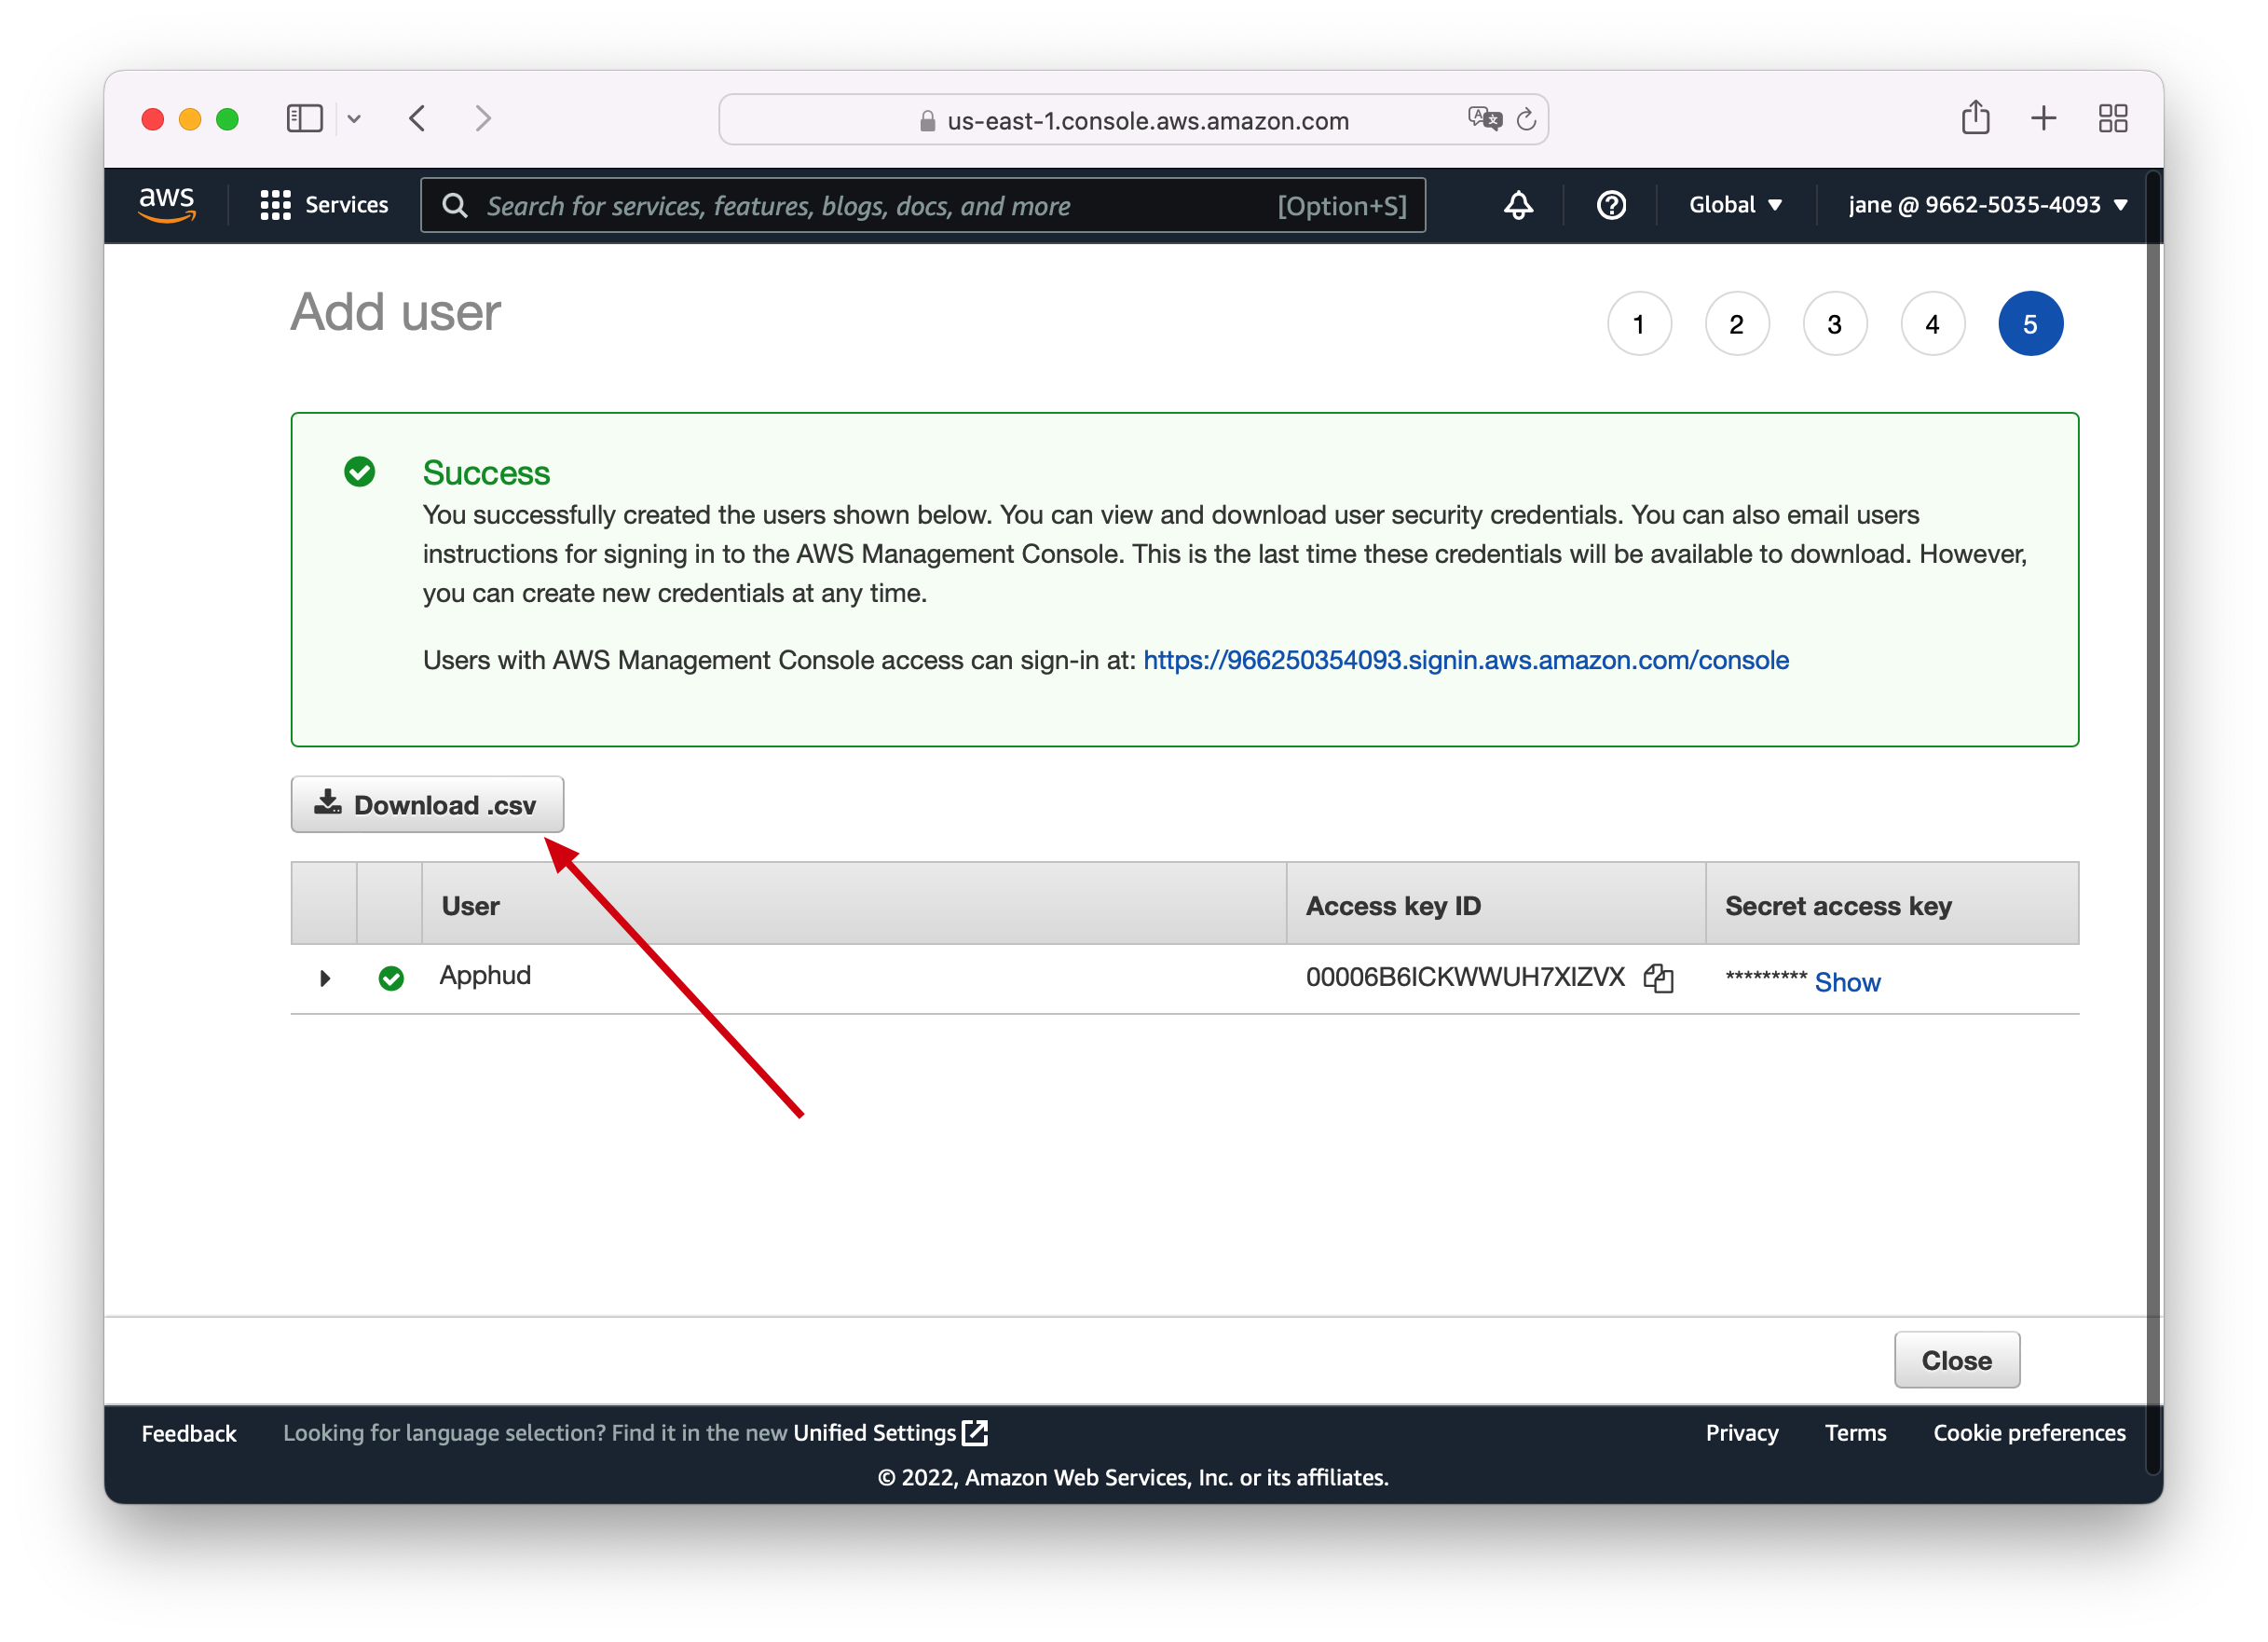
After creating a user download .csv credentials or copy Access Key ID and Secret Key:
Step 8
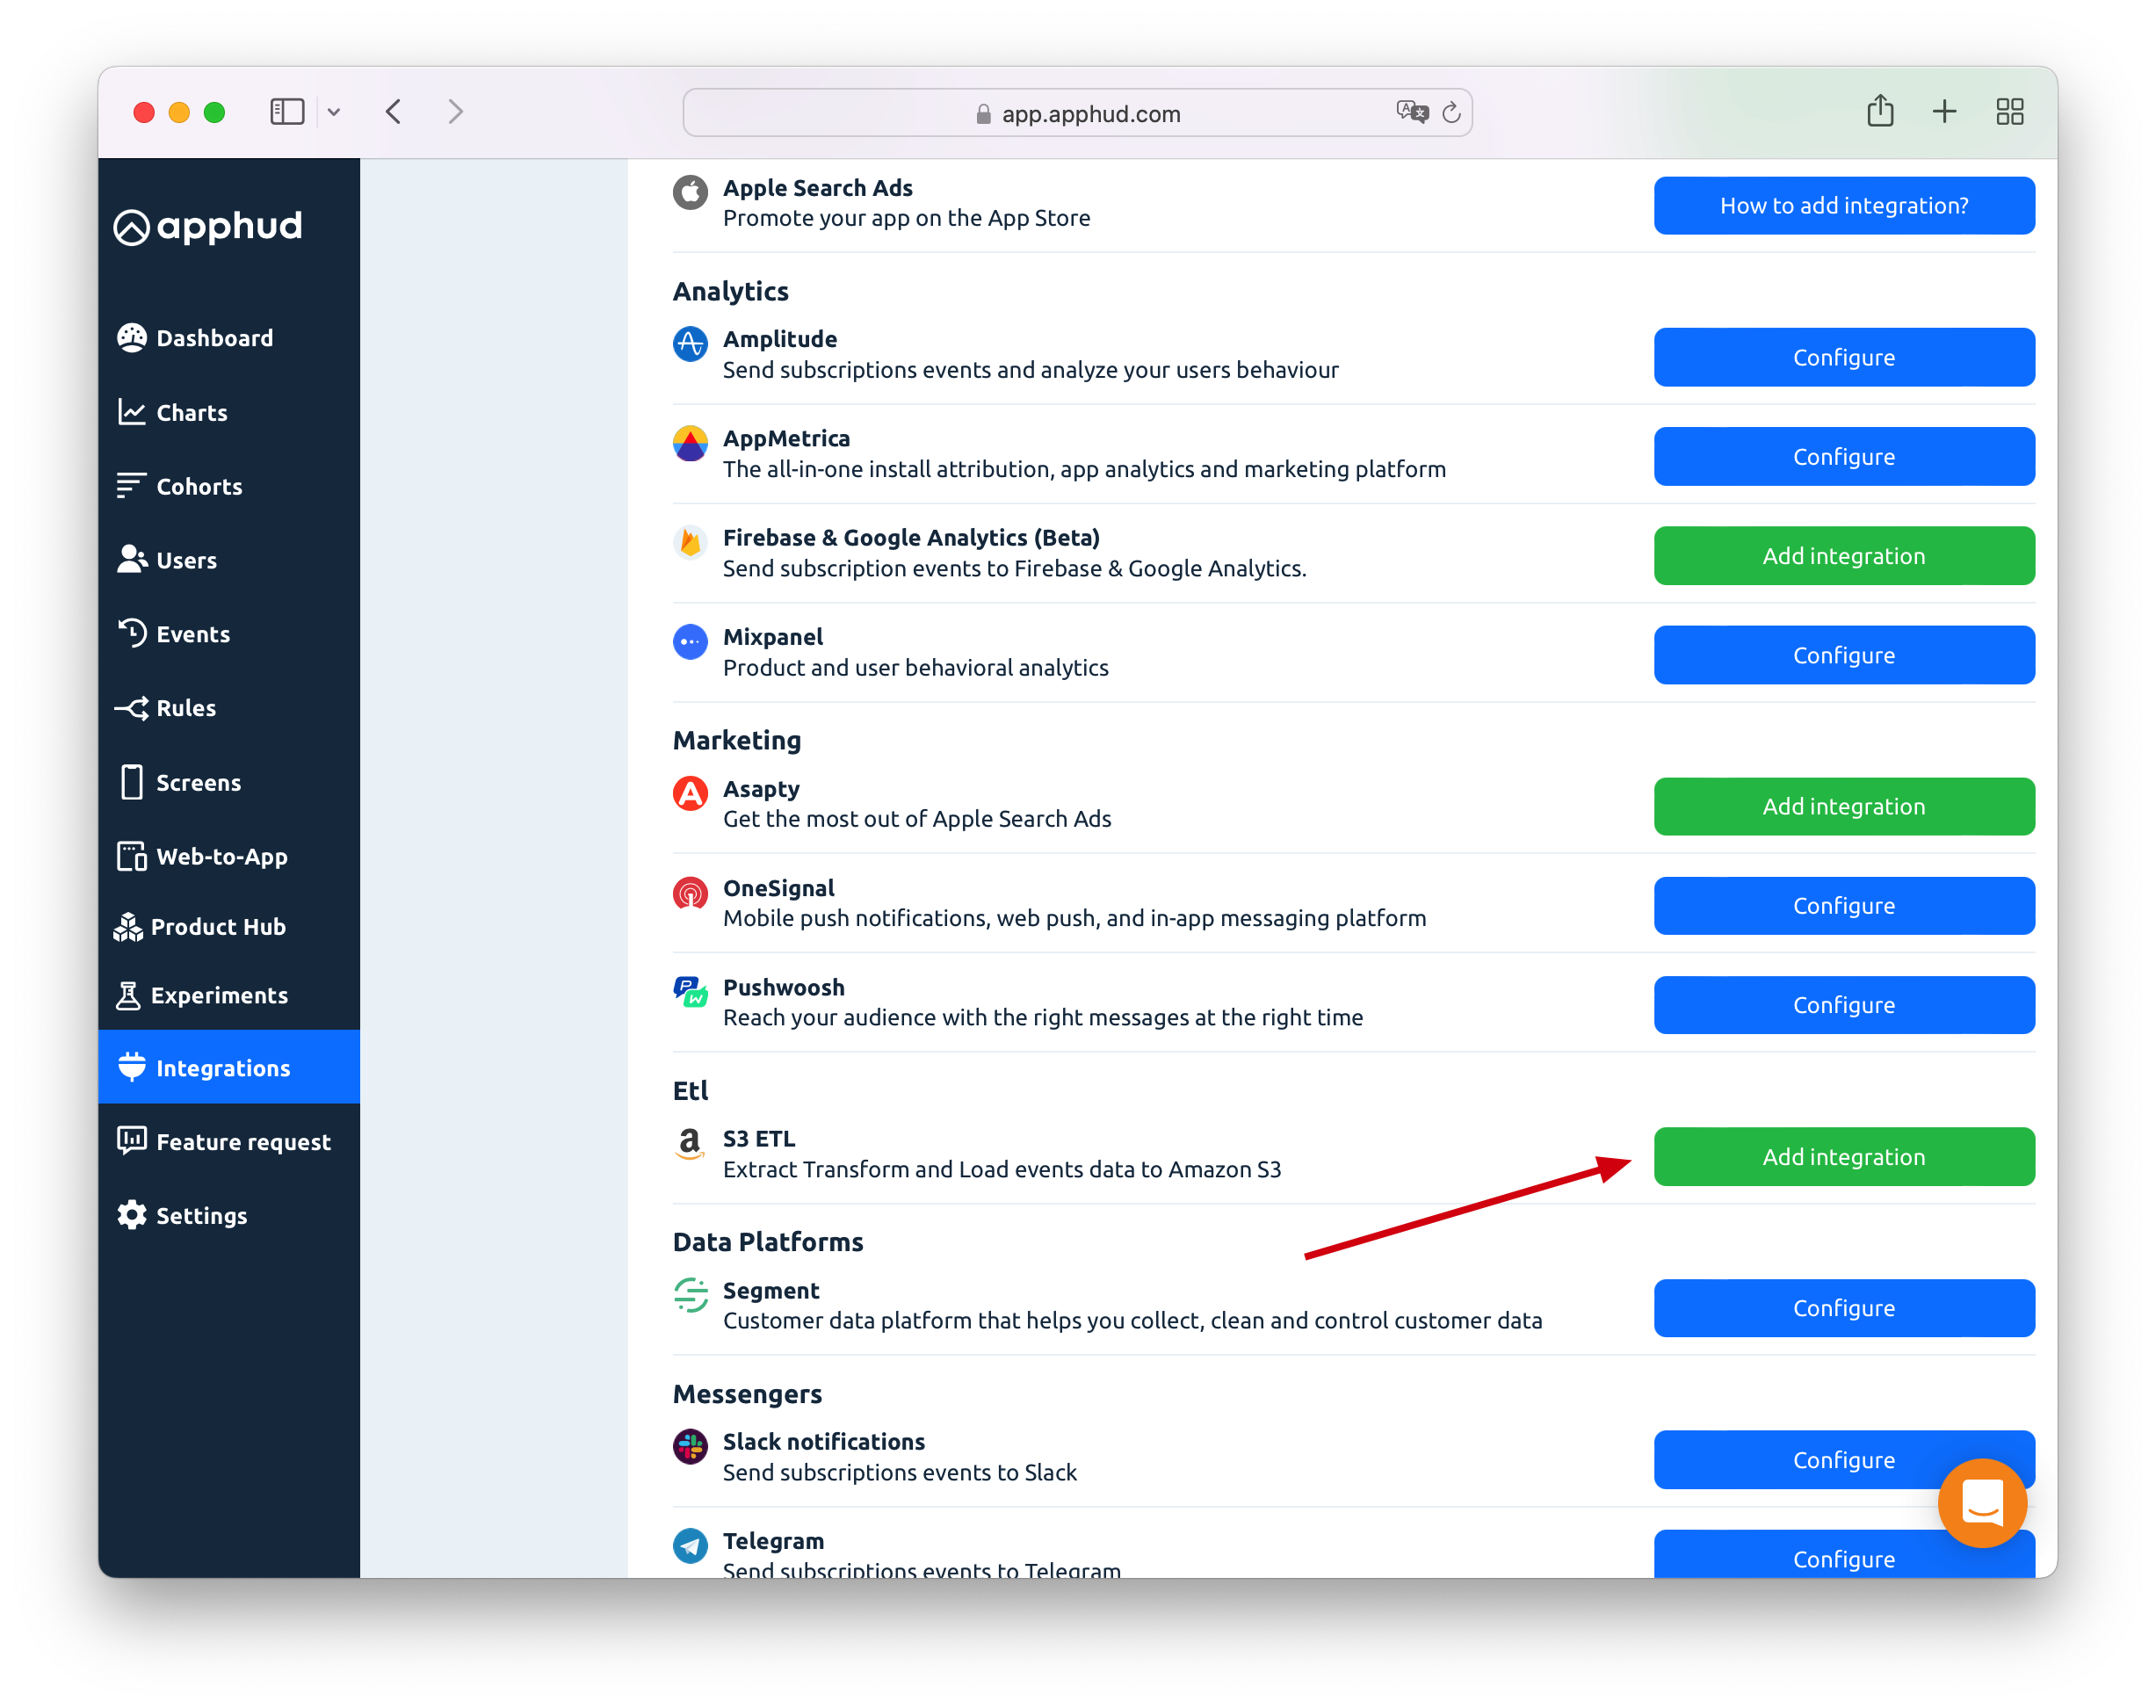
In Apphud on Integrations Page find Amazon S3 ETL and click Add integration:
Step 9
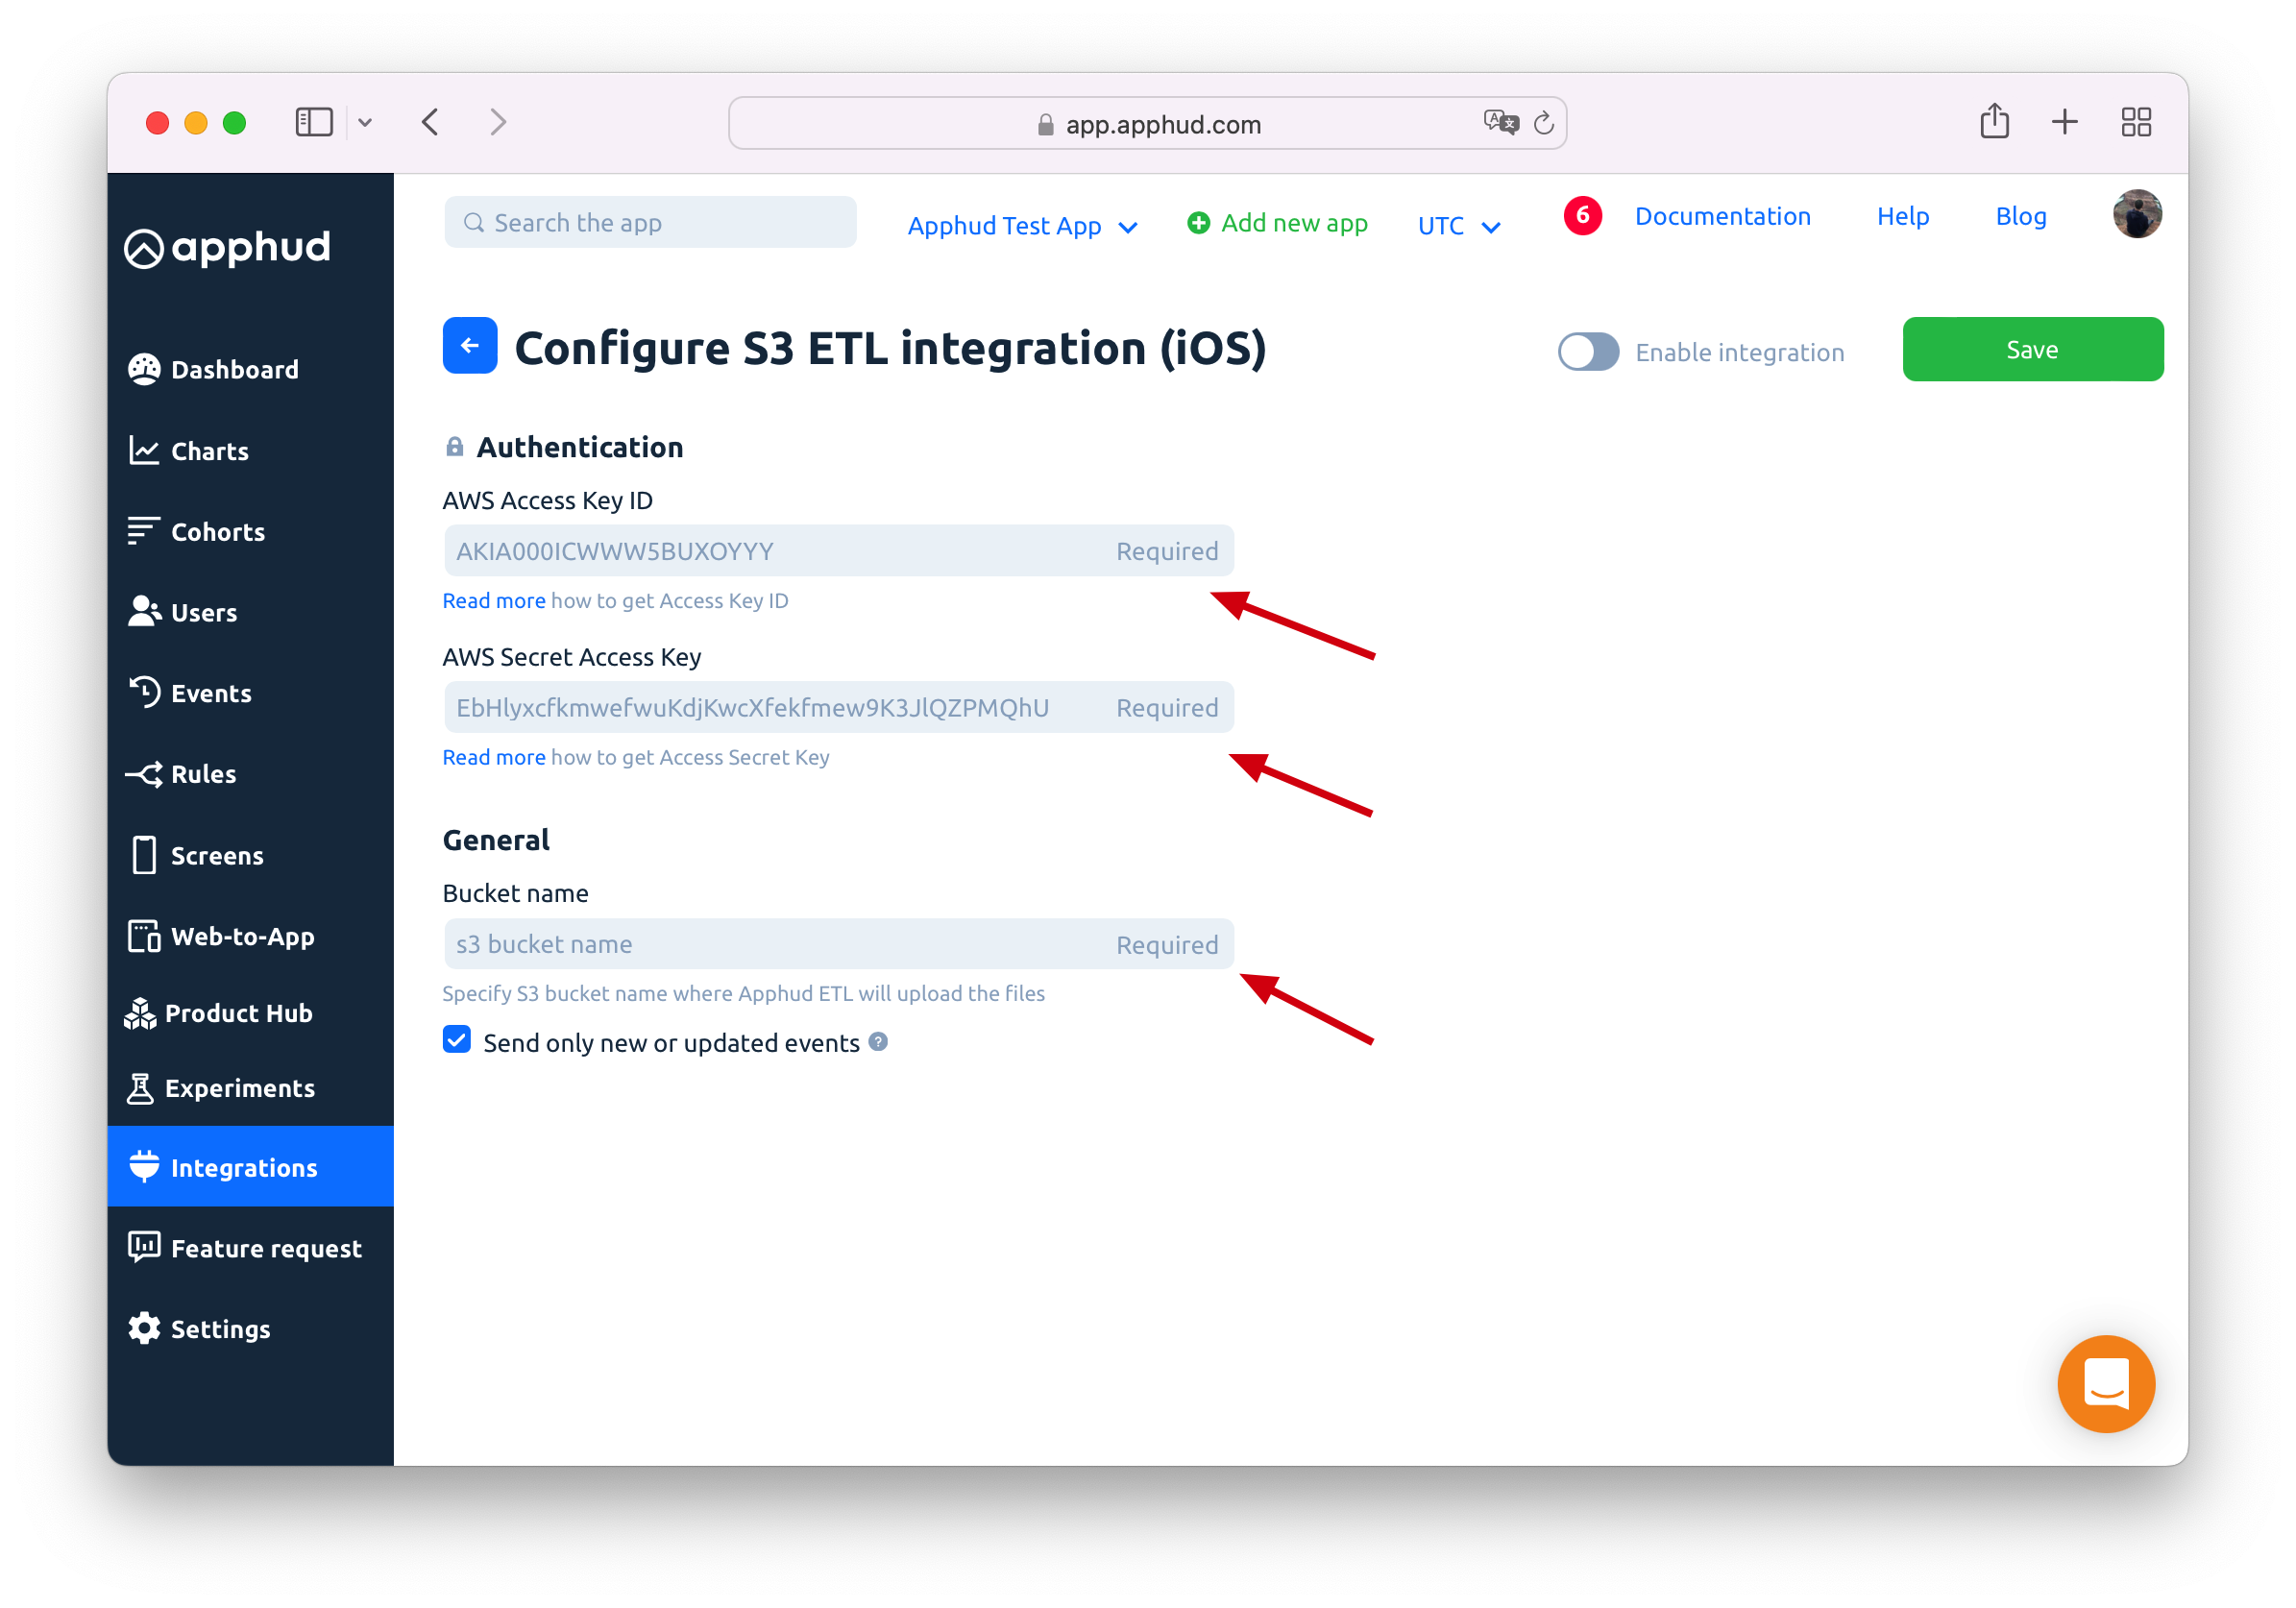
Fill in all fields with credentials obtained in the previous steps:
Step 10
Finally, Enable integration and click Save. Once enabled, allow up to 24 hours for the first delivery to appear.
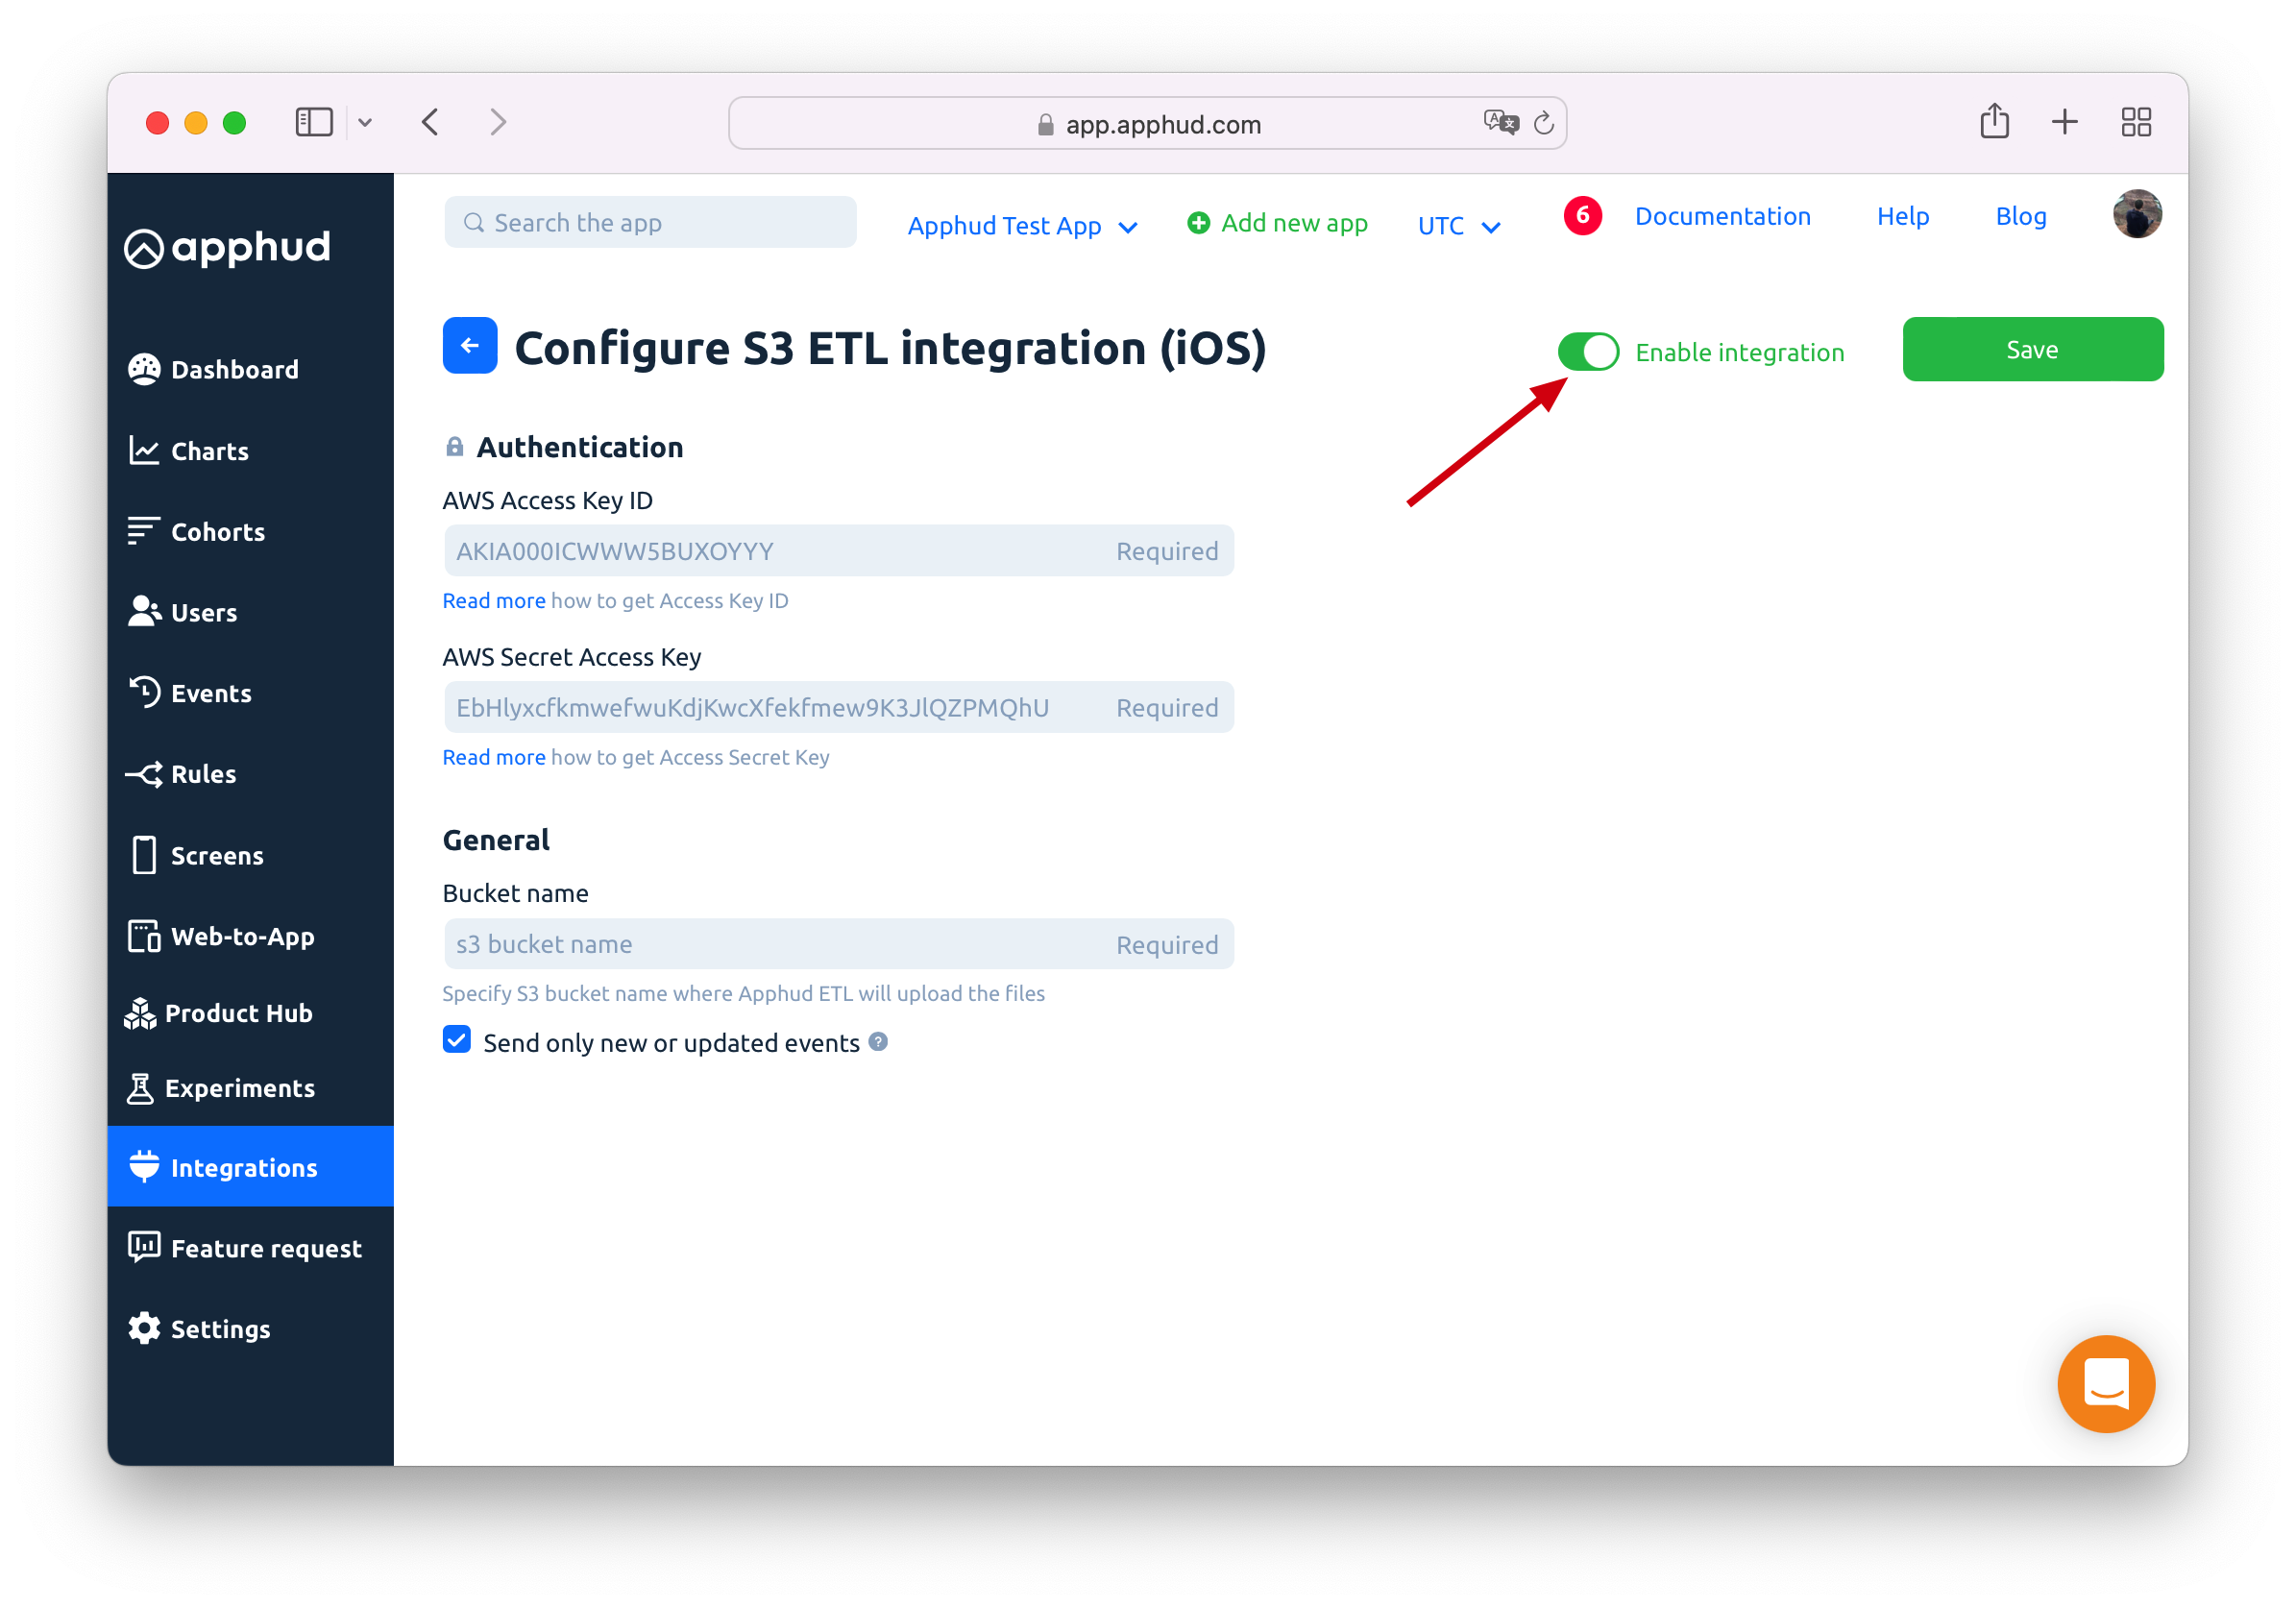
Get New or Updated Events Only
You can receive only new and updated transactions from the last export instead of all data. The default value of this option is on. This is the recommended value.
Updated 10 months ago
