
Singular
This guide describes how to add and configure Singular integration.
The Singular integration sends Apphud subscription and purchase events to Singular — a marketing platform that gives you a complete view of ROI with next-generation attribution, full-funnel marketing data, and fraud prevention — and receives Singular attribution postbacks so you can view campaign data in every Apphud chart (New Users, Proceeds, Customer LTV, ARPU, and others).
How does Integration Work?
This integration works in two ways.
1. Receive Attribution Data from Singular
Apphud receives attribution postbacks from Singular for iOS and Android apps, so you can view campaign data in every Apphud chart: New Users, Proceeds, Customer LTV, ARPU, etc.
See Receive Singular Attribution Data below for the postback setup.
2. Send Subscription Events to Singular
Apphud can also send all subscription events to Singular so you can view them in Singular and Singular can pass this data to its partners. This helps measure the efficiency of your ad campaigns.
How to Add Integration?
Step 1 - Install SDKs
- Install Apphud SDK.
- Install Singular SDK.
- Collect Device Identifiers (required). See below.
- Request IDFA consent (highly recommended, iOS 14.5+). See below.
- Set Custom User ID so Singular and Apphud match. See below.
Step 2 - Preparations in Singular
Open your Singular dashboard and copy your SDK Key. If you maintain a separate Singular app for sandbox testing, copy the sandbox SDK key as well.
Step 3 - Authentication
In Apphud, open Connections → Integrations (the All or Attribution tab). Click Add Connection for Singular and choose a Source in the pop-up.
Enter the Singular SDK key for the production environment and, optionally, for the sandbox environment in Test SDK key field.
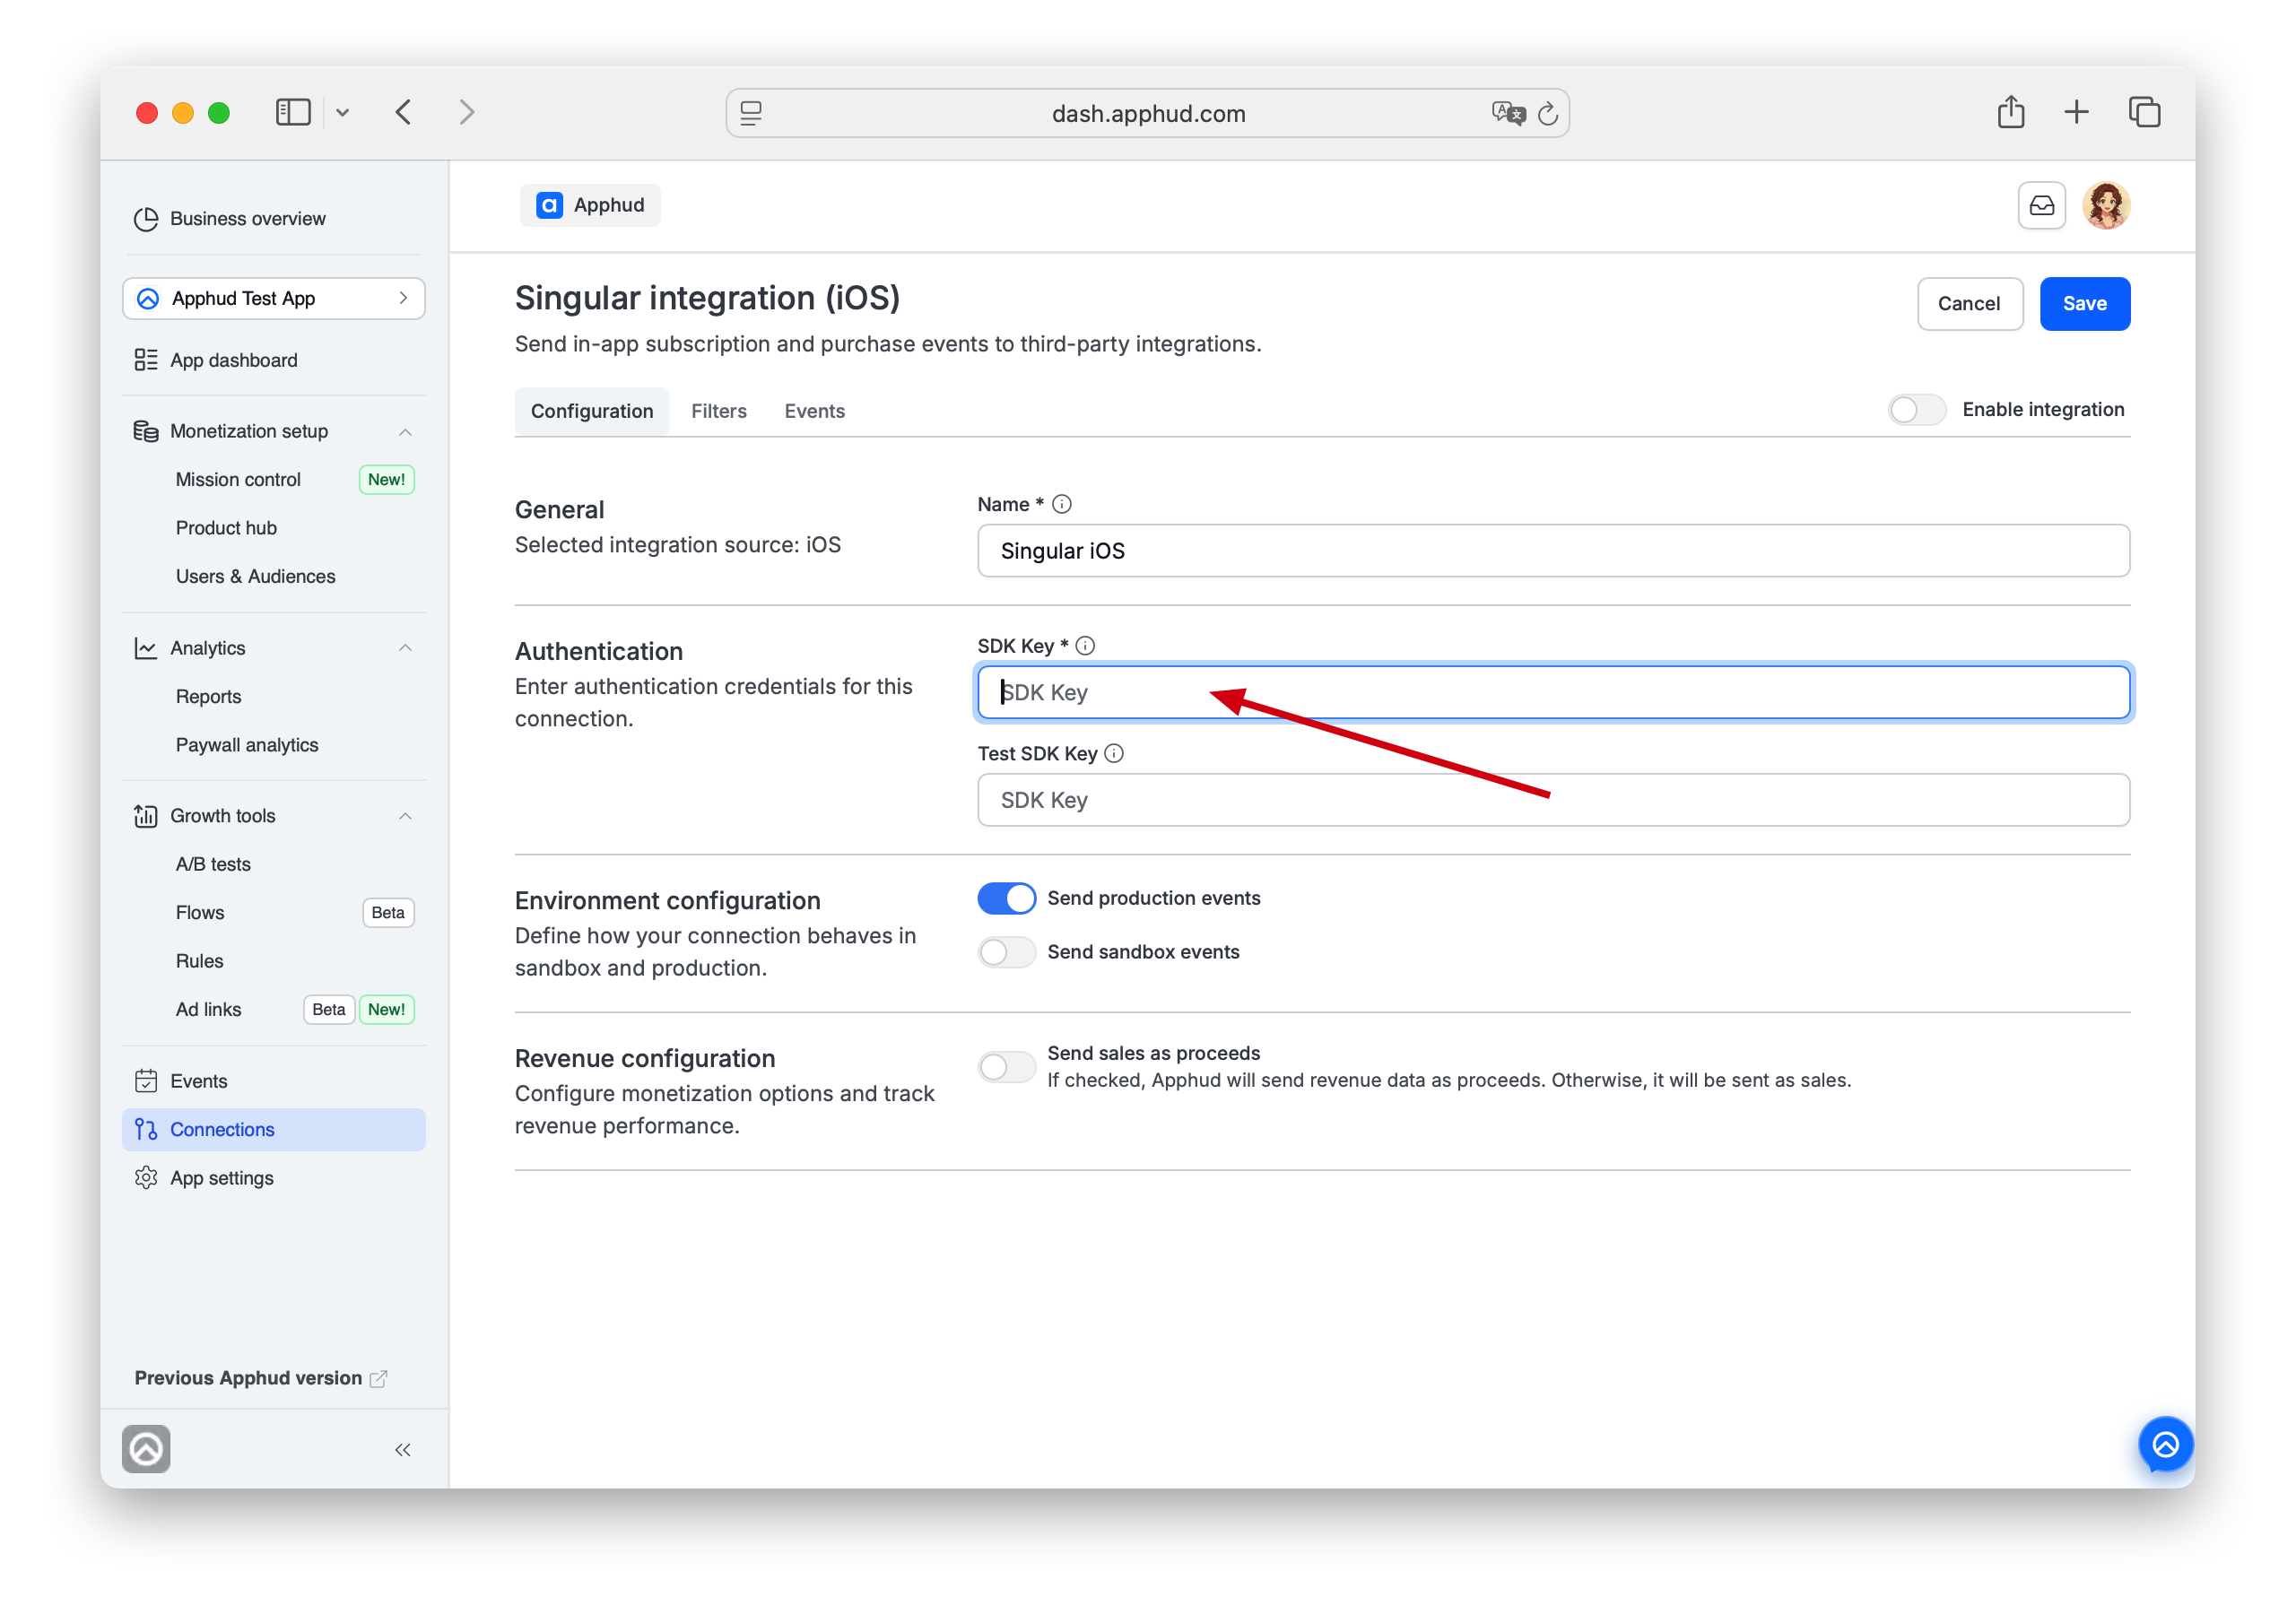
Step 4 - Additional Configuration
Environment and Revenue
Configure generic Environment and Revenue settings as described on Integrations overview → Configuration tab.
Set up filters (optional)
Navigate to Filters tab. Set up filters if needed as described on Integrations overview → Filters tab.
Step 5 - Set up Events list
Open the Events tab of the configuration.
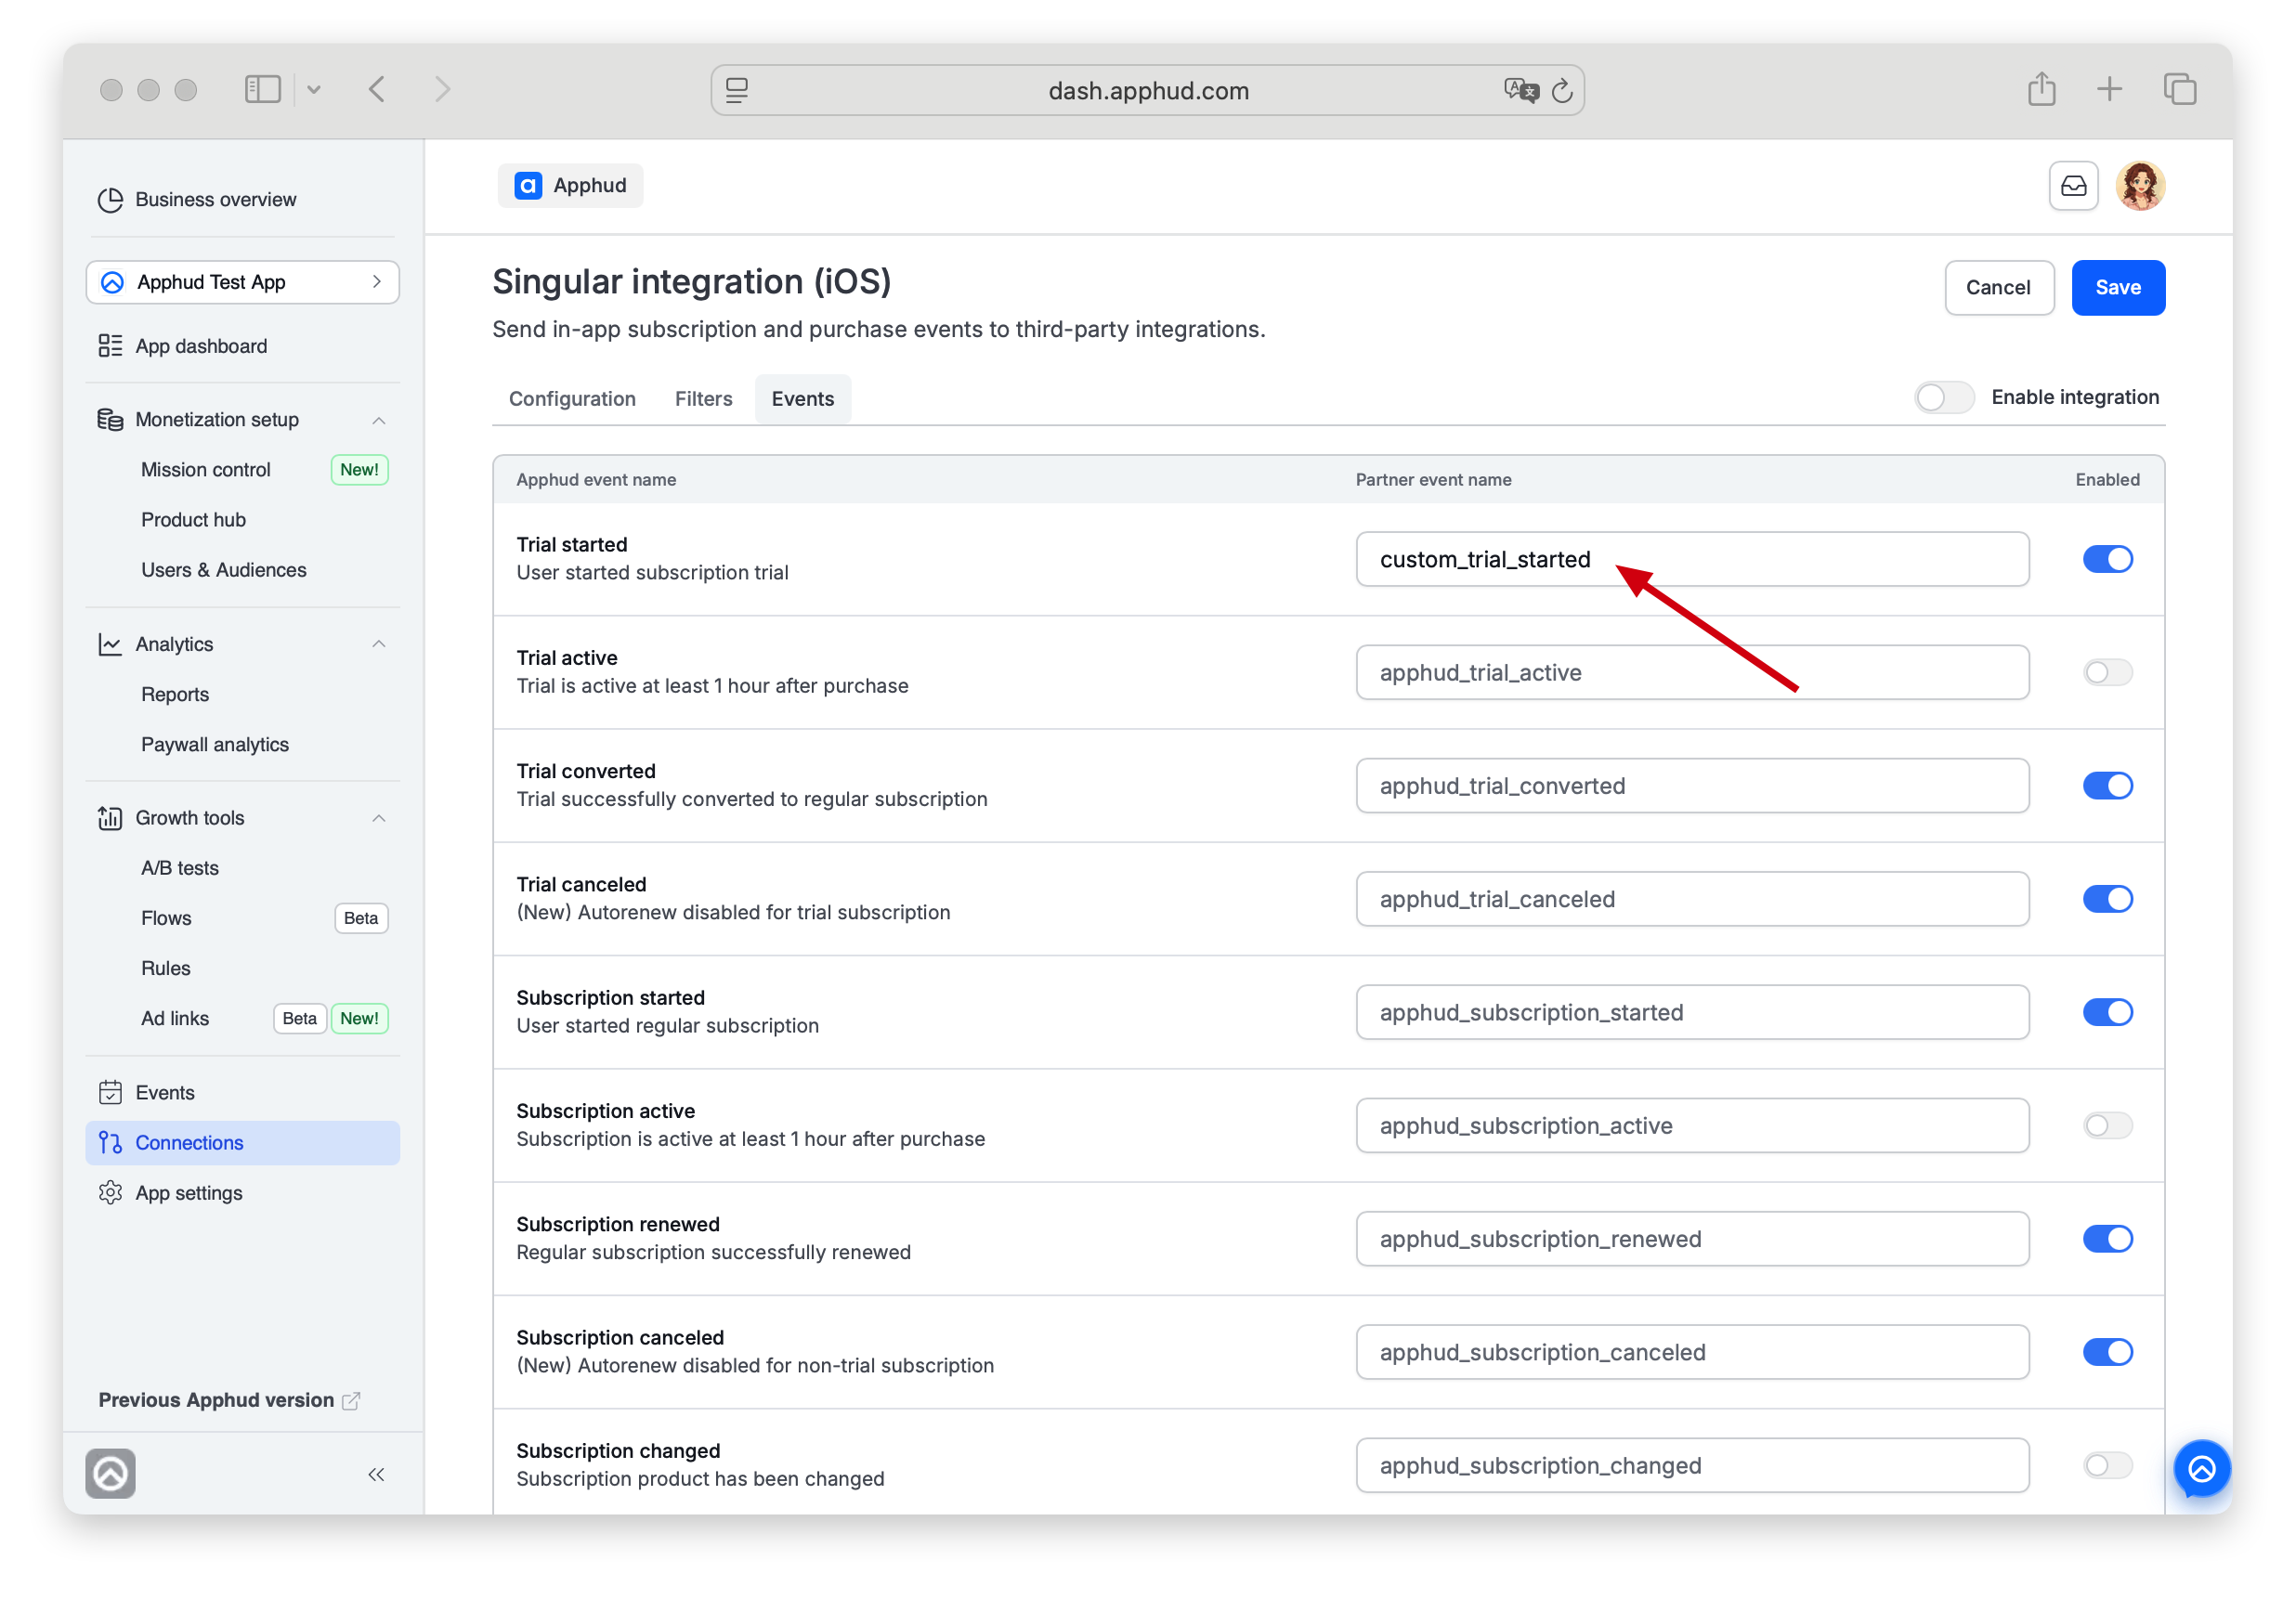
You can enter custom event names or disable some.
Event name restrictionsUse only lower-case alpha-numeric characters (
a–zand0–9) for in-app event names.
Do not Reject IAP without receiptApphud events, by default, do not contain store receipts because we validate purchases prior to event triggering. Do not activate the "Reject IAP without Receipt" option on Singular's Apps page, otherwise these pre-validated events will be discarded by Singular.
Step 6 - Test connection (optional)
Save the connection.
For the general integration configuration testing flow see Integrations overview → Test connection.
To verify Singular integration end-to-end:
- Make sure Singular SDK is properly integrated and the Apphud Singular integration is configured.
- Open the Testing Console in Singular and add your test device.
- Make a purchase — you will see Apphud events in the Singular Testing Console.
Step 7 - Enable and save
Once you confirmed the connection works — Enable integration and Save.
Set Custom User ID
To match users between Singular and Apphud, set the Singular Custom User ID to the Apphud User ID:
Singular.setCustomUserId(Apphud.userID())Singular.setCustomUserId(Apphud.userID())Future<void> _initSingular() async {
final config = SingularConfig('API_KEY', 'API_SECRET');
config.customUserId = await Apphud.userID();
Singular.start(config);
}Collect Device Identifiers (required)
iOS: Call setDeviceIdentifiers(idfa: String?, idfv: String?) method immediately after the SDK initialization. If the advertising identifier (IDFA) is not available, pass only the IDFV.
When IDFA becomes available, you can call setDeviceIdentifiers(idfa: String?, idfv: String?) again.
Android: Call Apphud.collectDeviceIdentifiers() method after the SDK initialization.
When targeting Android 13 and above, you must also declare AD_ID permission in the manifest file.
For more details, refer to Device Identifiers guide.
Request iOS IDFA Consent (highly recommended)
Starting iOS 14.5, access to IDFA requires user consent. You should request IDFA manually using the AppTrackingTransparency framework and pass it to Apphud. Read more here.
Receive Singular Attribution Data
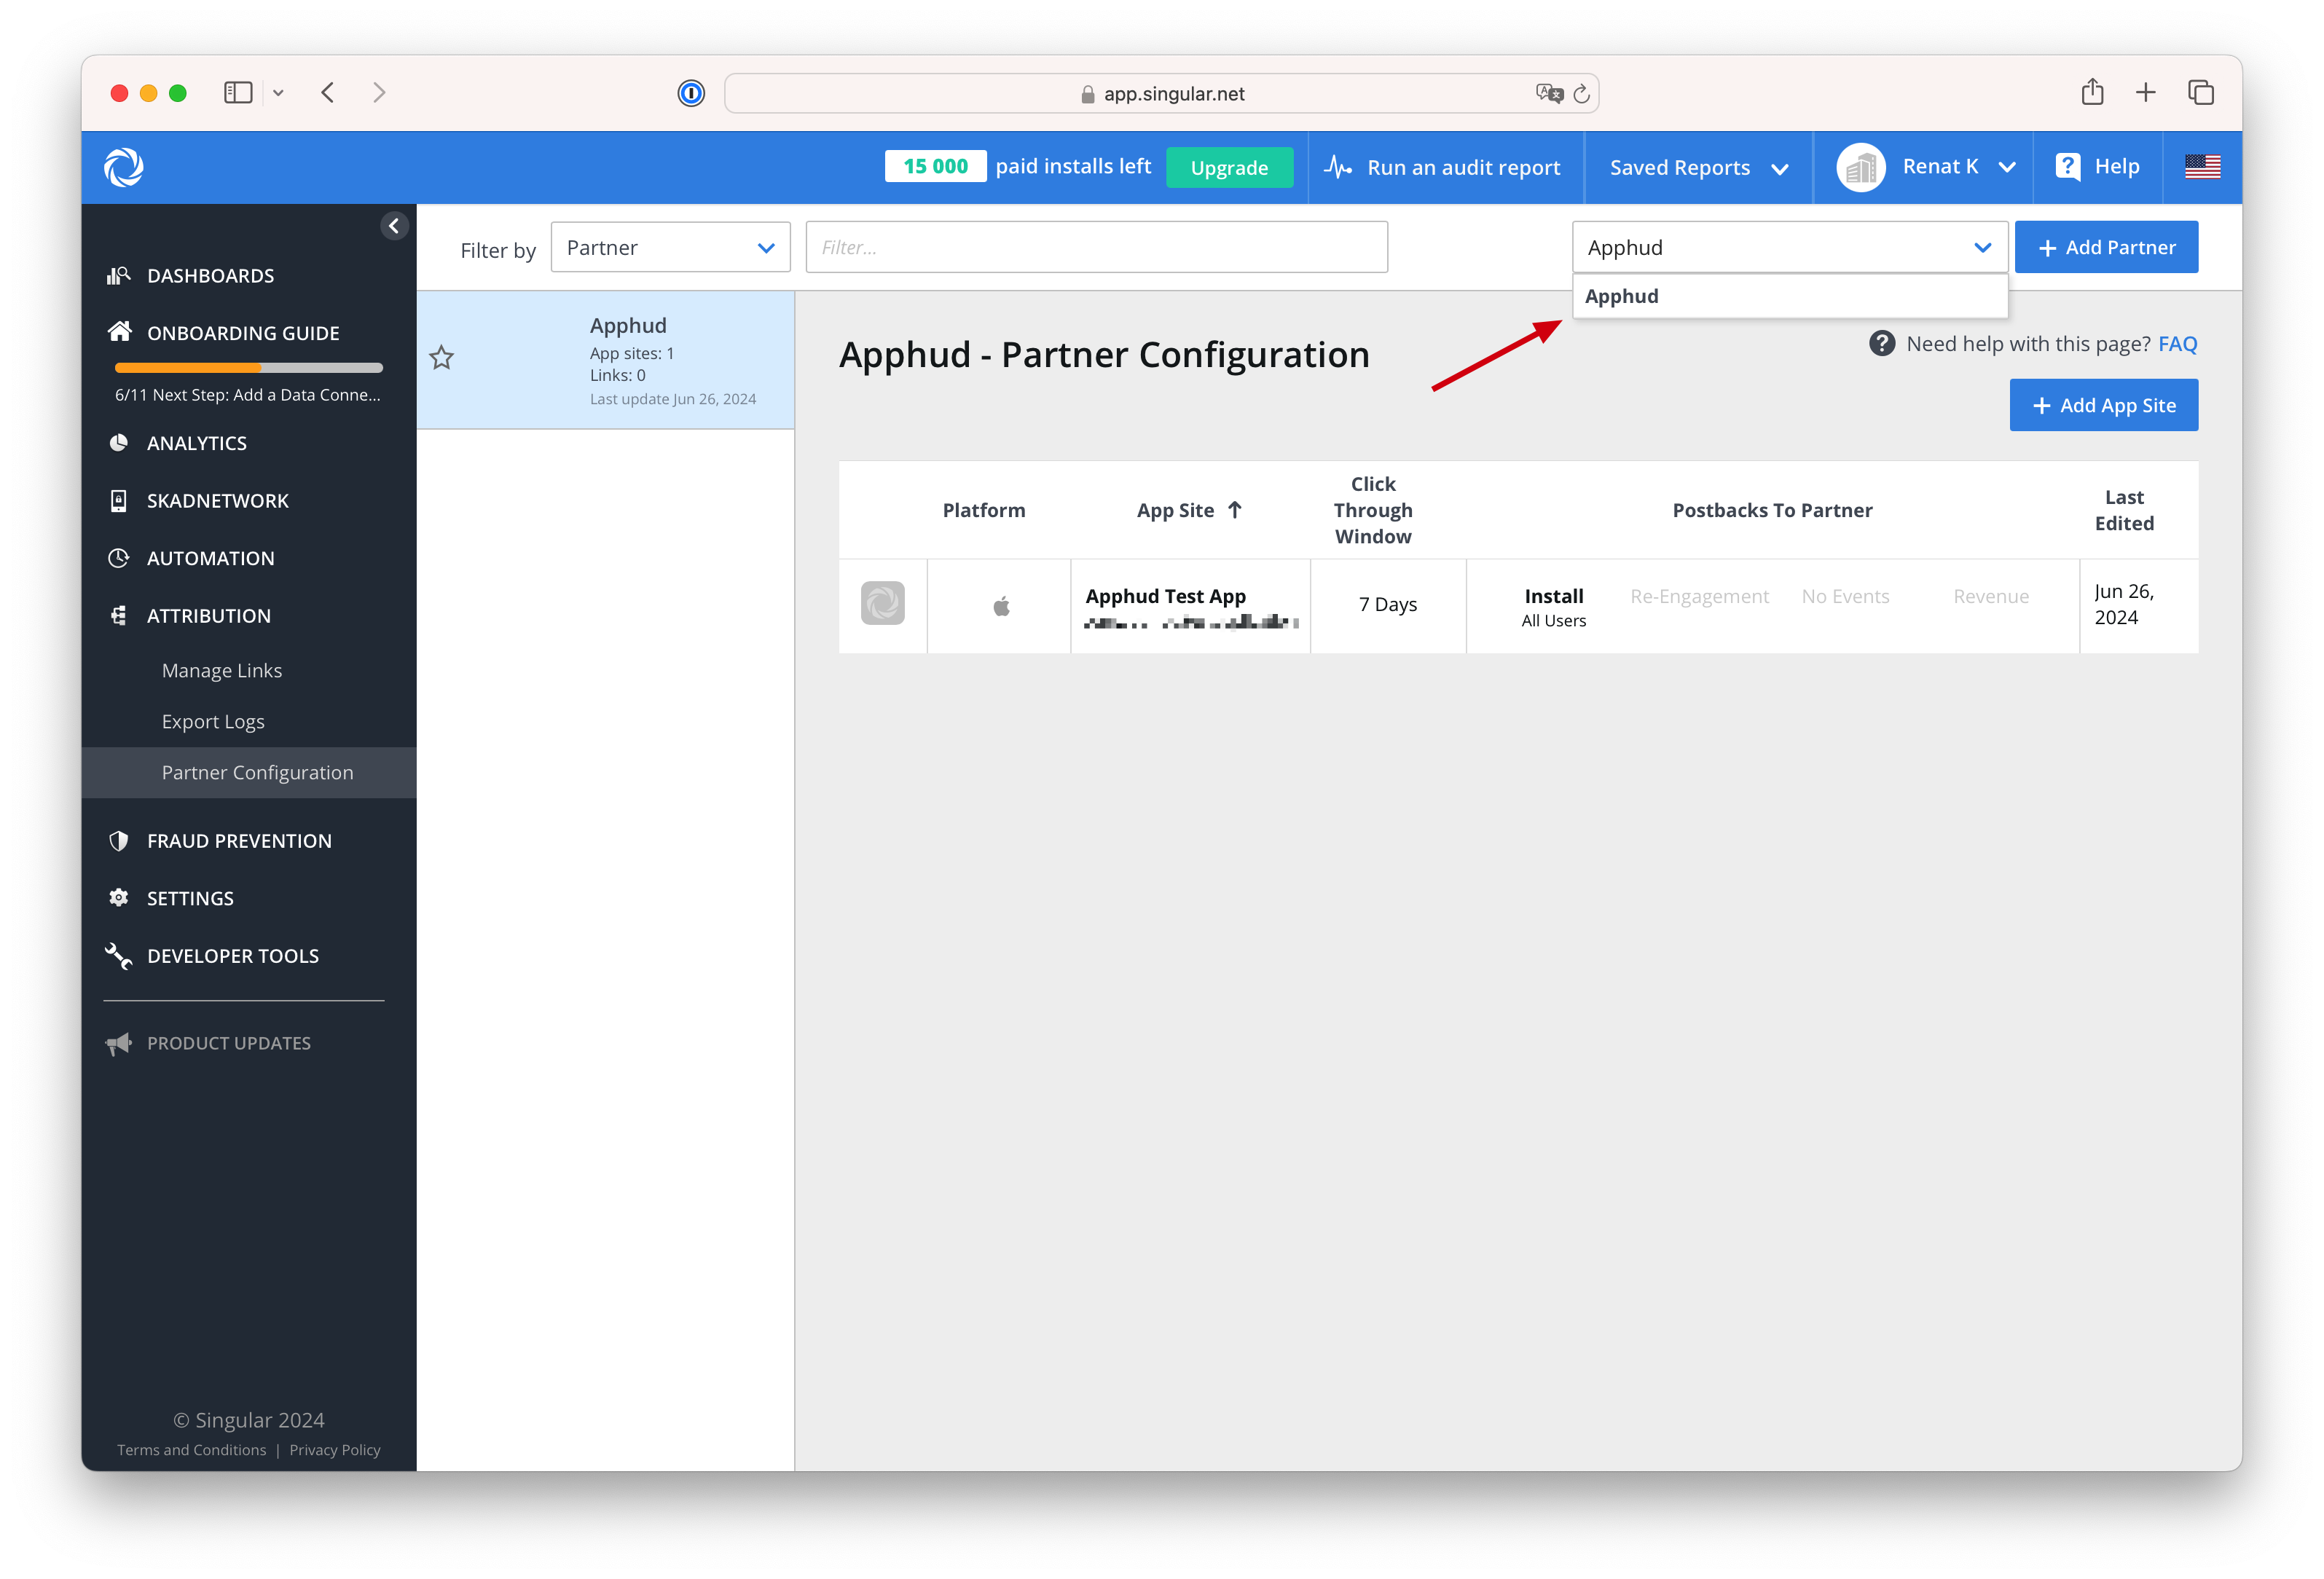
To set up attribution postbacks so Apphud receives campaign data from Singular:
-
Log in to your Singular account.
-
Find the Apphud partner on the Partner Configuration page.
-
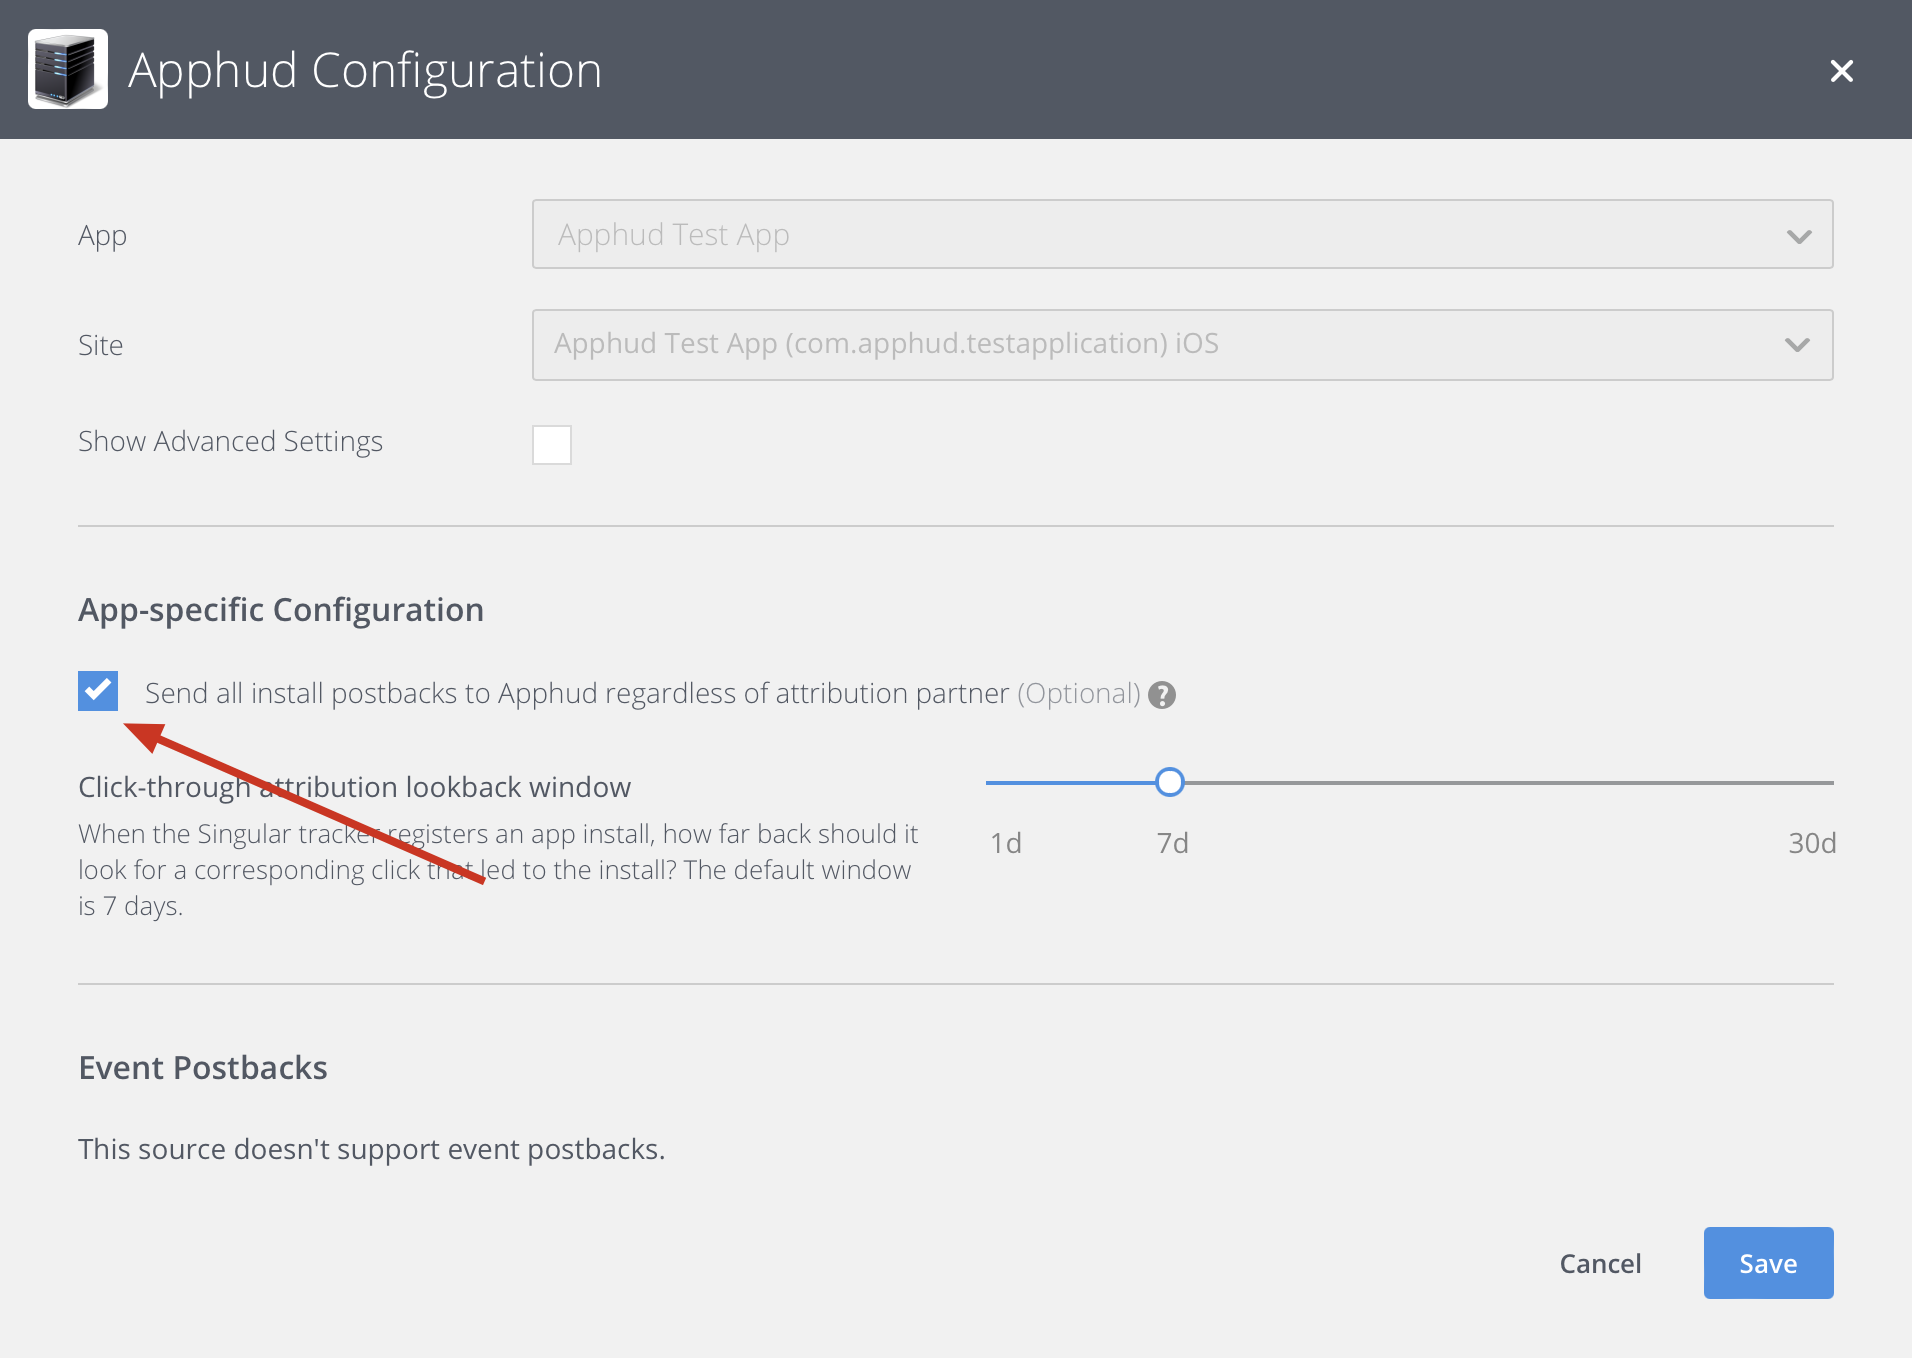
Make sure the Send all install postbacks checkbox is checked.
-
Save the integration.
Setup is finished. You should start receiving attribution data within 2 hours. If this doesn't happen, contact your support manager.
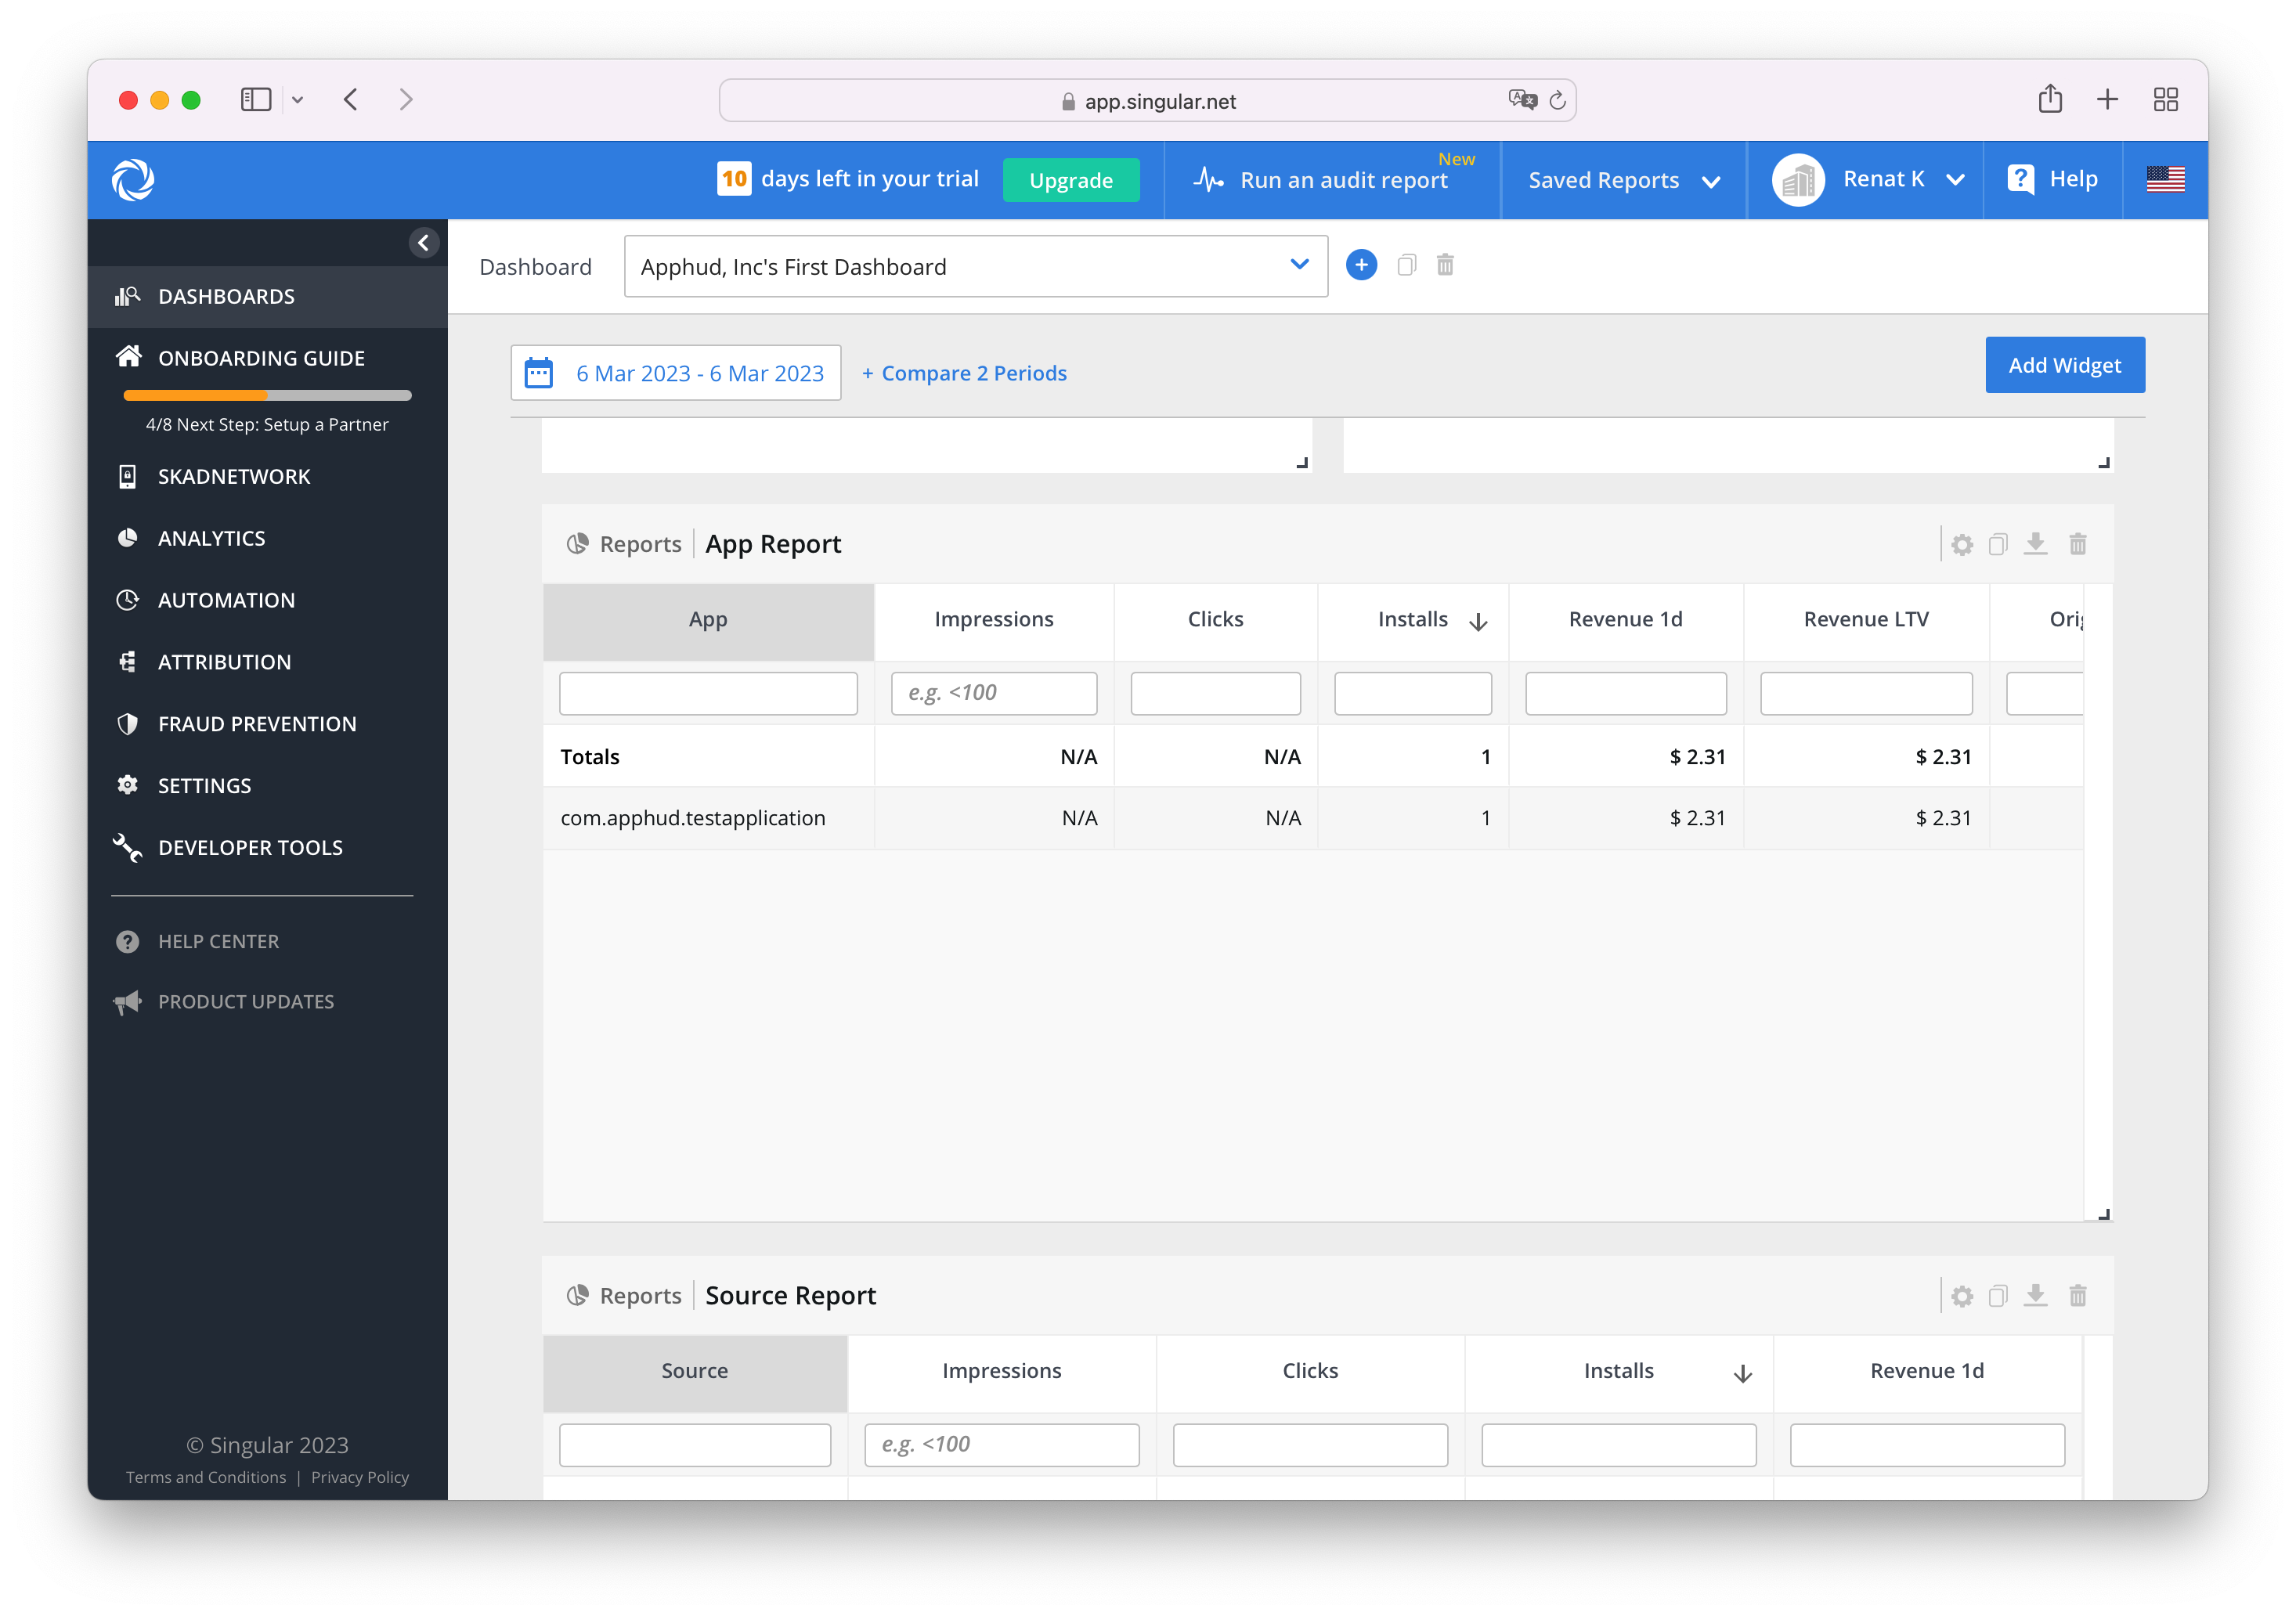
View Revenue in Singular
You can view your revenue in Singular under App Reports:
Updated 3 months ago