
Email Templates
Create and edit Flow email templates and configure your sending domain under Growth tools → Flows → Flow email items — set both up before adding a Flow.
Overview
When users purchase a subscription on the web, an email is automatically sent to the address they provided during checkout. You can configure the design of these emails in Apphud, either by creating a new template from scratch or by duplicating and editing an existing one.
Where to Add Templates and Domains
Email templates and the sending domain are managed under Growth tools → Flows → Flow email items:
- Open Growth tools → Flows in the sidebar.
- Switch to the Flow email items tab.
- Click + Add new (top-right) and choose:
- Email template — create a new email template.
Set these up before creating a FlowConfigure your domain and email template(s) first — they need to be in place before you add a Flow, so the Flow can send emails from your verified domain using your template.
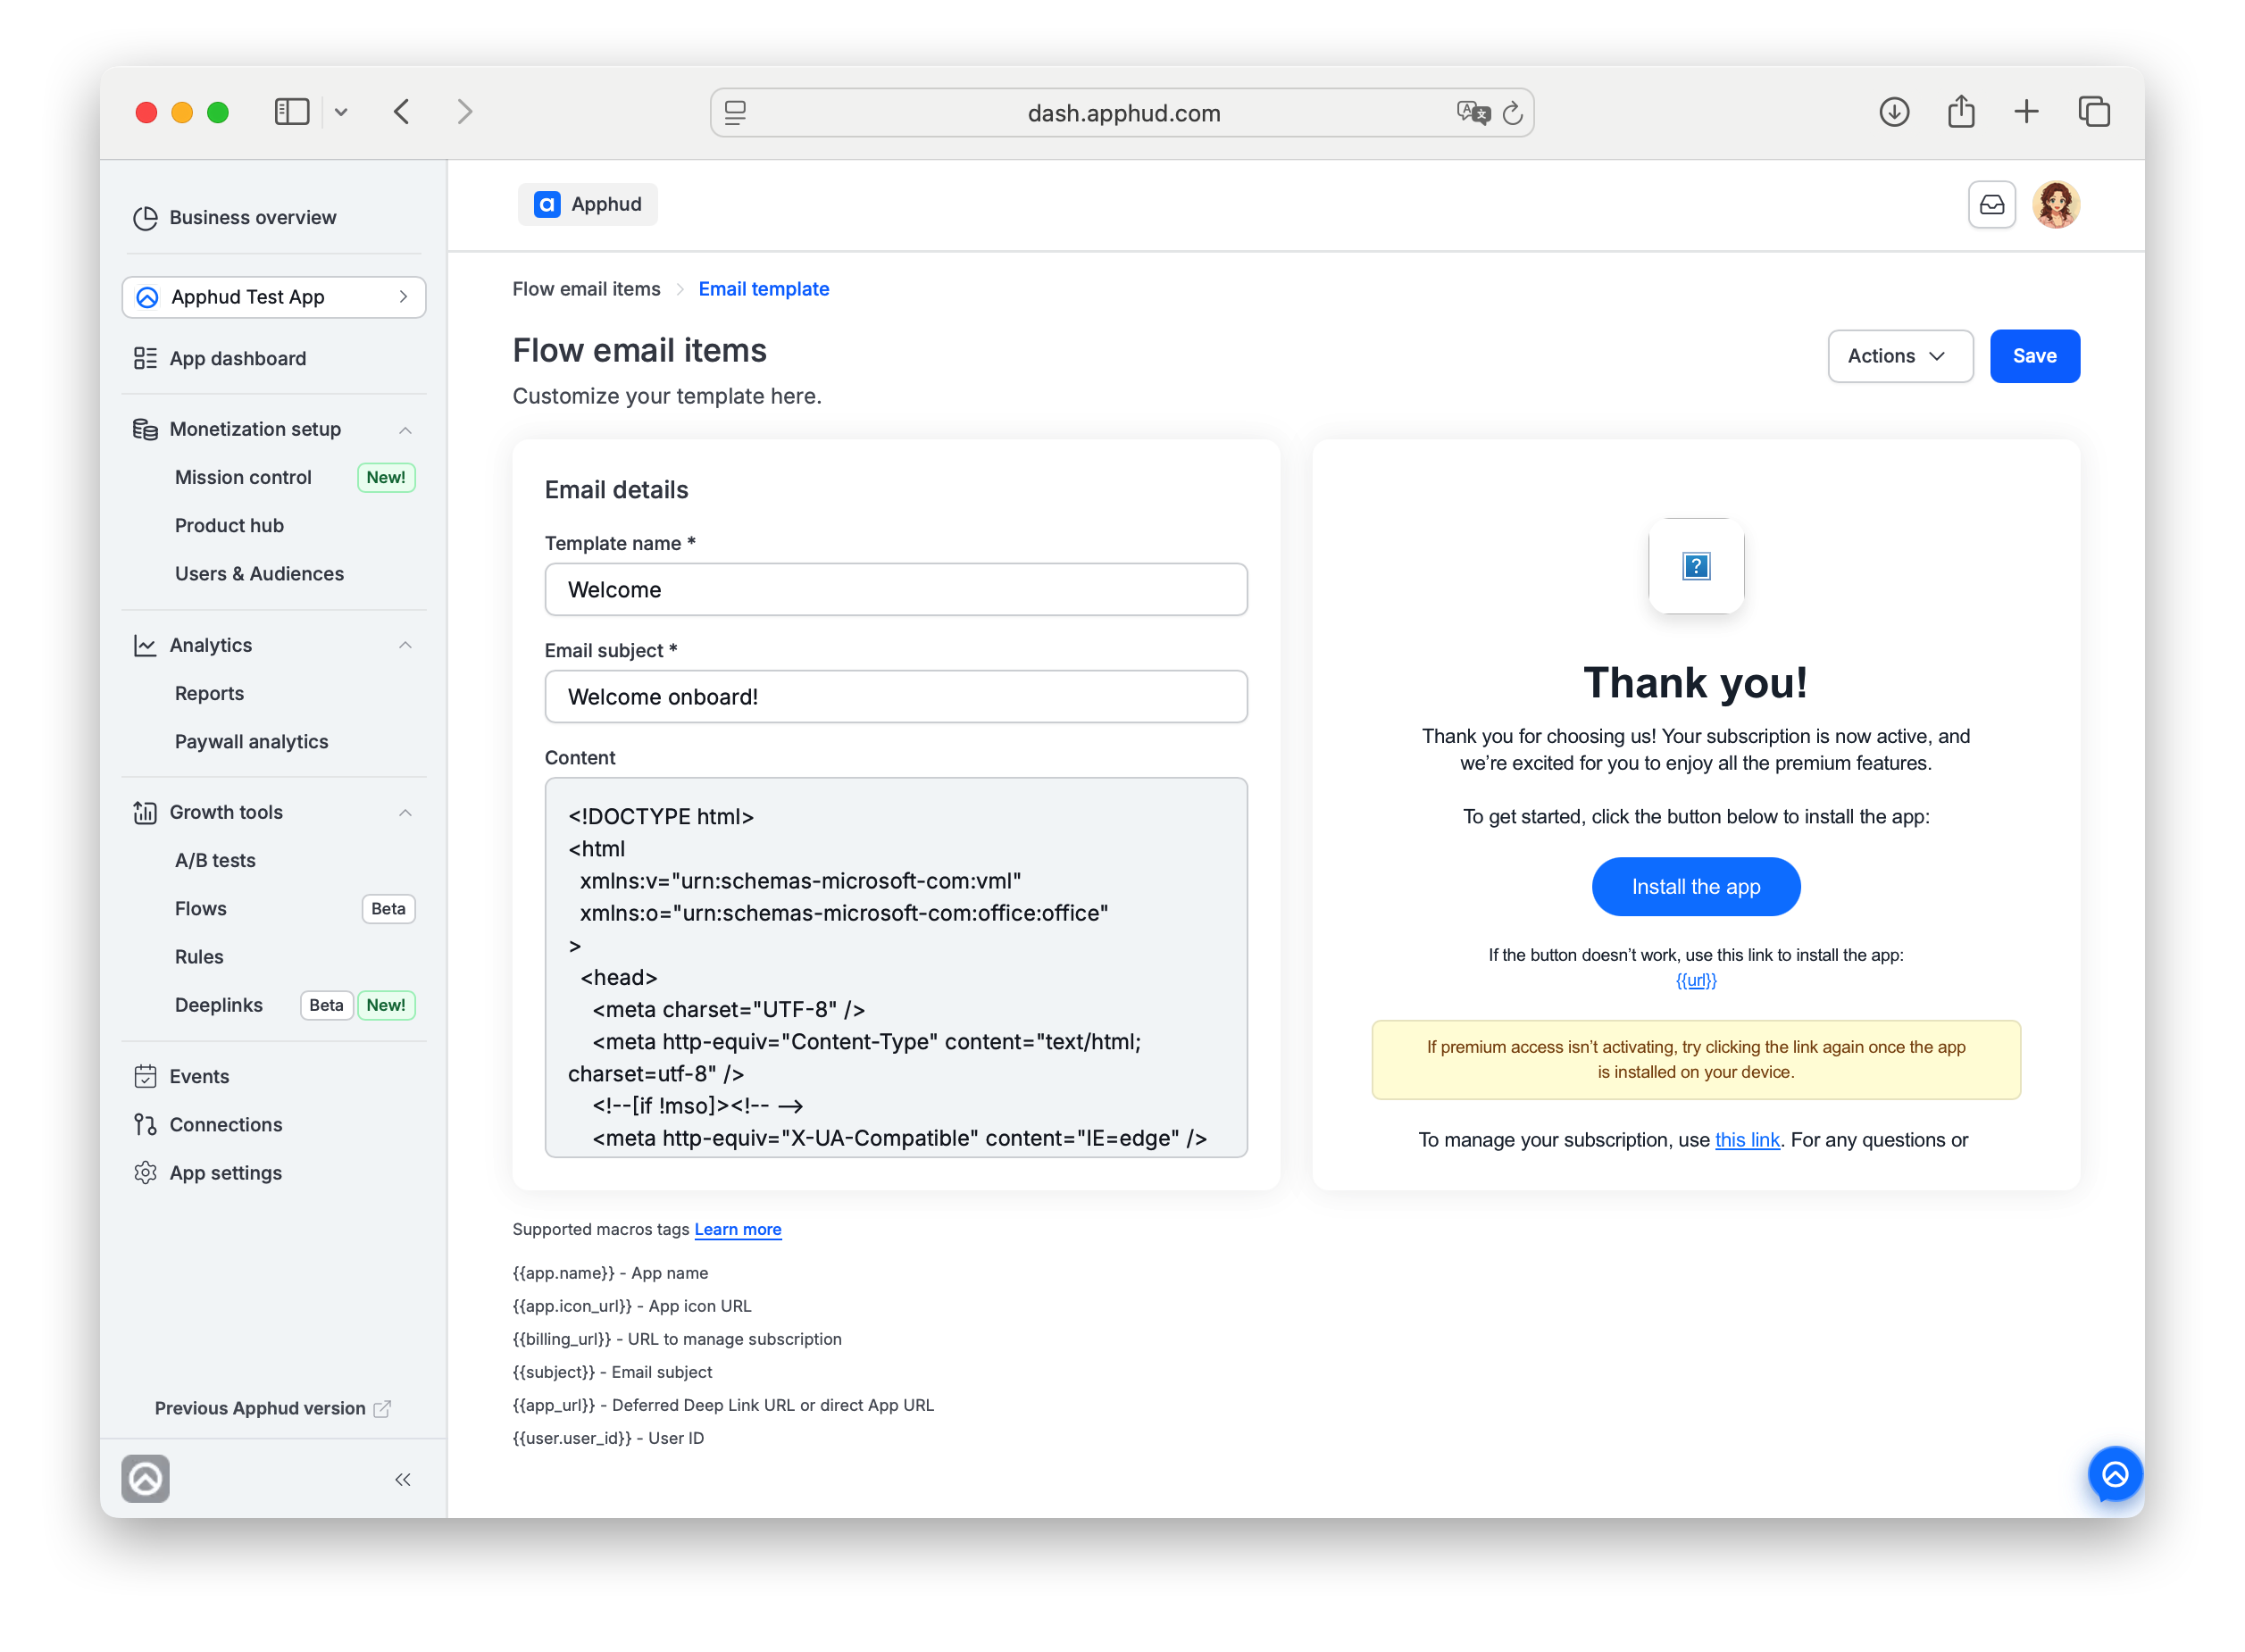
Editing an Email Template
Follow these steps to edit an email template in Apphud:
-
Create or Select a Template:
Start by creating a new email template or selecting an existing one to edit. -
Modify the Subject and Content:
- Subject: Edit the email subject.
- Content: The email content is defined using HTML. You can paste your custom HTML design into the provided text area.
-
Preview the Email:
On the right side of the editor, you'll see a preview frame that displays how your email will look to users.
Available Email Macros
Use email macros to dynamically insert content into your emails. The following macros are available:
{{app.name}}– The name of the app, as specified in the app settings.{{app.icon_url}}– The app’s icon URL, fetched from the App Store or Google Play.{{billing_url}}– A URL for subscription management. This URL allows users to cancel their subscription via Stripe or Paddle. To enable this, activate the customer portal in the Stripe Dashboard or the Paddle Dashboard.{{subject}}– The email’s subject line.{{app_url}}– A Deferred Deep Link URL or a direct App URL, as defined in the Flow settings.{USER.USER_ID}– The user’s anonymous ID.
Email Sender
On the flow settings page you can edit sender email address. By default it's no-reply.
Updated 25 days ago