
Pushwoosh
This guide describes how to add and configure Pushwoosh integration.
The Pushwoosh integration sends Apphud subscription and user events to Pushwoosh so you can target users in the Customer Journey Builder and trigger personalized push campaigns based on real subscription lifecycle data.
About Integration
Apphud can send all user events to Pushwoosh, which you can use in Journeys Builder and create your custom push campaigns.
How to Add Integration?
Step 1 - Install SDKs
- Install Apphud SDK on iOS or Android.
- Install Pushwoosh SDK.
- Match User IDs between Pushwoosh and Apphud. See below.
NoteIf you haven't got a push certificate, Pushwoosh can generate it automatically. A push notification request will appear on app launch by default.
Step 2 - Preparations in Pushwoosh
In your Pushwoosh account, get the Application ID of your project.
If you maintain a separate sandbox project, get its Application ID as well.
Step 3 - Authentication
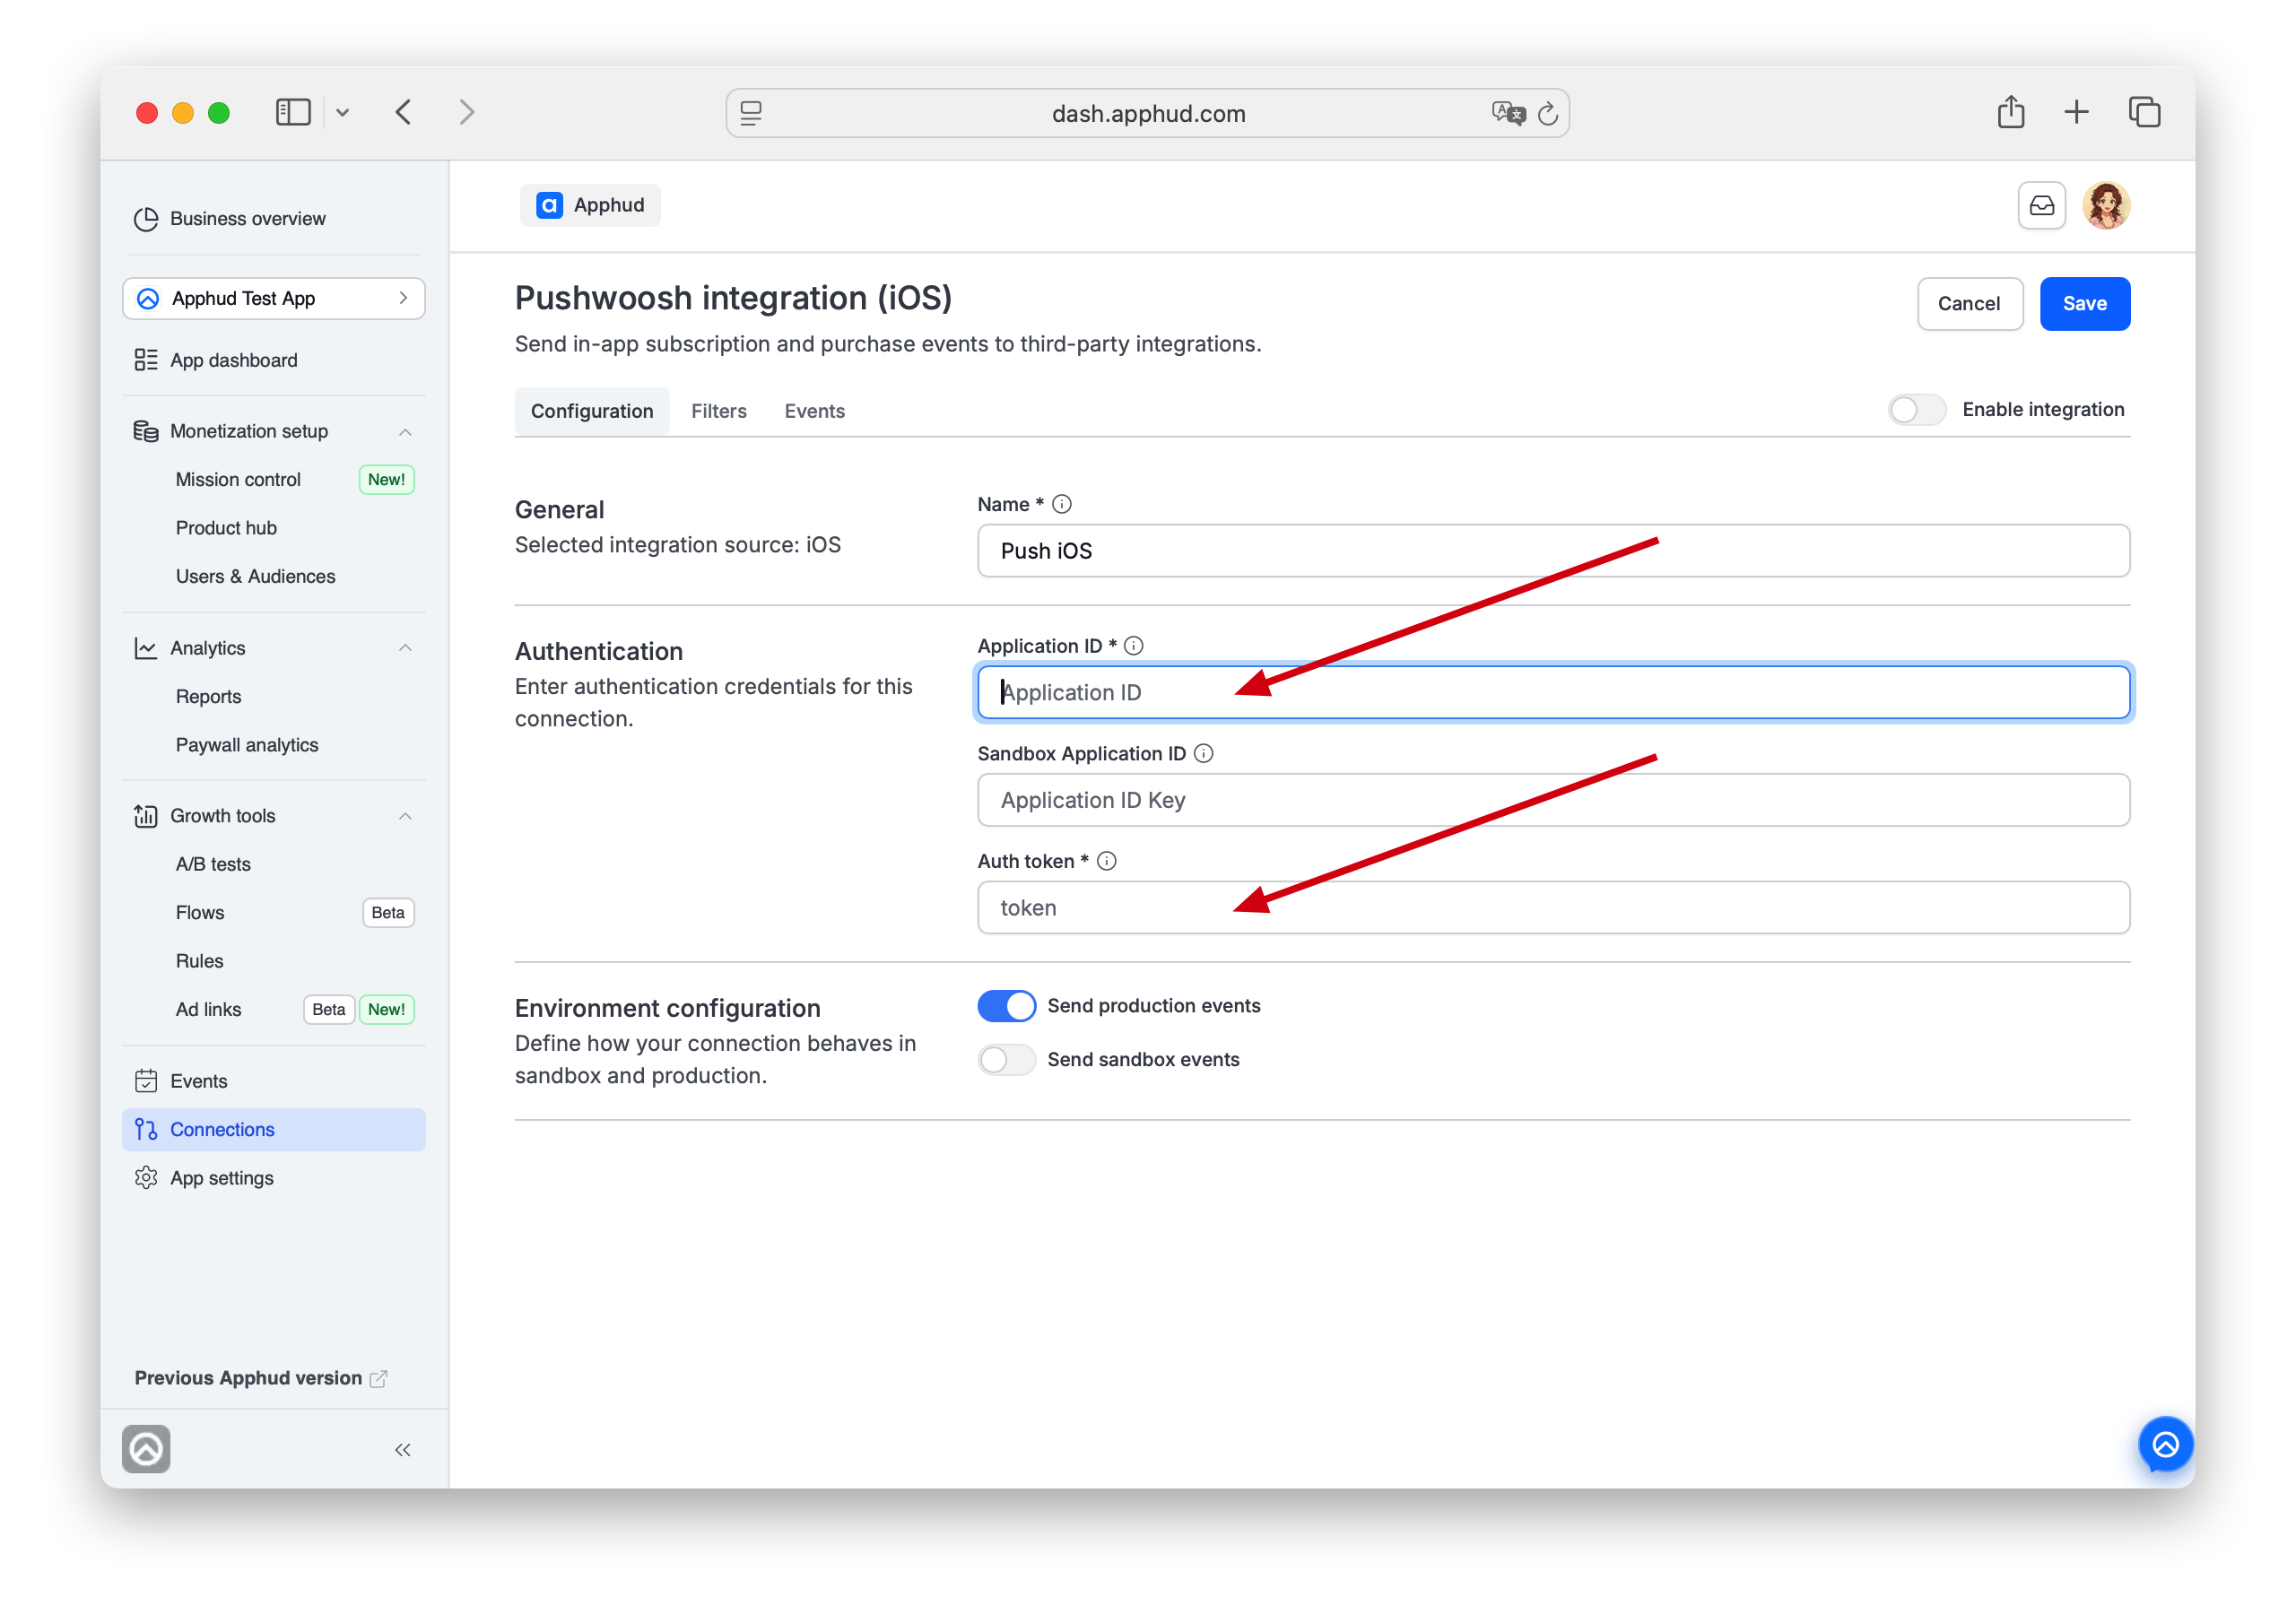
In Apphud, open Connections → Integrations (the All or Marketing tab). Click Add Connection for Pushwoosh and choose a Source in the pop-up.
Enter connection Name and authentication data:
- Application ID (required) — your Pushwoosh Application ID.
- Sandbox Application ID (optional) — if you maintain a separate Pushwoosh sandbox project.
Step 4 - Additional Configuration
Environment
Configure generic Environment settings as described on Integrations overview → Configuration tab.
Step 5 - Set up filters (optional)
Navigate to Filters tab. Set up filters if needed as described on Integrations overview → Filters tab.
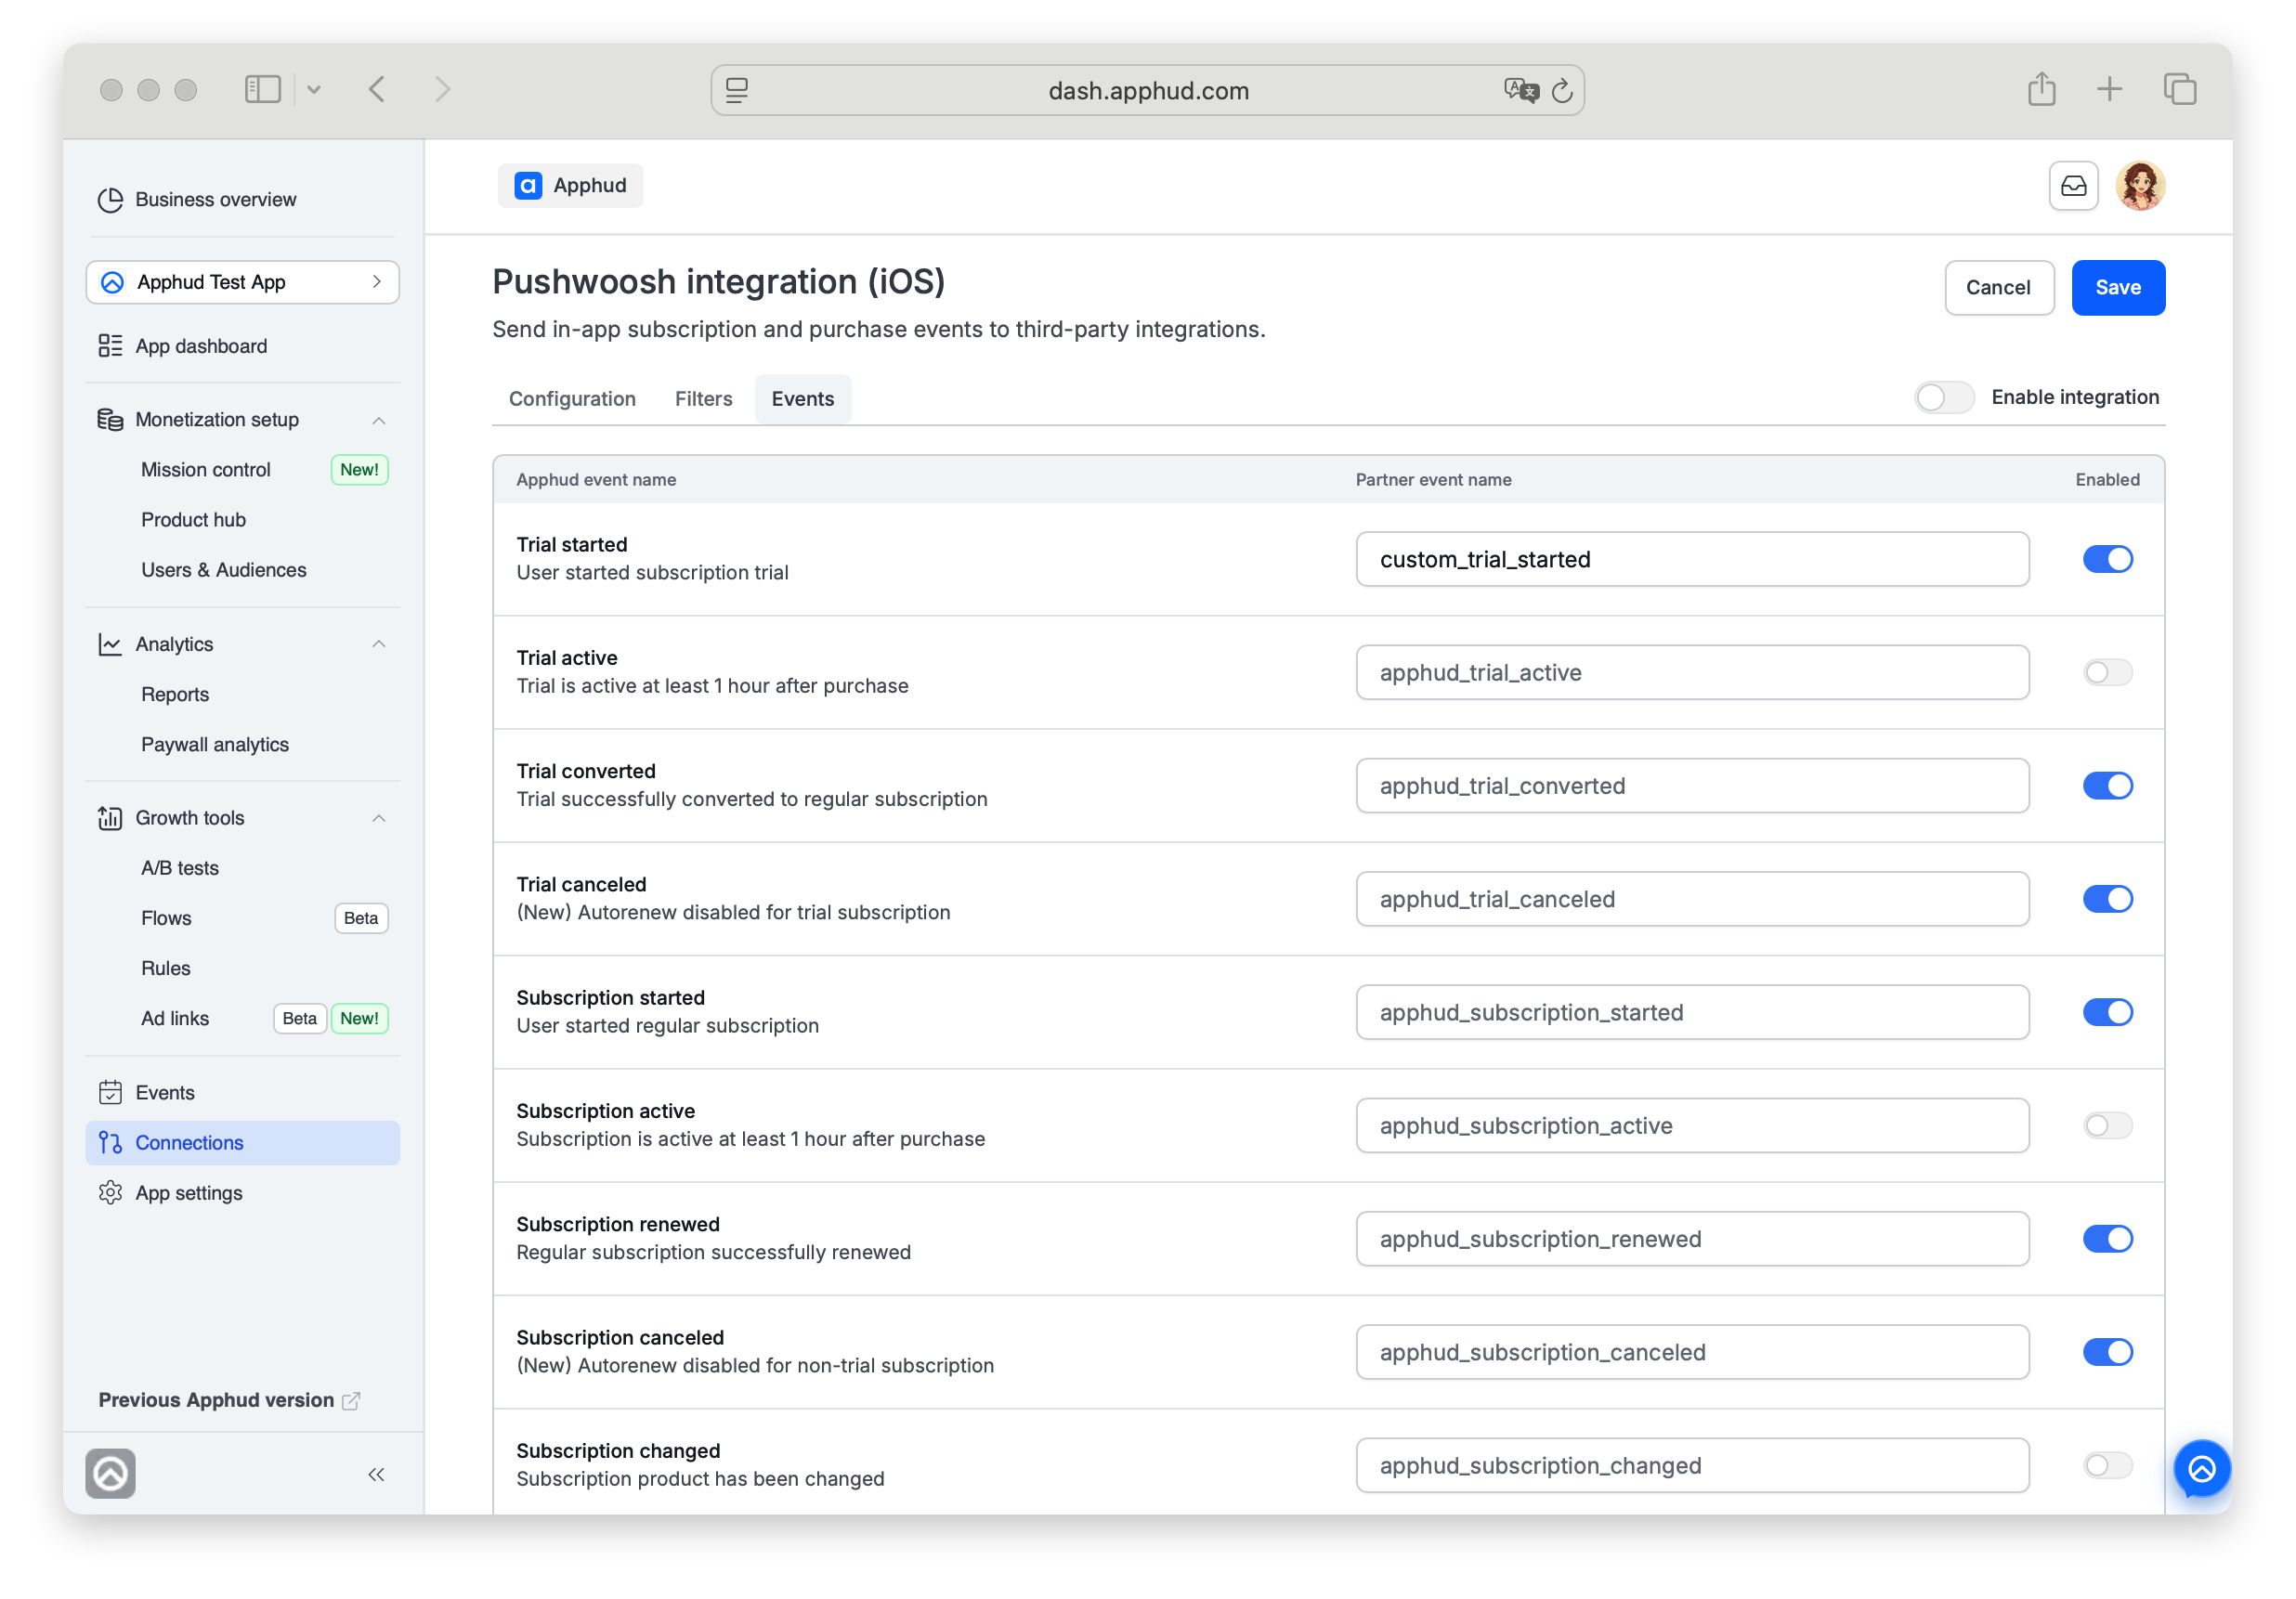
Step 6 - Set up Events list
Open the Events tab of the configuration. You can enter custom event names or disable some.
Step 7 - Test connection (optional)
Save the connection.
For the general integration configuration testing flow see Integrations overview → Test connection.
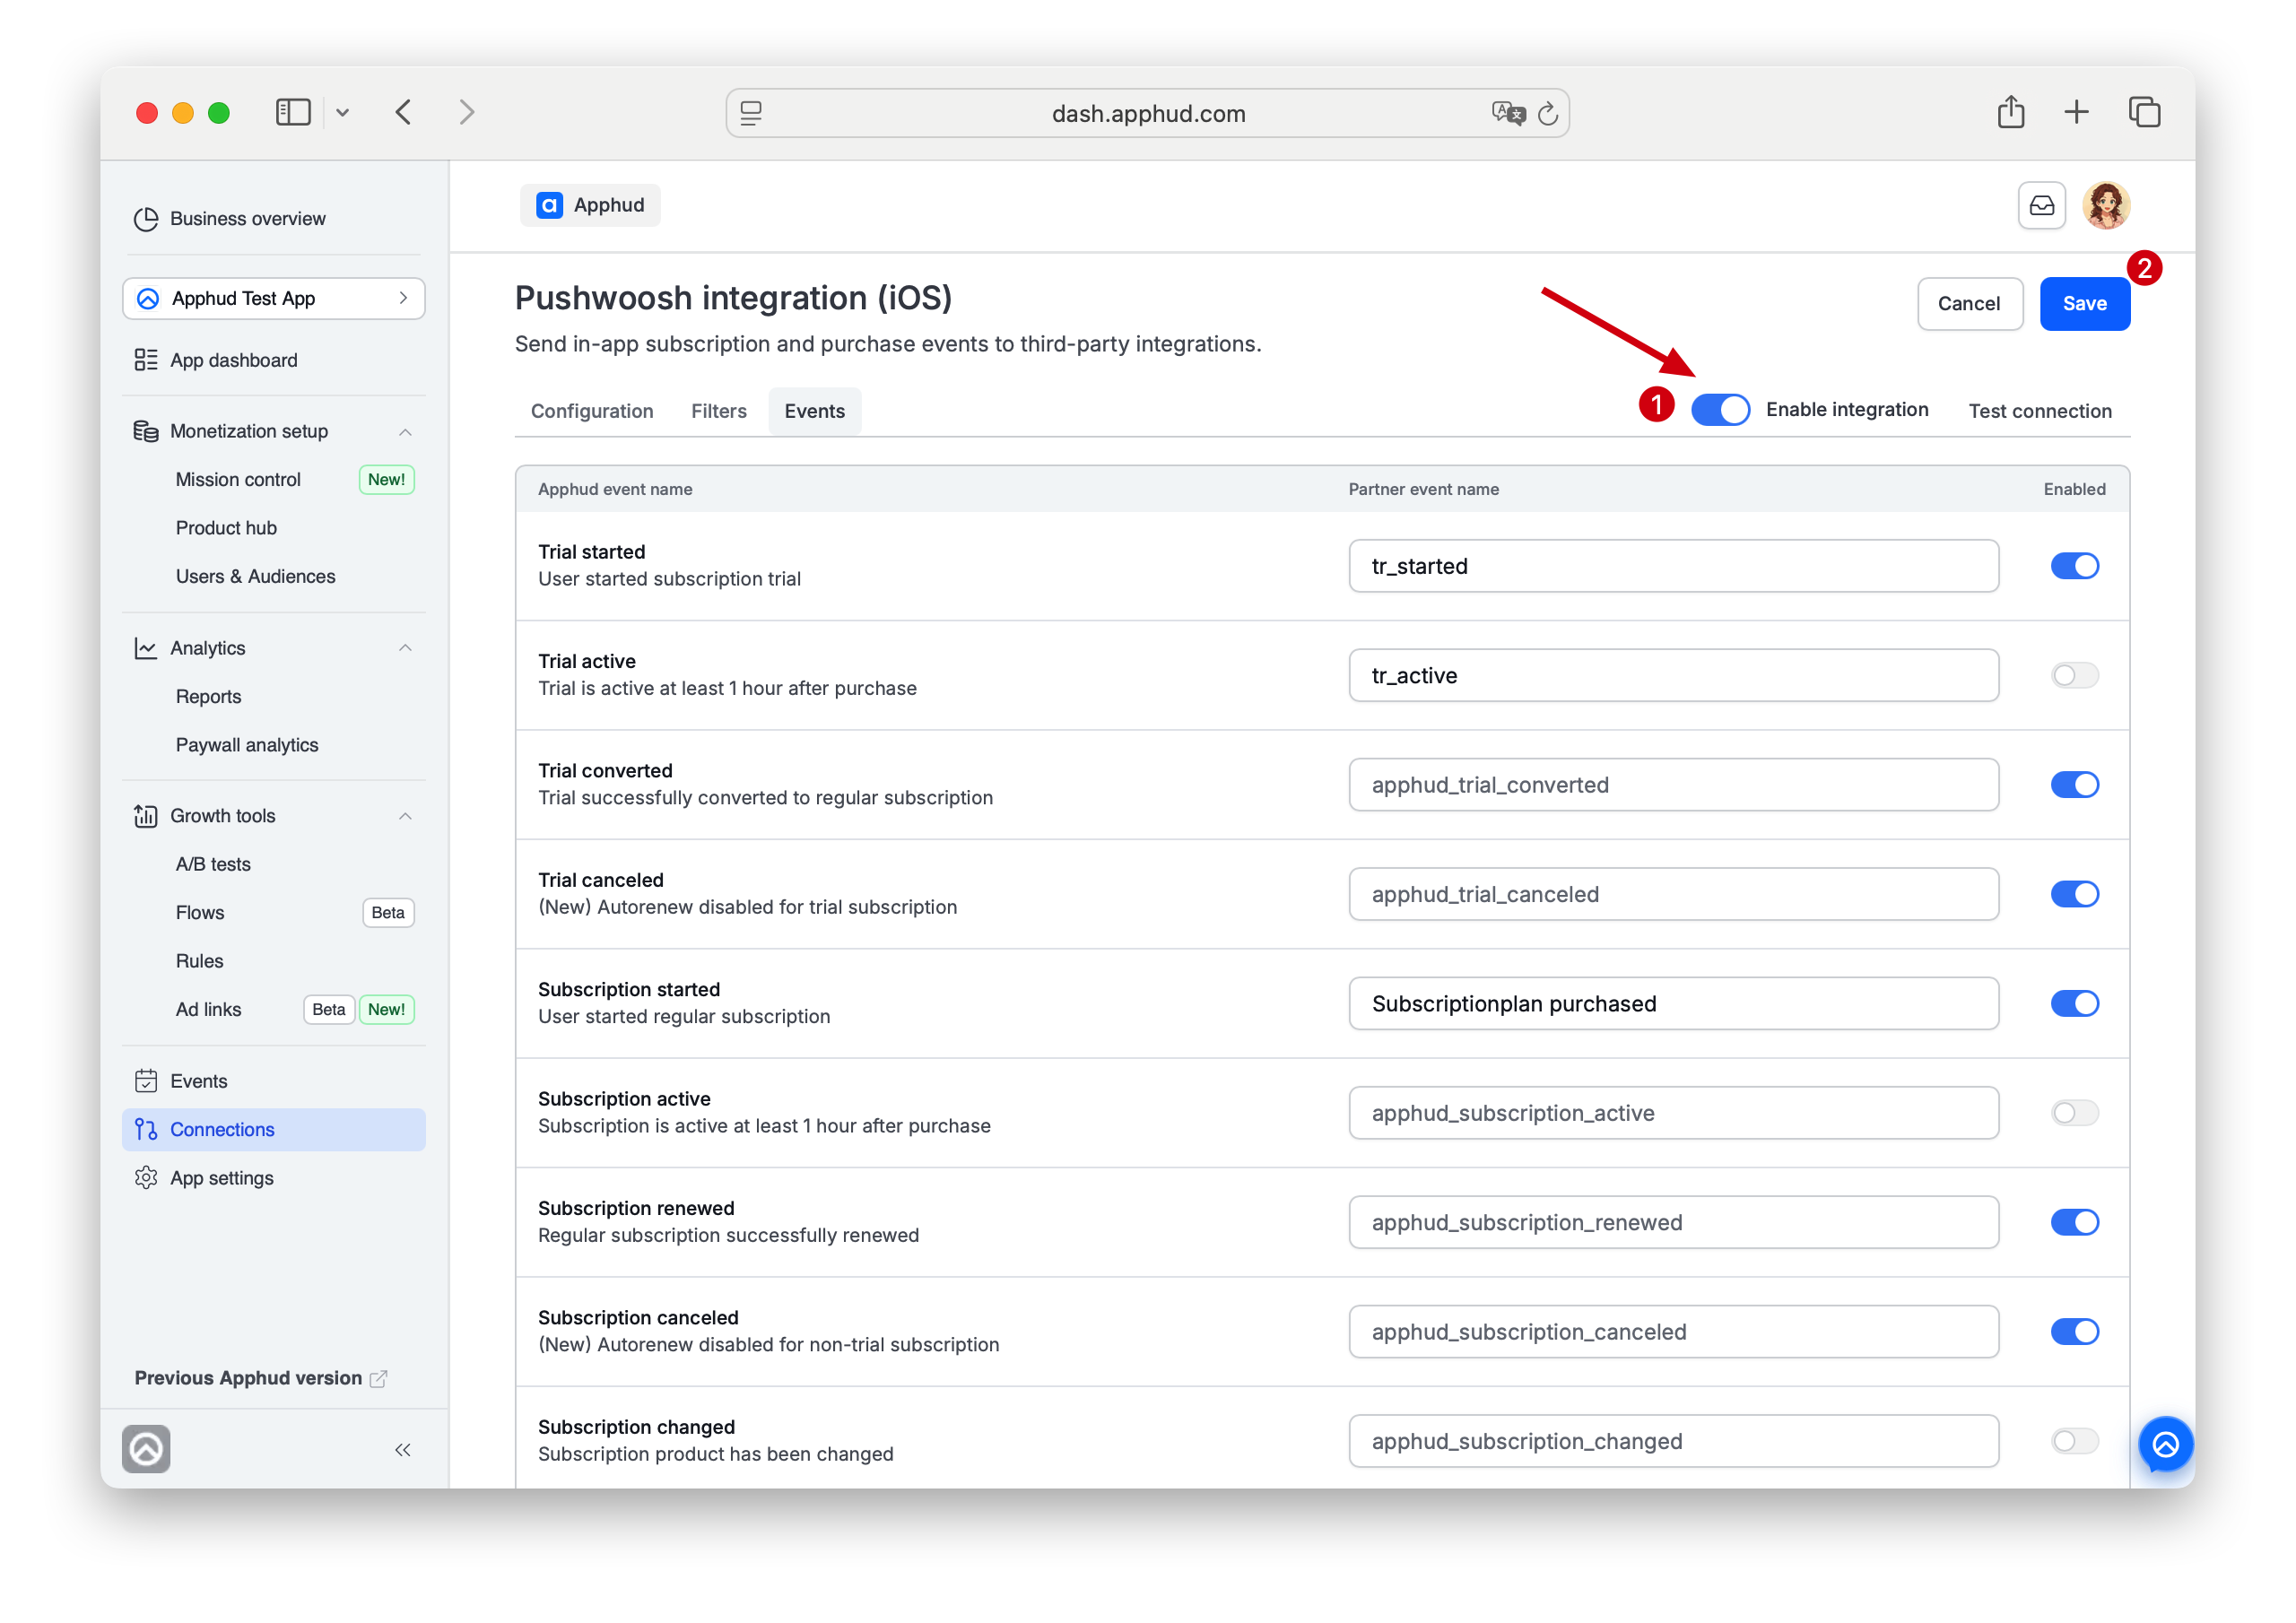
Step 8 - Enable and save
Enable integration and click Save.
Match User IDs
By default, when an app with Pushwoosh SDK is launched for the first time, it sets a device HWID as the UserID. You can call
setUserIdon a login to associate a device with a particular user. When a user logs out, you can reset this value to a default one with anothersetUserIdcall (e.g., the initial HWID).
Set the Apphud User ID as Pushwoosh's setUserId:
// assuming both Apphud and Pushwoosh SDKs are initialized:
Pushwoosh.sharedInstance()?.setUserId(Apphud.userID())
Custom events
If Apphud events are not enough, you can also send Pushwoosh Recommended, General, and Custom events from your app code.
- Create a custom event in Pushwoosh → Dashboard → Events → Add event.
- Use it in your app:
// How to integrate Event into your app
let attributes: [String : Any] = [
    "Custom event attribute" : "string value"
]
PWInAppManager.shared().postEvent("Custom event name", withAttributes: attributes)
// How to integrate Event into your app
NSDictionary *attributes = @{
@"Custom event attribute" : @"string value"
};
[[PushNotificationManager pushManager] postEvent:@"eventName" withAttributes:attributes];// How to integrate Event into your app
TagsBundle attributes = new TagsBundle.Builder()
.putString("Custom event attribute", "string value")
.build();
PushwooshInApp.getInstance().postEvent("Custom event name", attributes);Updated 4 months ago